Manuel d'utilisation Flat View – CameraBits
Contenus
Concepts de photo mécanicien
Mécanicien photo® Le logiciel se veut le navigateur photo le plus utile du marché. Pour ce faire, il fonctionne logiquement, de manière intuitive et, surtout, il remplit ses fonctions le plus rapidement possible.
L’autre approche moins évidente est que Photo Mechanic n’essaie pas d’être tout pour tout le monde. Photo Mechanic consiste à transférer efficacement et rapidement de nouveaux fichiers sur votre ordinateur, puis à visualiser et éditer ces images aussi rapidement que possible, de la manière que vous souhaitez. Photo Mechanic est flexible et discret afin que vous puissiez travailler sans avoir à attendre que votre ordinateur se rattrape ou à effectuer des opérations en arrière-plan dont vous n'avez peut-être pas besoin.
Photo Mechanic n'est pas un éditeur d'image, ce n'est pas un processeur RAW et ce n'est pas une application de catalogage. Photo Mechanic consiste à importer des images, puis à les visualiser et à les organiser aussi rapidement et efficacement que possible. En se concentrant sur ces tâches essentielles, il vise à être le meilleur dans ce qu’il accomplit.
Le concept de base de Photo Mechanic est simple. Pointez le Navigateur vers un dossier et Photo Mechanic générera des vignettes de toutes les images contenues dans ce dossier. Tout de suite, vous pouvez commencer à prévisualiser les fichiers individuellement en plein écran et les marquer avec différents niveaux de «capacité de conservation».
Depuis Photo Mechanic, vous pouvez ouvrir des fichiers dans des éditeurs dédiés tels que Adobe Photoshop.® pour l'édition ou le traitement RAW, vous pouvez envoyer par courrier électronique des images JPEG de format personnalisé à un client, vous pouvez exporter dans une galerie de pages Web, renommer tous les fichiers et ajouter des données de copyright IPTC, ou tout ce qui précède, etc.
La vue Contact Sheet est au cœur de Photo Mechanic et consiste en un affichage des images miniatures d'un dossier particulier. Vous pouvez créer des feuilles de contact à partir de plusieurs dossiers et les garder soit séparées, soit les combiner en une seule vue. Tous les formats de fichier reconnus dans le dossier seront miniatures, y compris les fichiers RAW de la plupart des appareils photo numériques actuels, ainsi que le format Open Source Adobe Digital Negative (DNG).
Chaque vignette peut être rapidement agrandie dans un écran de prévisualisation dans lequel chaque image peut être agrandie jusqu'à 800% pour vérifier la netteté critique. Les images peuvent être recadrées et un menu contextuel par clic droit permet d'exporter l'image de différentes manières, par exemple FTP vers un serveur, Email, Enregistrer au format JPEG, etc. Les images peuvent être visualisées 2-up pour une comparaison côte à côte lorsque, Par exemple, en portrait, les différences entre les images peuvent être trop subtiles pour une seule image.
Les feuilles de contact et les aperçus sont générés aussi rapidement que possible, l'accent étant mis sur la productivité plutôt que sur les opérations en arrière-plan inutiles: les photographes souhaitent voir leurs images immédiatement et Photo Mechanic affiche les vignettes d'un dossier en un clin d'œil.
Outre la visualisation des images, l’autre fonction principale de Photo Mechanic est de déplacer efficacement les images d’un dossier de données externe, tel qu’une carte Compact Flash, vers l’ordinateur de l’utilisateur. Copier simplement les fichiers de la carte est correct, mais Photo Mechanic ajoute la possibilité d’effectuer d’autres opérations en même temps, ce qui permet de gagner du temps en évitant de double-manipuler les fichiers. Pendant le téléchargement des fichiers ou leur acquisition, Photo Mechanic peut les renommer, les sauvegarder sur une destination secondaire et modifier les métadonnées des fichiers pour faciliter le catalogage ultérieur.
Une fois copiée, la vue omniprésente de la planche-contact affiche toutes les images de manière simple à personnaliser et offre des outils de retouche sophistiqués utilisant 9 classes de couleurs différentes (1 à 8 et Aucune), une évaluation à 5 étoiles et une case à cocher Etiquette pour chaque image. .
Photo Mechanic est l'outil idéal pour les deux premières étapes de n'importe quel flux de travail: obtenir les fichiers sur l'ordinateur, puis les éditer en ensembles significatifs. Photo Mechanic permet également la sortie de fichiers dans une variété de formats qui peuvent être sauvegardés, transformés en galeries Web, mis en FTP ou envoyés par courrier électronique via Internet.
Menus contextuels: les utilisateurs d’une souris / d’un pavé tactile d’un bouton sur Mac OS X peuvent maintenir la touche Ctrl enfoncée tout en cliquant pour afficher un menu contextuel pour l’élément d’interface utilisateur actuel. Les utilisateurs possédant deux souris à bouton (ou plus) peuvent simplement cliquer sur le bouton droit pour afficher un menu contextuel pour l'élément d'interface utilisateur actuel.
Tout au long du manuel, diverses opérations seront effectuées en cliquant avec le bouton droit de la souris sur les éléments de l'interface utilisateur. Les utilisateurs de la souris à un bouton doivent plutôt cliquer sur Ctrl-clic sur l'élément d'interface utilisateur indiqué.
Photo Mechanic fonctionne presque à l'identique sur Apple® OS X® et Microsoft® Les fenêtres® systèmes d'exploitation. La principale différence entre les deux réside dans le fait qu'OS X inclut des utilitaires tels que Spotlight Search et RAW Conversion. En outre, certains raccourcis clavier et touches de modification sont différents. .
Les préférences apparaissent de la même manière, avec des différences minimes de mise en page et l'absence de l'onglet RAW dans la version Windows.
Raccourcis clavier: La liste des raccourcis clavier à la fin du manuel est la liste Mac. Heureusement, tous les raccourcis sont spécifiés dans tous les menus eux-mêmes, il est donc facile de voir quel sera l'équivalent Windows. Généralement, les différences sont les combinaisons de touches de modification:
 |
| Exemple de raccourcis OS X vs Windows |
Option (OS X) et Alt (Windows et OS X) ne sont pas vraiment équivalents. La touche Option est la touche de modification sur le Mac.
Ctrl (OS X) = Ctrl (Windows) et apparaît comme un curseur ^ sur les menus Mac
Décalage (OS X) = Décalage (Windows). La touche Shift est la touche de modification dans la version Windows
Command (⌘) n'a pas d'équivalent direct. Dans la plupart des cas, la touche Ctrl aura le même effet sous Windows. Par exemple, un clic dans la fenêtre d'aperçu fera un zoom avant. Utilisez Ctrl-clic sur Windows pour obtenir le même résultat.
Pour des raisons de clarté, le symbole de la touche a été utilisé dans la plupart des endroits dans ce manuel. Utilisateurs de Windows, utilisez plutôt la touche "Ctrl" dans la plupart des cas. Toutefois, consultez la liste complète des raccourcis clavier pour OS X et Windows pour obtenir les combinaisons de touches exactes.
Finder vs Explorer: dans Apple OS X, vous utiliserez souvent l'outil système "Finder" pour rechercher des fichiers sur votre ordinateur. Dans Microsoft Windows, vous utiliserez probablement l'outil système "Explorateur Windows". Si vous voyez le terme "Finder" dans ce manuel, vous pouvez généralement remplacer "Windows Explorer" par les systèmes Windows.
Photo Mechanic n’est pas un programme qui demande beaucoup de ressources, et il n’existe aucune exigence absolue en ce qui concerne les spécifications de votre matériel pour l’exécuter. Si votre ordinateur peut exécuter les systèmes d'exploitation requis, vous devriez pouvoir exécuter Photo Mechanic. Tout dépend de votre tolérance personnelle pour les performances et les temps de chargement. La vitesse du programme variera également en fonction du nombre de photos visionnées et de la taille des fichiers. Si vous recherchez des directives générales, voici quelques recommandations:
- 4 Go ou plus de RAM, plus si vous comptez utiliser d'autres applications d'utilisation intensive de la mémoire, telles que les produits Adobe.
- L'espace disque disponible doit être au moins deux fois supérieur au nombre de cartes mémoire les plus grandes à ingérer.
- Votre écran doit être réglé sur un minimum de 1024 sur 768 en utilisant un espace colorimétrique 32 bits ou des millions de couleurs.
- Core duo ou processeurs i3, i5 ou i7.
L'installation de Photo Mechanic sur votre ordinateur implique généralement le téléchargement du dernier programme d'installation à partir de http://www.camerabits.com/downloads. Téléchargez la version correspondant au système d'exploitation de votre ordinateur, que ce soit Windows ou Apple OS X. (Recherchez les problèmes connus). Notez l'emplacement où votre ordinateur télécharge le fichier; C'est généralement un dossier appelé "Téléchargements". Une fois le téléchargement terminé, cliquez sur le programme d'installation (ou double-cliquez le cas échéant.)
Dans certains cas, vous devrez peut-être installer le logiciel en étant connecté en tant qu'administrateur de votre ordinateur. Si vous rencontrez des problèmes d'installation, vérifiez que vous disposez des autorisations appropriées pour votre compte d'utilisateur sur votre ordinateur.
Important: une licence standard de Photo Mechanic vous permet d’utiliser le programme sur trois ordinateurs maximum pour un seul utilisateur. Si vous envisagez de cesser d'utiliser Photo Mechanic sur un ordinateur, vous devez désactiver Photo Mechanic sur cet ordinateur afin de ne pas utiliser l'un de vos logements par inadvertance.
enregistrement

L'inscription à Photo Mechanic est simple et rapide. Une fois que vous avez téléchargé et installé le logiciel, cet écran vous le demandera lorsque vous lancerez le logiciel. Votre clé de licence vous sera envoyée par courrier électronique au moment où vous payez pour la licence complète. Remplissez simplement les détails et entrez la clé de licence.
Si vous avez acheté une licence en tant qu'individu, vous n'avez pas besoin de saisir quoi que ce soit pour Département, mais simplement votre nom, tel qu'il apparaît dans le courrier électronique de confirmation d'achat.
Il est également recommandé de sauvegarder le courrier électronique d'inscription dans un endroit sûr au cas où vous auriez besoin de le réinstaller pour une raison quelconque.
Votre licence autorise l'utilisation de Photo Mechanic sur un maximum de trois ordinateurs différents, à condition qu'ils soient utilisés par la même personne.
Lorsque vous cliquez sur le bouton Enregistrer, Photo Mechanic tente de contacter le serveur d'authentification de Camera Bits pour valider l'enregistrement. Ceci est fait pour empêcher l'utilisation généralisée de codes de licence piratés. Habituellement, cette étape aboutira sans autre intervention de l'utilisateur.
Désactivation
(Nouveauté dans Photo Mechanic Version 5 Build 15002 ou ultérieure)
Votre achat de Photo Mechanic vous permet d'installer le programme sur trois ordinateurs maximum à la fois, à condition que vous soyez le seul utilisateur. Si vous envisagez de désinstaller Photo Mechanic de l’un de vos trois ordinateurs pour l’ajouter à un autre ordinateur, vous devez désactiver la licence de l’ordinateur sur lequel vous souhaitez effectuer la désinstallation. Vous pouvez désactiver le menu Aide dans Photo Mechanic:
Sur OS X
Sur les systèmes exécutant Apple OS X, utilisez la section Mandatiers du panneau de configuration réseau du panneau Préférences Système pour configurer vos paramètres. Veillez à autoriser l’accès de Photo Mechanic à votre trousseau afin qu’il puisse obtenir automatiquement l’ensemble des paramètres de votre proxy HTTP.
Sous Windows:
Si votre ordinateur est protégé par un pare-feu et nécessite l’utilisation d’un serveur proxy, Photo Mechanic peut être configuré pour utiliser les paramètres contenus dans un fichier de paramètres de proxy.
Tout d’abord, créez un fichier texte nommé: http-proxy-settings.cfg
Dans le fichier, placez les informations suivantes (une information par ligne):
nom du serveur proxy ou adresse IP
numéro de port avec lequel le contacter
nom d'utilisateur pour le serveur proxy (si requis par ce serveur)
mot de passe pour le serveur proxy (si requis par ce serveur)
Vous allez placer le fichier http-proxy-settings.cfg dans un dossier système. Vous devrez peut-être modifier votre système pour autoriser l'affichage des fichiers et des dossiers système cachés. Pour ce faire dans l'Explorateur Windows:
- Cliquez sur le disque local (C:)
- Cliquez sur le menu Outils.
- Cliquez sur l'élément de menu Options de dossier ….
- Cliquez sur l'onglet Affichage.
- Recherchez les éléments Fichiers et dossiers cachés dans la zone de liste Paramètres avancés.
- Cliquez sur le bouton radio Afficher les fichiers, dossiers et lecteurs cachés.
- Cliquez sur OK pour appliquer les modifications.
Une fois que vous avez terminé, vous pouvez placer le fichier http-proxy-settings.cfg à l'emplacement suivant:
Pour Windows 7/8, l'emplacement est le suivant:
C: ProgramData Camera Bits, Inc Photo Mechanic
Pour Windows Vista:
C: UtilisateursAppData Roaming Camera Bits, Inc Photo Mechanic
Remarque: l'activation de Windows XP n'est plus prise en charge.
S'il est évident que la saisie de votre nom d'utilisateur et de votre mot de passe dans un fichier en texte brut est moins que sécurisée, le fichier http-proxy-settings.cfg doit seulement exister suffisamment longtemps pour que le processus d'inscription soit terminé. Ensuite, le fichier doit être détruit. (Remarque: Photo Mechanic ne pourra pas non plus rechercher automatiquement les mises à jour si vous supprimez ce fichier cfg. Si vous souhaitez désactiver Photo Mechanic sur cet ordinateur afin de libérer une place pour votre licence, vous devrez créer à nouveau ce fichier. au même endroit.)
Procès
Les nouveaux utilisateurs qui n'ont jamais essayé Photo Mechanic peuvent essayer gratuitement la version complète et sans restriction. Lorsque vous téléchargez et installez le programme, vous pouvez demander une version d'évaluation à partir de la boîte de dialogue d'enregistrement. Vous devez être connecté à Internet pour que Photo Mechanic active votre essai gratuit. Vous pourrez utiliser le programme pendant 30 jours pour voir si vous l'aimez.
Activation manuelle
Si vous ne parvenez pas à vous connecter à Internet, même via un proxy, vous pouvez toujours l'activer tant que vous pouvez vous connecter à un autre ordinateur ou appareil doté d'un accès à Internet, tel qu'un smartphone.
Photo Mechanic vous donnera la possibilité de générer un "fichier de passeport"
- Vous devrez transférer ce fichier passeport sur un appareil avec accès à Internet (exemple: lecteur de stockage amovible, carte mémoire / lecteur, câble USB, etc.).
- Sur cet appareil connecté à Internet, vous visiterez http://camerabits.com/activate
- Téléchargez votre fichier de passeport pour validation.
- Télécharger le fichier de passeport validé
- Transférez le fichier de passeport validé sur l'ordinateur d'origine.
Ensuite, au cours du processus d’inscription, vous téléchargerez ce fichier validé sur Photo Mechanic pour terminer l’enregistrement.
Nous savons que ce processus peut être fastidieux. Nous vous recommandons donc vivement d’enregistrer Photo Mechanic lorsque votre ordinateur est connecté à Internet.
Si vous recevez un message concernant un "code de challenge", vous êtes peut-être sur une ancienne version. Dans ce cas, mettez à jour la dernière version et réessayez.
Activation via la ligne de commande
Il peut arriver que l’activation de Photo Mechanic via une interface de ligne de commande via un script soit efficace. (par exemple, licences en masse) En supposant que vous disposiez d'une connexion Internet fonctionnelle, Photo Mechanic (version 5, versions 15278 et supérieures) peut désormais être activé à l'aide de la ligne de commande, comme suit:
Sous Windows:
Vérifiez tout d'abord que votre script est en cours d'exécution avec son répertoire actuel en tant que répertoire dans lequel réside Photo Mechanic et que vous utilisez une invite de commande administrative ou exécutez votre script à partir d'un script Windows PowerShell en tant que système.
Pour activer Photo Mechanic, utilisez le commutateur / activate. Le paramètre / department est facultatif. Si vos noms contiennent des espaces, citez le commutateur et la valeur.
démarrer "" / w "Photo Mechanic.exe" / activer "/ nom = nom de l'entreprise" "/ département = nom du service" / licence = 5PQTE -...
Pour désactiver, utilisez le commutateur / de désactiver.
démarrer "" / w "Photo Mechanic.exe" / désactiver
Pour vérifier si un système donné est activé, utilisez le commutateur / activé.
démarrer "" / w "Photo Mechanic.exe" / activé
REMARQUE: "" après le démarrage est nécessaire ou la commande de démarrage ne fonctionnera pas. La commande de démarrage elle-même est nécessaire car sinon, l'exécution de votre script sera exécutée parallèlement à l'exécution de Photo Mechanic lui-même et vous n'obtiendrez pas correctement le résultat de la commande dans votre script.
Sur Apple OS X:
L'activation et la désactivation nécessitent toutes deux des privilèges élevés. Soit exécuter depuis un shell avec la possibilité de lire / écrire dans / Library / Preferences, ou en utilisant sudo.
Pour activer Photo Mechanic, utilisez le commutateur –activate. Le paramètre –department est facultatif. Si vos noms contiennent des espaces, vous devez soit les échapper, soit citer également le paramètre et la valeur.
sudo "/ Applications / Photo Mechanic 5.app/Contents/MacOS/Photo Mechanic 5" --activate --name = Société Nom --department = Département Nom --license = R4UDM ...
Pour désactiver, utilisez le commutateur –deactivate.
sudo "/ Applications / Photo Mechanic 5.app/Contents/MacOS/Photo Mechanic 5" --désactiver
Pour vérifier si un système donné est activé, utilisez le commutateur –activé.
"/ Applications / Photo Mechanic 5.app/Contents/MacOS/Photo Mechanic 5" - activé
–activated retournera 1 en l'absence d'activation ou pour les enregistrements hérités. –activated retournera 0 quand une activation valide est présente.
La sortie de toutes les commandes va à stderr. Le shell obtiendra la valeur de sortie de l'application en $ ?.
REMARQUE: Il n'y a actuellement aucun moyen d'effectuer des activations hors ligne manuelles via une ligne de commande.
Types de fichiers reconnus
Formats de fichier image
| BMP | Bitmap Windows |
| EPS-TIFF | Postscript encapsulé avec aperçu TIFF |
| GIF | Format d'échange graphique |
| JPEG | Groupe mixte d'experts en photographie |
| PSD | Photoshop (enregistré en mode de compatibilité maximale) |
| PICT | Format Mac Pict |
| PNG | Portable Network Graphics |
| TIFF | Format de fichier d'image marqué |
| TGA | Targa |
Formats de fichiers RAW
| ARW | Format RAW Sony |
| CR2 | Format RAW Canon |
| CRW / THM | Paire Canon RAW / THM |
| DNG | Format négatif numérique |
| ERF | Format Epson RAW |
| IIQ | Format RAW Phase One |
| MOS | Feuille Format RAW |
| NEF | Nikon Format RAW |
| ORF | Format RAW Olympus |
| PEF | Format Pentax RAW |
| RAF | Format RAW Fuji |
| BRUT | Format RAW Panasonic / Leica |
| SR2 | Format RAW Sony |
| SRF | Format RAW Sony |
| IST | Format Sinar RAW |
| TIF | Format RAW TIFF de Canon 1D / 1Ds |
| X3F | Format Sigma RAW |
Formats de fichier de film
| AVI | Windows AVI |
| MOV | Film QuickTime |
| MPEG | Film MPEG 2 |
| MPEG4 | Film MPEG 4 |
Si un format de fichier n'est pas correctement reconnu, Photo Mechanic tentera de récupérer les aperçus TIFF / jpg incorporés. Dans de nombreux cas, comme avec les dos numériques de Phase One, la vignette obtenue sera très petite. Si la Agrandir les photos pour les afficher en avant-première et diaporama L’option est définie dans Préférences> Aperçu, puis Photo Mechanic agrandira cet aperçu pour remplir la fenêtre et l’image pourra avoir un aspect "pixellisé".
Certains formats de fichiers peuvent nécessiter l’installation de QuickTime d’Apple. Ces formats sont GIF, PICT, BMP et TGA. QuickTime doit être affiché sous forme de vignette dans tous les fichiers vidéo. QuickTime doit déjà être installé sur les Mac, ce qui ne s'applique donc qu'aux ordinateurs Windows.
Toutes nos félicitations!
Vous avez installé Photo Mechanic! Préparez-vous pour une navigation ultrarapide, une édition de métadonnées puissante et un flux de travail suralimenté! Commençons:
Photo Mechanic est un navigateur d'images conçu dans un souci de rapidité et de facilité d'utilisation. Vous pouvez aussi appeler cela un éditeur de photos. Mais contrairement aux autres programmes de retouche photo conçus pour fonctionner avec une photo à la fois afin de modifier ses pixels, Photo Mechanic est conçu pour fonctionner avec des groupes de photos afin de les gérer. Les éditeurs de photos professionnels qui traitent beaucoup de photos tous les jours et souvent dans les délais impartis comprennent cette distinction. Leur travail consiste à sélectionner des photos et non des pixels.
Nous avons préparé des vidéos pour vous aider à comprendre les bases de Photo Mechanic. Regardez-les pour lancer votre formation Photo Mechanic.
Ou si vous préférez vous plonger dans la pièce, voici quelques remarques pour vous aider:
Première utilisation
Lorsque vous lancerez Photo Mechanic pour la première fois, vous verrez une fenêtre de la planche contact vide et la barre de menus principale en haut de l'écran. Il existe plusieurs façons d’ouvrir une nouvelle feuille de contact.
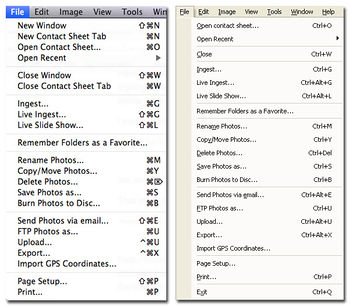
1. Sélectionnez Fichier> Nouvel onglet Feuille de contact (N) pour ouvrir une feuille de contact vierge dans la fenêtre principale. Ensuite, faites glisser un dossier dans la partie principale de la planche contact. Toutes les images de ce dossier seront affichées sous forme d'une série de vignettes.
2. Sélectionnez Fichier> Ouvrir la feuille de contact (⌘O) pour ouvrir un dossier existant en tant que nouvelle feuille de contact. Une boîte de dialogue Ouvrir apparaîtra pour vous permettre de naviguer dans le dossier avec lequel vous souhaitez travailler.
3. Faites glisser un dossier du bureau sur l’icône Photo Mechanic.
Choisissez un dossier et Photo Mechanic générera rapidement une planche-contact composée de vignettes pour tous les fichiers image de ce dossier.
Vous pouvez configurer Photo Mechanic pour qu'il démarre de différentes manières. Par défaut, Photo Mechanic démarre avec une fenêtre de feuille de contact vide. Vous pouvez le configurer pour qu'il présente plutôt une boîte de dialogue Ouvrir, ou vous pouvez lui demander d'ouvrir la dernière feuille de contact ouverte. Ce paramètre peut être défini dans l'onglet Général de la boîte de dialogue Préférences.
Il s'agit de la fenêtre principale que vous utiliserez dans Photo Mechanic, dans laquelle vous pourrez visualiser tous les fichiers image de vos dossiers. Vous pouvez ouvrir plusieurs feuilles de contact à la fois. Ils apparaîtront sous forme d'onglets en haut de la zone Contact Sheet. Vous pouvez basculer rapidement entre eux en maintenant la touche Ctrl enfoncée et en appuyant sur les touches fléchées droite ou gauche sous Windows. Sur macOS, vous pouvez le faire avec Command- {ou Command-}.

Les images apparaissent sous forme de vignettes individuelles avec le nom du fichier image affiché en dessous.
Passez la souris sur une image pour afficher jusqu'à 4 icônes: deux pour la rotation de la vignette, une pour l'affichage d'informations IPTC et l'autre pour déclencher la fenêtre d'aperçu pour un affichage plus détaillé. Les rotations ne sont effectuées qu’à l’affichage. C’est l’une des philosophies fondamentales de l’utilisation de Photo Mechanic qui stipule que, dans la mesure du possible, aucune modification n’est apportée aux données d’image de vos précieux fichiers.

Au-dessous de chaque vignette se trouve une petite case à cocher pour «marquer» l’image et une bande grise, la barre de classe de couleur, qui changera à mesure que les images sont classées par couleur ou classées par étoile lors de l'édition ultérieure.
Chaque vignette peut afficher jusqu'à 3 lignes d'informations {variables} supplémentaires, similaires aux info-bulles, mais affichées sur chaque vignette. Activez ces étiquettes dans Préférences sous l'onglet Feuille de contact.
La vue principale
Sur la barre d’outils se trouve un curseur permettant de contrôler la taille des pouces; Ceci est interactif et peut également être défini sur une taille par défaut dans Préférences. Lorsque vous revenez à une planche contact après l'avoir refermée, la taille des vignettes sera celle définie dans Préférences.
En haut de la fenêtre principale, vous trouverez des onglets, un par feuille de contact ouverte. Les onglets peuvent être sélectionnés en cliquant dessus ou glissés entre plusieurs fenêtres ouvertes. Cela facilite la visualisation de nombreuses feuilles de contact de nombreux dossiers différents.
Photo Mechanic a des menus contextuels. Un clic droit (ou Ctrl-clic) sur une vignette, ou une sélection de vignettes, fait apparaître le menu des opérations disponibles. Les mêmes commandes peuvent être trouvées dans les différents menus.
Cliquez avec le bouton droit sur une vignette pour afficher ce menu contextuel. (Sur une souris à un seul bouton, utilisez la touche Ctrl.)

Afficher les volets
Il existe différentes façons de configurer la vue principale. Vous pouvez les sélectionner dans le menu principal sous Vue.
- Afficher / masquer la barre d'outils active ou désactive la barre d’outils dans le menu principal en haut de l’écran. Il contient des icônes de fonctionnement de fichier de base, le curseur Taille de la vignette, Options de tri et Gestion des couleurs activée / désactivée.
- Navigateur Il s'agit de la vue Dossier familière pour la navigation dans la structure de répertoires de votre ordinateur. Utilisez ce volet pour sélectionner le dossier dans lequel vous souhaitez que Photo Mechanic crée une planche contact. Double-cliquez pour ouvrir le dossier en tant que nouvelle feuille de contact. Option-Double-Cliquez pour ajouter un dossier à la feuille de contact actuellement ouverte
- Favoris Un volet très utile dans lequel vous pouvez définir des dossiers comme favoris pour accélérer la navigation. Cela peut être très utile si un dossier se trouve au plus profond de la structure de répertoires et que vous devez y faire souvent référence.
- les tâches Cela montre la progression d'éléments tels que l'acquisition de la carte mémoire et les téléchargements FTP. Si vous fermez la boîte de dialogue de progression de la progression et que vous souhaitez la revoir, vous pouvez double-cliquer sur la progression ici.
Les favoris et le navigateur peuvent être redimensionnés en faisant glisser les barres de séparation entre les volets. Double-cliquer sur les séparateurs les fera s'effondrer. Double-cliquez sur un séparateur réduit pour qu'il se développe dans sa position d'origine.
Les dossiers fonctionnent de la même manière que dans d’autres programmes, mais Photo Mechanic ajoute des améliorations avec les favoris et le Navigateur pour permettre un accès facile aux dossiers couramment utilisés.
Le Navigator est une vue de la hiérarchie familière des dossiers que vous pouvez ouvrir pour accéder à des sous-dossiers, etc. En faisant glisser un dossier de Navigator dans le panneau Favoris, vous disposez désormais d'un "raccourci" vers ce dossier sans avoir à négocier complètement le dossier. hiérarchie.
Une bonne façon de travailler consiste à afficher les dossiers sur lesquels vous travaillez dans la fenêtre Favoris et à les utiliser pour copier et déplacer des fichiers. Les favoris et Navigateur offrent tous les deux des commandes Copier les éléments sélectionnés ici et Déplacer les éléments sélectionnés ici dans leurs menus contextuels.
Faire glisser un dossier dans la zone de la planche contact l'ouvrira sous forme de planche contact.
Vous pouvez faire glisser des images de la vue Contact sur n'importe quel dossier pour les déplacer ou maintenez la touche Option enfoncée pour les copier au lieu de les déplacer.
Pour supprimer un dossier de favoris, cliquez dessus avec le bouton droit de la souris et choisissez Supprimer.

Il existe d'autres améliorations intéressantes dans les panneaux Favoris et Navigateur: Cliquez avec le bouton droit de la souris (Ctrl-clic) sur un dossier Navigateur ou Favori pour afficher les menus ci-dessus. Dans la version Mac OS X de Photo Mechanic, vous pouvez définir une couleur pour le dossier afin de les distinguer ultérieurement. Vous pouvez ajouter un nouveau dossier dans un dossier existant: le dossier parent est alors affiché avec un petit triangle à gauche de son titre pour indiquer qu'il peut être développé.
Pour combiner deux dossiers en une seule feuille de contact, cliquez avec le bouton droit de la souris sur le dossier que vous souhaitez ajouter et sélectionnez l’option ‘Ouvrir dans la feuille de contact actuelle '. Un double-clic sur cette option ouvrira également le dossier dans la fenêtre de la liste de contacts actuelle.
Pour mémoriser l'ensemble des dossiers que vous parcourez actuellement sous un onglet de la feuille de contact, utilisez l'élément de menu «Mémoriser les dossiers en tant que favori …» dans le menu Fichier. Cela vous permettra de donner un nom à l'ensemble de dossiers. Une fois nommé, un favori «Multi-dossiers» sera créé dans le panneau des favoris.
Ce volet de la planche contact vous indique la progression de certaines tâches exécutées par Photo Mechanic, telles que l'acquisition de plusieurs cartes mémoire, la copie de fichiers ou les téléchargements FTP, etc. Un double-clic sur une barre de progression ouvre une boîte de dialogue de progression dédiée.
Curseur loupe
Les images peuvent être prévisualisées à 100% à partir de la planche contact à l’aide du curseur loupe. L’élément de la barre d’outils ‘Cursor Mode’ indique le mode dans lequel se trouve le curseur. Le mode Cursor peut être rapidement basculé en appuyant sur la touche ‘Z’. Vous pouvez également cliquer sur l’élément de la barre d’outils «Mode Curseur» pour choisir le mode de curseur souhaité.
Une fois activé, l’effet Loupe est lancé en cliquant et en maintenant le bouton de la souris enfoncé sur la vignette qui vous intéresse. Un instant plus tard (en fonction de la résolution de la photo et de la vitesse de votre système), la plus grande zone disponible ne masquant pas l'affichage de la vignette est remplacée par l'aperçu de l'image. Tout en maintenant le bouton de la souris enfoncé, vous pouvez révéler d'autres parties de l'image en effectuant un panoramique du contour du zoom autour de la zone des miniatures.
Les raccourcis clavier sont un bon moyen d’accélérer les opérations et valent le coup d’être appris. Quand une seule image est sélectionnée ou mise en surbrillance dans la fenêtre Contact Sheet, certains raccourcis peuvent être utilisés:
| ← → ↑ ↓ | Les touches fléchées déplacent la sélection |
| UNE | Lecture audio, le cas échéant. Une nouvelle pression sur A arrêtera la lecture |
| E | Éditer une photo avec un éditeur externe |
| T | Basculer le tag |
| + ou = | Tag image |
| – ou _ | Détacher l'image |
| ] | Tourner dans le sens horaire de 90 ° |
| [[[[ | Tourner dans le sens anti-horaire de 90 ° |
| je | Modifier les informations IPTC |
| U | Upload via FTP |
| 1-8 | Définir la classe de couleur |
| 0 | Effacer la classe de couleur |
| Barre d'espace | Aperçu de l'image |
Selecting Images
In the Contact Sheet window simply click once on a thumbnail to select it. Notice that the background changes color when you do this. In Preferences you can customize this to pick a background color that you can quickly recognize. A good combination to use is light grey for unselected, with black text and dark grey or black with white text for selected images. The important thing is to be able to tell at a glance which images are selected or not.
To select multiple images together, hold down the ⌘ key and click another image. Holding down the Shift key selects images between your first selected image and a new selected image. Images can be removed from a selection by clicking on them again while holding down the ⌘ key. To clear the selection simply click on another image, outside the images completely or ⌘D to Deselect All.
(The effect of the Shift and ⌘ modifier keys can be swapped in Preferences)
Tagging
A Tagged image is one which has the small checkbox ticked in the lower right of the thumbnail. Tagging is distinct from Color Class as it is an on/off facility and can be used in parallel with the Color Classes to allow a huge variety of editing and categorizing strategies.
Tag Selection
Untag selection
Mac: ⌘-
Windows: Ctrl-
To Tag an image simply click in the check box or, with a selection of images,⌘+ Tags and ⌘- Untags. For a single image T will toggle the tag.
⌘T selects all tagged images. F3 will filter the view to show Tagged Images only.
Modifier-click on the Tag box in a selection of images to Tag or Untag the whole selection.
One of the fundamental features in Photo Mechanic is the ability to mark images with 8 different color classes plus ‘None’. This allows an Editor to make subtle distinctions between image groups based on whatever criteria are deemed necessary. For example, a photographer might like to divide images up into ‘Top Shots’, ‘Keepers’, ‘Not Sure’ and ‘Oh dear!’. Like everything in Photo Mechanic, Color Classes are fully customizable in Preferences and so you could use Classes like these if you choose. The Defaults are Winner, Winner Alt, Superior etc but there is no reason why you cannot use your own Classes, and colors if you like. You can even chose your own color scheme by clicking on the color swatch in the Preferences screen and picking a new color for each. Important Note: If you also work with Adobe Lightroom and want to be able to set Color Classes that show up in LR, please see this note on compatibility settings: Maximizing IPTC/XMP Compatibility

Color class descriptions in Preferences > General
To use the Color Classes simply hit a number key when you have a single image selected and a bar beneath the thumbnail will change to the appropriate color. If you want to set a color class for a multiple selection, just hold the ⌘ key down when you hit the number key.
If you click on the color bar under a thumbnail the Color Classes list will appear for yet another way to set the Color Class. To apply a Color Class to a selection, use the Modifier key when making the change and the new class will apply to the whole set.
See Slide Show for another way to use Color Classes.
Color Class Widget

The Color Class Widget
The Color Class Widget can be seen at the bottom right of the Contact Sheet window. To use it make sure the check box is ticked and then click on a color box to either display or hide images of that particular color class. The last box on the right toggles on and off those images with no set color class. You can click-drag the mouse pointer across all the boxes to check or uncheck the colored squares.
Using this widget, together with tagging, gives you a huge variety of ways of sorting out your images to suit your own personal style of working. Along with Star Ratings, Color Classes are also compatible with Adobe Bridge and Lightroom.
By turning on only the green Class in the Color Class Widget, only images with that Color Class will be shown, as seen below.
Star Ratings work in much the same way as Color Classes, and the combination of the two allows for quite sophisticated ranking and sorting. One benefit of Star Rating is that it can be read by other applications so a ‘rated’ folder of images can be viewed in other apps with the Star Ratings still intact.
The star widget is right next to the color class widget
To set a Rating on a selected image or group of images in the Contact Sheet
view use Ctrl-1 to 5 (on OSX) or Alt-1 to 5 (on Windows) to set the number of stars. On individual thumbnails click the Star Rating you want or drag the mouse over the stars to increase or decrease the rating.
To display differently rated images you can use the Star Rating Widget to the left of the Color Class Widget and it operates in all the same way as the Color Class widget. This filters Star Rated images but does not select them.
To actually select certain Star Ratings,⌘-Option-3, for example, will select all images currently displayed in the contact sheet with a Star Rating of 3.
To use the mouse to display certain Ratings just click on the Star/Number you wish to show. You can have any, all or some Ratings displayed, shown by dark or light Star/Numbers. You can drag the mouse over the Stars to include more ratings.
To set a default, set the Widget to display the Rating that you want, and right-click on the Widget and select Set as Default. Later you can reset the Widget to the new default by right-clicking and choosing Restore to Default.
The check box to the left of each Widget disables the effects of that Widget, showing all images in the contact sheet.
Note that the Widgets operate on the current Contact Sheet of displayed images, not necessarily the entire folder. In other words if you have set the Color Class Widget to show only thumbnails with a Red label, the Star Rating Widget will then sort Star Rated images within this Red subset.
External Compatibility
Both Color Classes and Star Ratings can be recognized by certain other applications such as Adobe® Photoshop Lightroom® and Adobe Bridge®. Star Ratings can also be exchanged with Microsoft® Expression Media®.
Color Classes will be recognized by apps if the text label for each class is exactly the same in each app. You can edit the default Photo Mechanic labels in Preferences/ General. It doesn’t matter what the Color Classes are labelled, just that the labels must be the same in all apps.
It is also a good idea to edit the actual colors themselves to give consistency throughout the various apps. Lightroom and Adobe Bridge use the same color sets and these cannot be directly edited, only the labels. Photo Mechanic allows editing of the colors so it makes sense to make sure it is set to the Adobe default of red, yellow, green blue and purple.
This is how the General Preferences might be set in Photo Mechanic:

The General Preferences screen
- Adobe Bridge: Color Class labels can be edited in Preferences/Labels, and there are only 5 to use. These will correspond to the Color Classes in Photo Mechanic which have the exact same text labels. The other three will not show up in Bridge and can be used for Photo Mechanic-specific sorting and editing.
- Lightroom: Five Color Class labels can be edited in the “Library” mode under Metadata/Color Label Set/Edit. Type in new labels and click ‘Change’ to lock in the new labels.
For Color Classes and Ratings to show up in other applications, Lightroom must be set to write metadata changes to the original files automatically – to set this option look under Metadata / Save Metadata, or to do it automatically, look in File/Catalog Settings and check the ‘Automatically write changes into XMP’ checkbox.
You must also use XMP sidecar files with your RAW files when working with Adobe products. Click here to see the best Adobe-compatible IPTC4XMP settings.
- Microsoft Expression Media: Star Ratings work fine, and color labels will work properly if you set the ‘Synchronize Color Class with IPTC/XMP Urgency field’ checkbox.
Remember to Synch the new ratings (Action/Synch Annotations) back to the original files after you have made changes otherwise the new Color Classes and Star Ratings will not be read by other apps since they initially only exist in the Expression Media database. Expression Media does not write metadata to the original files unless told to.
- Capture NX2 (Nikon): Star Ratings work fine, and color labels will work properly if you set the ‘Synchronize Color Class with IPTC/XMP Urgency field’ checkbox. You must also embed IPTC4XMP in your TIFF-based RAW files (NEFs.)
Tri
Much of the sorting that can be done in Photo Mechanic is done using Star Ratings, Color Classes and Tags, these are explained in detail in the Selections section.
Photographers are used to spreading transparencies on a light box and gradually dividing them up into sets such as ‘Keepers’, ‘Not Sure’ and ‘Wastebin’. Photo Mechanic uses a more sophisticated version of much the same method by assigning images with a Color Class to designate its worthiness. Classes can be set individually or en masse and each Class can be displayed on its own, or with any other Classes. In fact the number of ways in which the images can be sorted and displayed is really only limited by your own imagination and workflow requirements.
Tagging is a simple way of sorting your images, they are either tagged or not. You can display all tagged images, all untagged images or all of them together. For a quick edit simply click the tag box on all the images you like and then hit F3 to display Tagged Only. At this point you might choose to Select All (⌘A) and FTP (⌘U) the whole set as small preview JPEGs to a client.
Other tools for Sorting include the “Sort by” menu on the Contact Sheet Toolbar.
There are presets to sort by, plus a custom option which allows sorting by any variable, and even by a secondary criteria. This means you could display the files by file type, file size, even by ISO setting.
A note on Sorting and Filtering
The tag is part of each image's metadata that needs to be read from the file and performing this reading takes time. Photo Mechanic can get the data it needs from the files on a fast local drive on the order of a hundred images per second. If it is on a network drive, it can drop as low as tens per second. Photo Mechanic generally is set to not filter on anything at all and as such it can get directly on to the business of showing you your images. But in order to filter and only show the tagged images, Photo Mechanic must get the metadata for all of the images before it can filter out the non-tagged images. If Photo Mechanic has already read the metadata on all of the images, then the filter will happen in mere seconds. But if it hasn't read all of the metadata yet, then it must read it all and depending on how fast Photo Mechanic can access that data, the filter can take a long time. In your case this filtering is taking minutes.
For example: With 15,000 images, even at 100 images read per second, it will take 150 seconds (2.5 minutes) to begin the filtering process. If Photo Mechanic is only able to read the metadata on 10 images per second then it would take 25 minutes to begin the filtering process.
Photo Mechanic does read all of the metadata in the background while you browse your images, but if it hasn't read it all then it can take a long time to do any kind of filtering. The Sort Cache which was introduced in Photo Mechanic 5 does help with this task, but the Sort Cache is of no use if the metadata hasn't been read fully at least once prior to the sorting/filtering. If images have changed since the sort data was cached, then it must be re-read to make certain that the sort data isn't stale. If your images don't change often, then the Sort Cache can be quite beneficial.

Set sort order from the main menubar
Découverte
Trouver
Mac: ⌘-F
Windows: Ctrl-F
Sorting and Finding are two sides of the same coin in that they both allow the user to make selections and view images based on certain criteria. Photo Mechanic allows two types of filtering: Sorting with Color Classes, Star Ratings and Tags, plus Find.

The Find command in the Edit menu allows searches to be made based on any information contained in the file, be it the file name or part of the file name, as well as any IPTC data encoded in the file itself. For example you could filter your images based on the Category contained in the IPTC data of your files (which you might have set during Ingest). The ‘Find’ results become the active selection in the Contact Sheet, which you could then Tag or Class as needed.
Type in the string you wish to search for, paying special attention to case and spelling.
Use the ‘Find:’ popup menu to choose how your search term(s) are handled. There two choices: ‘Any of the words’ and ‘All of the words’. Use any of the words when you want to enter multiple terms and you don’t care if an image contains all of the words. Use all of the words when you want to find photos that contain all of the words you’ve entered.
Use the ‘In:’ popup menu to choose what the Find panel is allowed to search. If you just want to narrow your selection, set the popup menu to ‘Selected photos’. If you want to create a new selection from the entire Contact Sheet, set the popup menu to ‘All photos’.
Use the two checkboxes following the ‘Searching:’ text to choose what metadata you wish to consider.
Use the ‘Case sensitive search’ checkbox to make your matches more exact.
Use the ‘Show/Hide IPTC’button to show or hide the dozens of IPTC-related checkboxes. If you’ve got them setup the way you want them then hiding them will make the panel much smaller, allowing you to see more of your results.
Set individual IPTC checkboxes to choose what fields you do or do not wish to search. Only checked items will be searched. Use the ‘All’ button to quickly set all IPTC checkboxes on. Use the ‘None’ button to quickly clear the IPTC checkboxes.
Finally click on the ‘Find’ button to begin the find operation. The progress bar to the left of the Find button lets you know how far along the find operation is. Once complete, the photos that end up selected will have met your Find criteria.
If you end up doing a lot of the same find operations repeatedly, use the Snapshot button to the left of the progress bar to save and restore your Find criteria.
See Find/Replace for details on finding and replacing data. See Spotlight Search for details on how to search outside of a Contact Sheet for images with specific criteria.
Arrangements
Contact Sheet thumbs may be arranged in any arbitrary sequence you choose simply by dragging them around the screen. This brings computer software closer to the ‘lightbox’ paradigm whereby you can sort your images as though they were transparencies on an actual lightbox.
Arrangements can even be made across multiple folders if the folders are open in the same contact sheet.
Arrangements can be saved with the folder(s) simply by dragging thumbnails into new positions. Each time this is done the Arrangement will be saved. The Sort popup menu in the tool bar will now update to ‘Arrangement’ so that the particular order that you have arranged the images can be retrieved. This holds for multiple folders opened into one contact sheet. It's best to use the Remember Folders command on the File menu to save the folders’ combination as a ‘Favorite’ for later use.
In the Contact Sheet tab of the Preferences dialog there is an option to set whether you have to be in an ‘Arrangement’ Sort to be able to move the images around.
Special tip: You can quickly move to the beginning or end of a Contact Sheet by using the Home and End keyboard keys. On many Mac keyboards, these are achieved by pressing the Fn key plus Left or Right cursor keys
Open Preview Window
Mac: ⌘-R
Windows: Ctrl-R
In addition to the Contact Sheet view, Photo Mechanic can display one or two images at a time for closer scrutiny when editing. The image can be viewed zoomed up to 800% to check critical focus or chromatic aberration. Various information about each image can be displayed alongside each image, or the image can be viewed on its own in full screen mode. New in Photo Mechanic 5: The Preview window can remain open while you work in a Contact Sheet. This is especially useful for large displays or with multiple displays.
These tools in the Preview Window operate on the photo that you're currently looking at. Here's what each tool does:

You can customize which buttons appear and in what order they are by right-clicking or ctrl-clicking in an empty area of the toolbar and selecting "Customize Toolbar."
Des vues

Views of the Preview Window
You can customize the Preview window's view with the buttons near the top of the window.
- View One Photo.
- View Two Photos, side by side for comparison.
- View Two Photos, one over the other.
- Toggle thumbstrip along the side or along the bottom
- Restore Panes
- Full View
Each view can be used ‘full-screen’ or with the info panels and thumbs list displayed. The info displays can be sized by click-dragging the splitter at the edge of their frames. They can be ‘collapsed’ by double clicking the splitter between the frames.
Images Side by Side
Single Image:
O
Side-by-side:
H
Over and under:
V
Toggle Full Screen or Info Palettes:
F
Toggle Focus between previews:
Languette
Here are two photos displayed ‘over and under’ for comparison. The H key and V key toggle between a ‘side-by-side’ layout and an ‘over-and-under’ layout. Return to a single image view using the O key.
Two Photos side by side for comparison, with Info displayed: click once on either image to bring it to ‘focus’ with respect to the Information displayed in the Histogram etc. ‘Tab’ will toggle focus between the images.
The Info Panel in the Preview window shows EXIF and IPTC information for each image such as date, ISO used, aperture etc. The list can be made longer or shorter by clicking on the plus and minus signs at the top right of the Info panel.
You can also customize which info is displayed, and the order of display, by using the Set Info Text command on the Settings submenu on the Edit menu. Edit this list to change the sequence of variables displayed in the Info Panel as well as the fields displayed. See Info Variables.
You can also use the Snapshot icon to save different Info Panel configurations and switch quickly between them.

The Info Panel and the Crop tool are found in the Preview window
Control the information that's displayed under Edit > Settings > Set Info Text…
Crop Tool
Below the Info Panel is the Crop tool which allows part of the image to be cropped when the image is saved, uploaded or otherwise exported. This is a non-destructive crop, which means the original file is unaffected when the cropped version is exported.
Click the Crop icon button to activate or deactivate the Crop Tool. Use this to define a crop area by click-dragging in the main preview window, just like in other image editing software. Once defined, the Crop area can be repositioned – the Crop tool changes to a Hand when the mouse cursor is within the defined crop area – click-drag to reposition the defined crop area. The cursor will change to a Rotate tool when outside of the crop area, or near the corners of the crop area. This allows you to rotate the image if it needs some straightening. Holding down shift while rotating makes it snap to 45-degree angles. See the Crop Tool in action here: Crop Tool Example
Nudging Crops
Modifier-arrows while the Crop tool is active allow movement of the crop. Holding down the Shift key on Mac or Ctrl key on Windows and using the arrow keys will move the crop by ten pixels at a time.
Reproducing Crops
From a Contact Sheet:
You can copy a crop from one image and reproduce it on another single image or batch of selected images. You can use the contextual menu from a contact sheet. Right-click on a thumbnal with a crop and choose Crop > Copy Crop. Then select other images, right-click them.
- Paste Crop: Adds the copied crop only to the single item being right-clicked.
- Paste Crop to selected items: Adds the copied crop to all selected items.
When viewing a cropped image in the Preview Window, you can clear the crop by pressing Shift-c (Windows) or Option-c (OS X)
Crop Settings
For more options, click the Settings button in the Crop panel.

- Shield area checkbox controls whether the area outside of the crop is darkened. This helps you visualize what the actual crop will look like.
- Show Grid overlay gives you a grid to help in straightening and composing the crop.
- Show Crop center crosshair allows you to turn the center on or off as needed.
- Crop Shape The crop area can be constrained in proportion. The numbers refer to proportions rather than units, i.e. a 3:2 proportion will keep the crop the same shape as a 35mm format image.
The crop will remain with the image and will be displayed in the normal Contact Sheet view so you can always see which images have crops set. When images are Saved As or Exported to HTML etc, the crop can be applied to the resulting image. In relevant dialog boxes there are Apply Crop check boxes so you can have the choice of cropping, or not, during that operation.
Clique le Retirer button to reset the image to its original state. En cliquant sauvegarder will keep the settings on your clipboard and allow you to Coller the same crop settings on other images as long as the info is on your clipboard (.i.e. as long as you don't copy anything else). You can save Snapshots of constrained crop settings which can be a great time saver if you commonly use a number of standard crop ratios.
You can also access Crop tools via the contextual menu, usually accessed by right-clicking or ctrl-clicking on an image in the Preview Window. Copy/Paste/Clear Rotation/Remove/Make Unconstrained and Settings are all accessible from the Crop submenu.
Zoom Panel
Toggle Zoom
Z
Zoom in
+
Zoom out
–
Lock
L
Zoom detail
(Mac) ⌘-click in the photo
(PC) Ctrl-click
Pan
Opt-arrow keys
Fast Pan
Opt-Shift-arrow keys
Toggle display of blown highlights
B
Toggle display of blocked shadows
N
Checking the Zoom checkbox applies whatever zoom setting has been chosen on the zoom slider bar. (For example, illustrated below, the zoom is set to 2x or 200%.) The Zoom slider has increments from 25% to 800% but the most useful ones are 100% and 50% for checking critical sharpness when editing.

Scroll down in the Info panel to see the Zoom slider
The Hand tool is active when the mouse is over the image – left-click/drag to move the image around. Also, use the Option-arrow keys to move the image or the Option-Shift-arrow keys to move it in bigger steps.
The mouse wheel can also be set in Preferences to Zoom or bring up next image.
Lock Scrolling is used when viewing two zoomed-in images in either of the comparison modes. Checking this box locks the two images together when moving either one with the hand tool. This is useful for very close comparison of two similar images when you need to examine the same part of both images in great detail. Lock Scrolling also zooms both images in sync. To use this function, set the Preview window to one of its compare modes (horizontal or vertical) then zoom in and align your images to show similar details. Then enable the Lock Scrolling function by either clicking on the ‘Lock scrolling’ checkbox or by pressing the ‘L’ key. Now both images will pan around together when you drag either of them around with the mouse or by using the Option-arrow keys.
If you ⌘-click on a particular detail of the image in the Preview window it will zoom to whatever percent size is currently set on the slider, centered on the spot you clicked on. ⌘-click again will zoom back out.
Histogram

Found at the bottom of the scrolling Info panel of the Preview window
Displays the Histogram information for the image which is currently displayed/ highlighted in the preview window. For some cameras, the actual white balance color temperature may be shown, if the cameras provide that data.
All three RGB colors are shown overlaying each other and where they overlap the composite color is shown. White is the region where all three colors overlap, yellow for red and green, cyan for blue and green and magenta for red and blue.
Highlights & Shadows
Use these controls to highlight areas on the image in the Preview window where the highlights or shadows have no detail. It is off by default. You can also turn these on and off using the 'N' (shadows) and 'B' (highlights) keyboard shortcuts.
Thumb Gallery
A Note about the thumbnails displayed as a filmstrip at the bottom of the Preview window:
This section of the screen gets its background and highlighted colors from the Preferences used for Contact Sheets – see Here for details. The ‘Set’ color shows which of the thumbs displayed in the Preview filmstrip is the one currently highlighted in the Contact Sheet view. (By default, it's light yellow)
To the left of the Film Strip are two gadgets – ‘All’ and ‘Selected’. If you have a multiple selection active in the Contact Sheet View, using the Selected tab here will restrict the Preview window to showing only those images. The Arrow keys will step through only the Selected images. Using the All tab will then include all images in the Contact Sheet View whether selected or not.

Video Files
Video files can be viewed and even played in the Preview window (Mac Only). You can choose which frame of the video file is used as the preview thumbnail by navigating to the desired frame with the video playback controls, then Ctrl-clicking on the video and selecting "Set as Poster Frame." You can save the current video frame by selecting File > Save Photo As. If you select a poster frame for a video, that is the photo that will be saved if you select multiple video thumbnails and then saving.

Rotating Photos
Rotate
While in a Contact Sheet
Mac: ⌘[ or⌘]
Windows: Ctrl-[ or Ctrl-]
While in a Preview
(Mac & Windows) [ or ]
Rotations are only performed ‘visually’: the original image is not rotated and will appear ‘as shot’ if opened in an external editor. This is called soft-rotation and is in line with Photo Mechanic’s policy of never altering the original image data in any way. While the image file’s EXIF orientation will be updated, the image data is not rotated or modified in any way.
Some cameras have a sensor for camera orientation which writes an orientation tag into the EXIF metadata of the image file. Photo Mechanic can work with this and such images will appear the correct orientation in the Contact Sheet and Preview displays.
To rotate an image in the Contact Sheet view you can choose from the following methods.
1. Click on the thumb to select it and choose Image / Rotate Photos from the menu. This is a slow way to work, but it is useful for large selections of photos.
2. Hovering the mouse over a thumbnail will cause icons to appear in the corners of the thumb. The two arrows in the top corners can be used to quickly rotate the thumb.
3. Use the keyboard shortcuts on selected thumbs – ⌘[ or ⌘]. These are the square bracket keys, [ for rotate left, or Counter Clockwise and ] for rotate right, or Clockwise – hold down the ⌘ key when using them.
4. To rotate a multiple photos in a selection, make the selection as usual and either use the keyboard shortcuts above or click on the arrow on one of the thumbnails while holding down the modifier key. If you don’t use the modifier key only the thumbnail that you are clicking on will rotate.
To clear a rotation from a photo, right click it in the Preview Window and select Crop > Clear Rotation.
In the Preview Display, images may be rotated using the icons on the menu bar or, better still, by using the square bracket keys again, but this time without the ⌘ key.
Preview and 2-Up Editing
While the Contact Sheet window is good for getting an overview of a collection of images, the Preview window is where critical editing can be done. The image can be viewed at 100% for focus checking and images can still be tagged, classed, and rated as usual.
With the full set of palettes displayed you can see at a glance the histogram for exposure, the focus (using the Z key to toggle zoom) and other images in the collection in the Thumb Gallery at the bottom to give an overview of the collection. Using the arrow keys to step through images is fast and intuitive and using the F key to toggle full screen mode combines well with the Z key to quickly check focus.
The 2-Up mode is useful for comparing very similar images, such as a sequence of portraits where expression differences can be quite subtle. You can toggle between 2-Up side by side and 2-Up one image over the other by using the H and V keys. This allows you to use one mode for landscape orientation images and the other for portrait mode images.
The image that is changed when using the arrow keys is the one that is currently ‘in focus’ – click on one or other of the images to bring it into focus so that the info palettes reflect that image. Using the arrow keys will change this image, but leave the other behind. In this way you could work through a sequence of portraits keeping one as a current favorite, and stepping though others to see if a better one appears. The ‘focused’ image also has an ‘aqua’ box drawn around it to help see which is in focus.
Greg Gorman Key
The G key adds a subtle editing function first identified and requested by photographer Greg Gorman. It works like this, using a portrait session as an example:
Using the 2-Up (H) mode in Full Screen mode (F), choose the first shot, change focus to the second half of the preview and step through the other images using the arrow keys. Only the second image will change, to image 2, 3, 4 etc, the first image in the non-focus window will stay the same. What we are doing is viewing Image 1 side by side with Images 2,3,4,5, etc.
Now, if we find an image which is better than Image 1 we can press the G key to swap the image in the focused window to the un-focused window, replacing the initial favorite with a new favorite. Continue to use the arrow key to view more images and the new favorite will remain in the other window.
By doing this we can very quickly find the best shot by continuing to press the G key when we see a shot that is better than the one we have ‘reserved’. Once we have finished going through the whole shoot we should have a preferred image in one window and the last image in the set in the other window. Return focus to the preferred image by clicking on it once and then close the Preview window. This preferred image will now be seen highlighted in the Contact Sheet display. You might wish to Tag it first, set its Color Class to Winner, or give it a rating.
As you go through the images you could even Tag all the ones that were considered possible ‘hero’ shots so that when you have finished, not only will you have one ‘best’ shot but all the ones you considered will be Tagged so you can go back and press F3 to see them all and make sure that your choice was the best one.
Zoom and Lock
In the 2-Up view, with the images zoomed in (Z key), pressing the L key will lock the two images together so that when you drag one image around in the view window, the other one will move with it. This is very useful for comparing two very
similar images critically.
Hint: Align the images first, using the Hand tool, before locking them.
Slide Show
Slide Show
Mac: ⌘-L
Windows: Ctrl-L
Another powerful way to edit your images in the current contact sheet is to display a Slide Show and mark the images as they are displayed. You can use the normal keyboard shortcuts for setting a color class or tagging the images as they are shown. If the Slide Show is set to manual it is easy for a group of editors to work their way through a collection and make a collective decision before moving onto the next image.
The Slide Show operates on the current selection of images so if you want to show them all, use ⌘A (or Ctrl-A in Windows) to select them all first.

Get to Slide Show Settings quickly with ⌘-L on a Mac
* Render Text – Check this to add captions to the Slide Show. The text can be typed in the text box and will be shown on each slide formatted in the font and color selected from the Font and Color Panels. A sample caption is displayed. For best results set the number of lines to 2 so there is some space between the caption and the next image.
For more sophisticated captions you can use Variables to create the rendered text from IPTC info, date, camera model etc.
- Fade speed – Set the speed of the transition
- Fade color – Change the background color between slides.
- Wait for Space Bar / Show Each Image for __ Seconds – You have the choice to have the Slide Show progress automatically, or wait for you to press the space bar to advance the slides. Accepts values to the tenth of a second.
- Loop until cancel – Keep playing Slide Show until Esc pressed.
- Randomly shuffle photo playback – Play random slides from among the ones you've selected.
- Apply Crop – If a crop has been set in Preview then checking this box will apply it to the displayed image.
When the Slide Show is playing you can use the keyboard shortcuts to control the playback as well as Tagging (+) or setting Color Classes (1-8,0) for each image. The D key ‘dismisses’ the image from the show (and the selection) so when you return to the Contact Sheet you will see that only the remaining images continue to be selected. Holding down the Option key while pressing ⌘-L will start the Slide Show immediately, using the last-used settings.
When going from windowed mode to full-screen mode (toggle with keyboard 'f') the full-screen Slide Show will resume on the monitor that the windowed mode Slide Show was running on. This means you can run the Slide Show on any monitor you choose.
Note: Slide Show prevents screen saver and system sleep while it is playing.
Live Slide Show
Live Slide Show
Mac: ⌘-Shift-L
Windows: Ctrl-Shift-L
Live Slide Show is much the same as the normal slide show except that it ‘watches’ a folder to see if a new file is added. This new file is automatically added to the slide show, so the show gets longer as new files are copied in. This can be especially useful during tethered shooting, or during a long import of many files.
Use the ‘Redisplay previously shown photos after __ seconds of inactivity’ check box to cause the Live Slide Show to start showing the first photos again after a desired amount of time since the last new photo was displayed. If unchecked, Photo Mechanic will wait indefinitely for new photos to arrive. Setting the ‘Shuffle display order’ check box will cause the redisplayed photos to be show in random order.
Note: If shooting Raw+JPG while tethered, Live Slide Show will show both the Raw and JPG files in the Live Slide Show, even if your settings are set to combine them into a single thumbnail. This is because the files show up one at a time during tethering. Check to see if your tethering software allows you to specify one filetype to transfer.
Concept
The industry standard for photographic captions and keywords is IPTC metadata. Photo Mechanic is designed to give you ultimate control in how this information gets added to your photos. These tools are meant to help you do this quickly, accurately, and efficiently.
IPTC Stationery Pad
IPTC Stationery Pad
Mac: ⌘-I
Windows: Ctrl-I
Captioning a group of images is very simple using the IPTC Stationery Pad. The Stationery Pad can be applied to single images or a selection of images making it perfect for adding information to whole sets of images at one time.
To use the Stationery Pad in this way, make a selection of images in the Contact Sheet and then open the IPTC Stationery Pad under Image / IPTC Stationery Pad on the main menu bar.
Type your data into the various fields and make sure the checkbox to the left of each field you wish to apply is checked. If unchecked, that field will not be applied. If you have a set of data that you use regularly, like a list of Photographers, Cities or States, you can set up a custom dropdown list for all of the fields in the IPTC Stationery Pad. Next to each field is a dropdown list arrow which will open an Edit option when first clicked. Click on Edit to bring up a word list dialog where you can enter any number of items and add them to the list.

This menu allows you to select from a list rather than type in the same words each time. One other benefit from this approach is that all the spellings will be the same as well as the case. Even slight misspellings will throw off a search so using the drop down lists is a good way to ensure consistency.
Next to each field in the IPTC Stationery Pad is a dropdown menu. Clique sur le modifier option to bring up the Edit IPTC List dialog where you can type in new entries and hit Return/ Enter to add them to the list.

Adding items to IPTC Lists
It is good practice to set up as much of this as you can in advance, and to export the data and keep a backup. If you have whole sets of data that you use on a regular basis, you can save the entire Stationery Pad to be loaded later. Use the Snapshot button to save the current data to use again later.
Normally the IPTC data is added to files by replacement of existing data but this may not always be desirable. You can ‘append’ data to Keywords, Caption and Caption Writers fields by checking the Plus (+) sign next to the field. This will then append the data rather than replacing whatever is there already.
Hint: It's a good idea to add a space at the beginning of annexé text so that the last and first text characters do not run into one another.
Holding down the modifier key causes the “Clear” button to change to an “Options” button. Click this to set options for which data fields are cleared and which are kept unchanged when you use the “Clear” button.
Using the Modifier key gives you options on which IPTC fields to clear
Emploi: Quickly access User/Client variables from this button
Sequence: The {seqn} variable allows you to add an increasing number to certain fields. Set the start of the sequence here. (Learn more about Image Variables)
To see a description of many IPTC fields, see the IPTC Variables Map
IPTC Info
This dialog complements the capabilities of the IPTC Stationery Pad by adding a thumbnail view to the selected image and the ability to step through a selection of images without having to return to the Contact Sheet view. You can get to it quickly by hitting the 'I' key, That's 'I' as in Imagine.

Prev-No Save
Mac: ⌘-Shift-{
Windows: Ctrl-Shift-[[[[
Prev-Save
Mac: ⌘-[[[[
Windows: Ctrl-[[[[
Next-No Save
Mac: ⌘-Shift-]
Windows: Ctrl-Shift-]
Next-Save
Mac: ⌘-]
Windows: Ctrl-]
Upload-Next-Save
Mac: ⌘-U
Windows: Ctrl-U
Copy Data
Mac: ⌘-Shift-C
Windows: Ctrl-Shift-C
Paste Data
Mac: ⌘-Shift-V
Windows: Ctrl-Shift-V
Most of this dialog operates much like the normal IPTC Stationery Pad with the difference being this applies only to one image at a time. All fields can include Variables and there is a Snapshot button to save commonly used data sets.
In the top right of the dialog, under the thumbnail, are seven buttons:
- Left Arrow: Move to previous image, without making changes
- Right Arrow: Move to next image without making changes
- Save & Left Arrow: Apply IPTC changes and move to previous image
- Save & Right Arrow: Apply IPTC changes and move to next image
- Save, Upload & Right Arrow: Apply IPTC changes and open the Upload dialog, then move to the next image
- Copy: Copies the currently displayed IPTC data to the clipboard
- Paste: Pastes any IPTC data from the clipboard to the current image
Remarque: No changes will be made to a file unless the OK button is pressed or either of the Save arrows are used.
The modifier key adds functionality to the Clear, Apply Stationery and OK buttons.
- Options: Changes which fields are Cleared
- Copy to Stationery: Copies whatever data is set in this dialog to the IPTC Stationery Pad
- Eval: Click this button to see how any Variables are resolved
Hold down the modifier and Ctrl key and the Apply Stationery button changes to Apply to Selected. If you have a selection active in the Contact Sheet window then this will apply the current metadata to those images, much like the IPTC Stationery Pad does. All non-empty fields will be applied.
Mots clés
Keywords play an important part in any archiving setup and Photo Mechanic adds some extra functionality to this field in both IPTC Stationery Pad and IPTC Info.
Clicking on the dropdown arrow on the Keywords field of the IPTC Stationery Pad or IPTC Info window and clicking on ‘Edit Keywords…’ brings up the IPTC Keywords dialog where you can set up a Master list of Keywords and select out of it the ones you want to use. By using the Snapshot button you can set up sets of keywords related to different subjects or jobs.

Adding Keywords can help finding photos later on
You can add, delete, or change keywords from your master keywords list. Note: Changing a keyword in the Master keyword list does not change the keywords on previously-saved photos. It only changes the entry in the list. If you wish to change a keyword that has already been applied to multiple images, you can use Find and Replace.
After setting up the Keywords list you can select them from the dropdown list next to the Keywords field in the IPTC Stationery Pad and IPTC Info display.
Use the additional Snapshot buttons to save either the Current or Master lists for later use.
Keywords Panel
Keywords Panel
Mac: ⌘-K
Windows: Ctrl-K

Another way to keyword an image or a set of images is by using the Keywords Panel. You can access this panel by choosing the ‘Keywords Panel…’ command on the Image menu.
This panel operates on selected photos and can be used interactively with the current Contact Sheet. Select some photos and then use the Keywords Panel to apply keywords to the selected photos.
Multiple sets of keywords may be saved and loaded from the Snapshot button. If you want to make a new subset of a list of keywords, you can Command-click the individual keywords to select them, then use the ‘Snaphshot from selected’ button to create a new set.
- Ajouter, Effacer, et Change buttons work just like they do in the Keywords Dialog.
- Load from Master loads the current set of master keywords (used above in the Keywords Dialog on it’s right hand column) replacing the current set of keywords.
- Save to Master saves the current set of keywords over the master keywords list as used above in the Keywords Dialog on it’s right hand column.
- Applying: text field may be edited directly to change keywords or quickly add in a keyword that you don’t want to add to your keyword list. Just add keywords separated by a comma or a semi-colon (depending on your IPTC/XMP Preferences.)
Then to apply the set of keywords listed in the ‘Applying:’ text field, click on the ‘Apply to selected photos’ button. The keywords will be applied according to the popup menu just above the button. The choices in that popup menu are ‘When applying, append keywords’ which only adds keywords, and ‘When applying, replace keywords’ which deletes any current keywords each selected photo has before adding the keywords.
Structured Keywords
Structured Keywords
Mac: ⌘-Opt-K
Windows: Ctrl-Shift-K
Beyond the basic functionality of a simple linear keyword list is the concept of controlled vocabulary and a hierarchy of keywords. There are two different Structured Keyword ‘tools’, one is a floating panel which can remain open and the other is accessed through the IPTC/Info Dialogs. Both have similar functionality, the slight differences being how the keywords are finally applied to images.
The main Structured Keywords Panel is accessed on the menu bar through Image / Structured Keywords Panel.

Organize Keywords into a structured hierarchy
Photo Mechanic comes with a basic vocabulary which is intended as a starting point and to illustrate the concept of nested keywords. Each keyword can be a parent, sibling or child word, forming a hierarchy of words from broad categories like ‘Animals’, to more detailed ‘child’ words like ‘Birds’ and on to even more detailed words like ‘48 Spotted Pardalote’.
‘Animals’ and ‘Plants’ would be sibling words and would appear alphabetically in the same panel. Each column to the right lists ‘children’ of a highlighted ‘parent’ word. The grey triangle to the right of a word indicates that it has Child words in the next column.
‘Grey’ words denote Categories, ‘normal type’ words are Keywords and ‘bold’ words are synonyms of the currently highlighted keyword.
Keywords can be added to files either singly or as the whole ‘path’ which includes all the ‘parent’ words. The preview field displays what the path will be; click on Add Keyword to add the last word in the list to the Collection panel or on Add Path to add the whole string of words. If you wish to use a path as a single keyword entity, use the Separator option by checking the ‘Use separator between keywords in path’ checkbox.
There is a search function for keywords, type in the word (or sub-string) and click ‘Find’. If there are more than one result the ‘Next’ and ‘Previous’ buttons are activated.
To save time when using large lists of searched for keywords there is an option to present the results in a list rather than the Next/Previous method. Hold down the modifier key and the ‘Find’ button will change to ‘Options’. Click the button to select how many results should be displayed in one list dialog.
- Appliquer to: adds the words to either the Keywords field or the Caption field of the IPTC metadata.
- Append: adds new keywords to any already in the field. Note : if this box is unchecked Photo Mechanic will replace any existing keywords.
- Double-click: there are 4 options for when you double click on a Keyword.
- Apply path to selected: applies the whole keyword path directly to selected images.
- Apply keyword to selected: applies the keyword directly to selected images.
- Apply collection to selected: applies the keyword directly to selected images.
- Adds Path: adds the path to the collection panel above.
- Adds Keyword: adds the keyword to the collection panel above.
- Synonyms: options to exclude synonyms, to add synonyms only at the end of the path or all along the path.
- Add Path: adds the path of the selected keyword to the Collection panel. Add Keyword : adds the selected keyword to the Collection panel.
Synonyms are different words with identical or similar meanings. It is useful to include these words in keyword list because you can never be certain whether a searcher might type in, for example, beast or beasts. Searches are ‘literal’ in the sense that a search for ‘beast’ will not show results that only have the term ‘beasts.’
In this way many different groups of keywords can be assembled into a Collection of keywords which can then be applied en masse to selected images using the Apply buttons in the bottom right hand corner.
This is a very powerful tool and there are many ways to use it to add keywords to your images. The exact method used will depend on your own workflow and how much detail you need from your keywords.
The other Structured keywords tool, seen below, is accessed through the IPTC Info dialogs by clicking the arrow next to the Keywords field. The main difference is that the keyword Collection is applied to the keywords field of the IPTC dialog when ‘Apply’ is clicked, thus the ‘Apply to’ dropdown and the three lower Apply buttons become redundant and are not included in the dialog. All other functions are identical.

The simplified Structured Keywords dialog found in the IPTC Info panel
If you want to create your own controlled vocabularies they can be created from scratch by right-clicking in the columns and selecting ‘Create Child’ or ‘Create Sibling’ etc. You can Import text files using the Load and Merge buttons, and edited lists can be saved using the Save button. Saving and sharing lists is a good idea when multiple users are adding keywords so that all words are consistent across users and all spelling are the same.
- Save: allows you to Save the current database to a file of your choosing. You don’t need to use Save unless you want to export the database to another system or share it with a friend. PM always saves the database internally for you as you make changes to it.
- Load: allows you to completely replace the current database with the file you’re loading.
- Merge: allows you pull in only the items in the new database that don’t already exist in the current database. This is useful for people who update their database on their machines but subscribe to a standard database (like the Controlled Vocabulary database) and want to get the latest version but don’t want to lose their own additions.
Vocabulary File Format: It must be a text file encoded in UTF-8 which means it is fully Unicode compatible and supports any language. There are plenty of free text editors for both Mac OS X and Windows that can read and write UTF-8. The layout of the file is simply a tab-delimited set of words with special wrapper characters that determine the type of item the word is. Simple items (keyword items) have no wrapper character at all. Category items (items used for organizational purposes only and are not part of the hierarchical path) are wrapped in ‘[’ and ‘]" Synonym items (items that are synonymous with their sibling item) are wrapped in ‘{’ and ‘}’. The easiest way to see this in action is to Save out the built-in structured keywords to a new file and then open it up in a text editor and see for yourself.

Commercial lists can be purchased from sources like David Riecks’ Controlled Vocabulary website : http://www.controlledvocabulary.com
You can also manage the keywords from within the Structured Keywords interface. Just right-click on an existing term and the contextual menu will appear.
- Rename: Allows you to rename the text of an item.
- Create child item: Adds a new item that will have the current item as its parent. This new item should be a more specific term than the current item.
- Create Synonym: Creates a child item that is synonymous with the parent item.
- Create sibling item: Creates an item that is at the same level as the current item.
- Set type to Synonym/Category: Changes the type of the current item.
- Effacer the current item and any children underneath it.
Find and Replace
Find and Replace
Mac: ⌘-Shift-F
Windows: Ctrl-Shift-F
Find and Replace is a powerful way to make broad changes to the IPTC data in your images. Photo Mechanic can search through the metadata in the currently opened Contact Sheet looking for a defined string. For each one it finds, Photo Mechanic can replace that string with another one.
The Find and Replace panel is under the Edit menu or use ⌘-Shift-F to open it.

Type in the string you wish to search for, paying special attention to case and spelling.
You can toggle off the case sensitivity using this checkbox.
Fill in the ‘Replace With’ box with the text you wish to insert and choose the fields within which you wish to search. This can also be used to change capitalization. You can find "soccer" and replace with 'Soccer" or "SOCCER." You can also use Photo Mechanic variables in your replacement: You could replace "ISO HERE" with {iso}.
It is important to note that all instances of the string will be replaced, so use the check boxes to limit the search to the fields you wish to search.
You can also choose between “All Photos” in the current Contact Sheet view or just the currently “Selected Photos”.
Click the “All” button to check all the IPTC Field boxes together or “None” to uncheck them all.
Click on “Replace” to start the Find and Replace operation.
You can Snapshot the options in the Find panel for later use. They will save and restore the Find: popup selection.
Snapshots

On all of the most commonly used dialog boxes you will see a small Lightning symbol this is the Snapshot button and it is used to make a quick copy of the dialog’s current settings. Click on the button and you will be prompted for a ‘save’ name and it is best to use something meaningful here.
In future, when you click this button, not only will you see a Save option but also a list of all the previous Snapshots relevant to that particular dialog box. Selecting a named item will load the Snapshot, restoring the settings.
The Save As dialog is a great place to use this– you could set up two different Snapshots, one for large web images and one for small thumbnail web images. Run the dialog twice over a selection, using each Snapshot and you have very quickly generated a set of images for the Web. This is very similar to the Export option, but like many things in Photo Mechanic, there are different ways to do many things and it is up to the user to determine which best suits his or her needs.
Snapshots can be managed by modifier-clicking on the named entry in the snapshot list. This brings up the Finder or Windows Explorer opened to the folder where the Snapshots are saved.
In the Finder or Windows Explorer, you can copy, rename and delete the snapshot files if you would like. When you return to Photo Mechanic, the snapshot menu will be updated.

Concept
The concept of variables is a simple but powerful one. A Variable is simply a symbolic representation of metadata contained within the photos themselves.
For example: {filename} is a Variable and is simply the actual file name of a particular photo. Each photo will of course have a different name so we use the Variable {filename} to refer to whatever the filename happens to be. The convention used in Photo Mechanic is to enclose the variable name in curly brackets like this { }.
There are a great many different Variables and some even have subtle variations: Consider a file named ABC123.jpg
{filename} or {file} = ABC123.jpg
{filenamebase} or {fbas} = ABC123
This could be very useful for creating a printed contact sheet because you could use the Variable {fbas} to label each image so that it would print the file name only, without the file extension, for a more professional look.
Variables are commonly used during the Ingest renaming process to generate new filenames so that certain data contained in each file can be used to derive a new filename. It would be possible to use {datesort}_{frame4}_{user} to make a filename based on the date of capture in a YYYYMMDD format plus the 4 digit frame number plus the name of the camera owner (if defined in the menu of your camera).
So, a shot taken on Jan 1st, 2006 and originally named _Y123456.CR2 would be renamed to 20060101_3456_nick.CR2 which is easy to sort on date order and clearly names the photographer, while keeping the unique file number from the camera.
Any combination of Variables is possible and Photo Mechanic makes it easy to customize your file naming in any way you see fit depending on the job at hand.
Variables can be used in many different places in Photo Mechanic, mainly in Ingesting, Renaming, Copying, FTPing, Exporting, the Info Panel (Preview window), the IPTC Stationery Pad, Printing, Save As and in Slide Show captions. When variables are available for use there will be a Variables button in the dialog box. Clicking this brings up a Variables list. To enter a variable in a field you can either type it in using the { } symbols or, simply double-click on the Variable you want in the list and it will be inserted into whichever field was active in the dialog box.
Note that highlighting a Variable in the list will reveal a brief description in the pane at the top of the list.
Client/User Variables enable you to define Variables for jobnames, clients, your business name, even phone numbers and email addresses.
Substring extraction can be used to ‘extract’ a range of characters from an image variable so they can be used as normal variables in other fields throughout Photo Mechanic.
The format is: {variable:index,count:conversion} or {variable:index:conversion}
In either case, <:conversion> is optional.
“lc” perform lower-case conversion of all applicable characters
“UC” perform upper-case conversion of all applicable characters
“PC” perform Proper Name case conversion
Voici quelques exemples:
Let’s say we have a file named DSC_1234.JPG
So the variable for {filename} would yield DSC_1234.JPG and {filenamebase} would be DSC_1234
Then to extract substrings from this:
{filenamebase:0,3} yields: DSC
{filenamebase:-4,4} yields: 1234
{filenamebase:-4} yields: 1234
{filenamebase:2,3} yields: C_1
{filenamebase:0:lc} yields: dsc_1234
{filenamebase:0:PC} yields: Dsc_1234
{filename:0,-4} yields: DSC_1234
Variables List
Types of Variables
- Camera or Image-specific
- APEX Values
- Standard IPTC Fields (Also: See the IPTC Variables Map)
- Time and Date
- ICC Profile
- Special
- GPS
- Location taken
- Utilisateur
- Client
- Nikon Picture Control settings
Camera or Image-Specific
| actuations, act | Number of shutter actuations for the camera. |
| aperture, f | Aperture setting of photo. (from the EXIF data) |
| aspect, aspt | Aspect Ratio of photo |
| aspectcrop, aspc | Aspect Ratio of cropped photo |
| brightness, brit, bv | Brightness of photo in APEX units. This is exposure value minus ‘film’ sensitivity value |
| bytes, byte | The uncompressed image size of the photo |
| colormode, cmod | The color mode set in the camera |
| colorclass, color, colr | Name of color class for photo |
| colorclasscolor, clrc | HTML color value of color class for photo |
| colorclassval, colorval, clrv | Numeric value of color class for photo |
| comment, cmnt | The comment (written by some cameras) |
| comp | Exposure compensation set by camera |
| corrupt, crpt | Number of invalid extra bytes in a JPEG |
| cropheight, yc | Height of a crop |
| cropwidth, xc | Width of a crop |
| ev | Exposure value in APEX units. This is a combination of aperture and shutter speed (or ISO and scene brightness) |
| ev100 | Exposure value in APEX units, relative to ISO 100. E.g. at ISO 200, this would be {ev} – 1 |
| filename, file | Filename of photo with the extension |
| filenamebase, fbas | Filename of photo without the extension |
| filesize, size | File size of the photo |
| firmware, firm | Firmware version of camera that took photo |
| flash, flsh | Flash used |
| flashcomp, fcmp | Flash exposure compensation |
| focusmode, focus, fmod | Focus mode of camera |
| folder, fldr | The folder name for a photo (e.g. the current contact sheet) |
| foldernum, fldn | The folder number for a photo (e.g. first three digits of DCIM folder) |
| folderpath, fpth | The full folder path for a photo (e.g. the current contact sheet) |
| frame, fnum | Frame number of photo |
| frame4, fnm4 | Frame number of photo, last 4 digits |
| hascrop, hc | Value will be 'True' if there is a crop set for this image |
| height, h, y | Height of image in pixels (prior to any rotation drawn by Photo Mechanic) |
| identifiant | Either owner (Canon) or comment (Nikon) |
| iso | ISO (ASA) setting of photo |
| lentille | Focal length of lens in mm. This isn’t a 35mm equivalent for non-SLR cameras |
| lens35, 35mm | Equivalent 35mm focal length of lens in mm (Not all cameras record this value) |
| lenstype, lt | Type of lens used |
| lenstypenum, ltnm | Variable to report the lens number for certain Canon and Sigma lenses. (This can be used to create a code replacement for translating a lens ID into a more descriptive string) |
| lightsource, lsrc | Light source |
| fermer à clé | Returns 1 if the file is locked on the memory card, and 0 if no lock is found |
| faire | Make of camera that took photo |
| mediatype, mtyp | Media type (e.g. still, video) |
| meteringmode, mmod | Metering mode set in camera |
| model, modl | Model of camera that took photo. |
| owner, ownr | Camera’s owner (if defined; same as user) |
| parentfolderpath, pfpt | The full folder path to the parent folder of the folder of the photo (i.e. 2 levels up) |
| chemin | The full path name of the photo |
| pixels, pxls | Total number of pixels (width * height) for photo, displayed as an exponential multiplier (ex. 4.1M) |
| prefix, prfx | First three characters of file name, excluding any leading ‘_’ character from AdobeRGB photos |
| printsize, psiz | Print size in inches or cms (depends on photo) |
| printsizecms, pscm | Print size in cms |
| printsizeinches, psin | Print size in inches |
| program, mode, prgm | Camera’s program mode for photo |
| quality, qlty | Compression quality for camera JPEGs |
| rating, stars, rate | Star rating of photo |
| rawplusjpeg, r+j | If photo is part of a RAW+JPEG pair then the result is 1, otherwise it is 0. |
| resolution, res | Resolution of file |
| resolutioncms, rscm | Resolution is pixels per cm |
| resolutioninches, rsin | Resolution in pixels per inch |
| rotation, rot | Rotation drawn by Photo Mechanic |
| serialnum, serial, snum | Serial number of camera that took photo |
| sharpness, shrp | Sharpness setting in camera for JPEG and TIFF files |
| shutter, ss | Shutter speed setting of photo, from EXIF data |
| software, soft | Software that produced the photo |
| sound, snd | Sound file attached |
| étiquette | Tagged state of image (either 1 or 0) |
| tonecomp, tone | Tone compensation (contrast) of photo |
| type | Image type (e.g. JPEG) |
| uniqueid, uniq | Unique 32 char ID written by some cameras |
| utilisateur | Camera’s user (if defined; same as owner) |
| width, w, x | Width of image in pixels (prior to any rotation drawn by Photo Mechanic) |
| whitebalance, white, baln | White balance of photo as set by camera or host software |
| whitemode, whim | White balance mode (AUTO or MANUAL) |
APEX Values
Some cameras record APEX exposure values for each photo (Additive system of Photographic EXposure). (Learn more about APEX on Wikipedia) Photo Mechanic will store the APEX values in these variables. In cases where the APEX values for Av and Tv are not recorded, Photo Mechanic will calculate them from existing camera settings for exposure time and f-number if possible.
If a camera writes the {tv} and {av} and {bv} values (Exif 0x9201, 0x9202, 0x9203) then they will be displayed directly. If a camera only writes the older Exif tags for Exposure Time and F Number, then PM will compute the {tv}, {av}, and {bv} APEX values from the camera settings.
The {sv} APEX value will always be computed based on ISO.
(Ev = Av + Tv = Bv + Sv)
| av | APEX aperture value |
| bv | APEX brightness value |
| ev | Exposure value in APEX units. This is a combination of aperture and shutter speed (or ISO and scene brightness) |
| ev100 | Exposure value in APEX units, relative to ISO 100. E.g. at ISO 200, this would be {ev} – 1 |
| sv | APEX ISO speed value (a.k.a. sensitivity value) |
| la télé | APEX time value |
Standard IPTC Fields
| assignment, assn | JobMinder assignment number (if defined) |
| byline, name | IPTC Byline (Photographer) field |
| caption, capt | IPTC Caption field |
| captionwriter, cwrt | IPTC Caption Writer field |
| category, cat | IPTC Category field |
| ville | IPTC City field |
| citytaken, cttk | IPTC City where the image was taken from field |
| contactaddress, ciad | Contact Info Address |
| contactcity, cicy | Contact Info City |
| contactstate, cist | Contact Info State |
| contactzip, cizp | Contact Info ZIP Code |
| contactcountry, cicn | Contact Info Country |
| contactemail, ciem | Contact Info Email |
| contactphone, ciph | Contact Info Phone |
| contactweb, ciwb | Contact Info Web URL |
| copyright, copy | IPTC Copyright field |
| copyrighturl, curl | IPTC URL field |
| country, cnty | IPTC Country field |
| countrytaken, cntk | IPTC Country taken |
| countrycode, ccod | IPTC Country Code field |
| countrycodetaken, cctk | IPTC Country Code taken |
| credit, cred | IPTC Credit field |
| editstatus, edit | IPTC Edit Status field |
| genre, gene | XMP Intellectual Genre field |
| headline, head | IPTC Headline field |
| instructions, inst | IPTC Special Instructions field |
| iptcampm, iap | IPTC day half (AM or PM) |
| iptcdate, idat | IPTC Date field (YYYYMMDD) |
| iptcday, iday | IPTC day (1, 2, 3 .. 31) |
| iptcday0, idy0 | IPTC day zero padded (01, 02, 03 .. 31) |
| iptcdow, idow | IPTC day of week (Sunday, Monday, etc) |
| iptcdow3, idw3 | IPTC day of week abbreviated (Sun, Mon, etc) |
| iptchour, ihr | IPTC 12 hour format (1, 2, 3 .. 12) |
| iptchour0, ihr0 | IPTC 12 hour format zero padded (01, 02, 03 .. 12) |
| iptchour24, ih24 | IPTC 24 hour format zero padded (01, 02, 03 .. 23) |
| iptcminute, imin | IPTC minute (00 .. 59) |
| iptcmonth, imn | IPTC month (1, 2, 3 .. 12) |
| iptcmonth0, imn0 | IPTC month zero padded (01, 02, 03 .. 12) |
| iptcmonthname, imnn | IPTC month name ( January, February, etc) |
| iptcmonthname3 | IPTC month name abbreviated ( Jan, Feb, etc) |
| iptcmonthnameap | IPTC month name abbreviated for AP ( Jan., Feb., etc) |
| iptcsecond, isec | IPTC second (00 .. 59) |
| iptctime, itim | IPTC Time field (HHMMSS+0800) |
| iptcyear2, iyr2 | IPTC year (2 digits) |
| iptcyear4, iyr4 | IPTC year (4 digits) |
| keywords, keyw | IPTC Keywords field |
| location, loc | IPTC Sublocation field |
| locationtaken, lctk | IPTC sublocation taken field |
| object, objt | IPTC Object name field |
| photog, phtg | IPTC Byline field |
| province, prov | IPTC State / Province field |
| scene, scen | IPTC Scene field |
| limace | IPTC Object name field |
| source, srce | IPTC Source field |
| sourcetype, srct | Digital source type |
| state, stat | IPTC State / Province field |
| statetaken, sttk | IPTC State where the image was taken from field |
| subject, subj | IPTC Subject field |
| suppcat1, sup1 | IPTC Supplemental category field 1 |
| suppcat2, sup2 | IPTC Supplemental category field 2 |
| suppcat3, sup3 | IPTC Supplemental category field 3 |
| title, titl | IPTC Byline Title field |
| transref, tref | IPTC Transmission Reference field |
| urgency, urgc | IPTC Urgency field |
| usage, usag | XMP Rights Usage field |
| worldregiontaken, wrtk | World region taken |
Time and Date Variables
| ampm | Capture day half (AM or PM) |
| date, shot | Capture date of photo according to camera or file creation time. The format is the same as the Date & Time control panel’s ‘short date’ setting |
| datemil, datm | Capture date of photo according to camera or file creation time in military format (ddMONyy |
| datesort, dats | Capture date of photo according to camera or file creation time. This can be used for sorting since the format is always YYYYMMDD |
| journée | Capture day of photo according to camera or file creation time (1, 2, 3 .. 31) |
| day0 | Capture day zero padded of photo according to camera or file creation time (01, 02, 03 .. 31) |
| dow | Capture day of week of photo according to camera or file creation time (Sunday, Monday, etc) |
| dow3 | Capture day of week (abbreviated) of photo according to camera or file creation time (Sun, Mon, etc) |
| heure | Capture 12 hour format (1, 2, 3 .. 12) |
| hour0, hr0 | Capture 12 hour format zero padded (01, 02, 03 .. 12) |
| hour24, h24 | Capture 24 hour format zero padded (01, 02, 03 .. 23) |
| minute, min | Capture minute (00 .. 59) |
| moddate, mdat | Modification date |
| modtime, mtim | Modification time |
| moddatesort, mdts | Modification date for sorting (YYYYMMDD) |
| modtimesort, mtms | Modification time for sorting (HHMMSS) |
| month, mn | Capture month according to camera or file creation time (1, 2, 3 .. 12) |
| month0, mn0 | Capture month zero padded according to camera or file creation time (01, 02, 03 .. 12 |
| monthname, mnn | Capture month name ( January, February, etc) |
| monthname3, mnn3 | Capture month name abbreviated ( Jan, Feb, etc) |
| monthnameap, mnap | Capture month name abbreviated for AP (Jan., Feb., etc) |
| à présent | Current time. See the Date & Time control panel for formatting |
| nowampm, nap | Current day half (AM or PM) |
| nowhour, nhr | Current 12 hour format (1, 2, 3 .. 12) |
| nowhour0, nhr0 | Current 12 hour format zero padded (01, 02, 03 .. 12) |
| nowhour24, nh24 | Current 24 hour format zero padded (01, 02, 03 .. 23) |
| nowminute, nmin | Current minute (00 .. 59) |
| nowsecond, nsec | Current second (00 .. 59) |
| nowsort, nows | Current time. This can be used for sorting since the format is always HHMMSS in 24-hour format |
| nowsortlong, nwsl | Current time including 1/100 of a second. This can be used for sorting since the format is always HHMMSSss in 24-hour format |
| nowsubsecond, nsub | Current subsecond (00 .. 99) |
| second, sec | Capture second (00 .. 59) |
| subsecond, ssec | Capture sub-second (for cameras that support this) |
| temps | Capture time of photo according to camera or file creation time |
| timesort, tims | Capture time of photo according to camera |
| timesortlong, tmsl | Capture time of photo according to camera (long format) |
| today, tday | Current date. The format is the same as the Date & Time control panel’s ‘short date’ setting |
| todayday, tdy | Current day (1, 2, 3 .. 31) |
| todayday0, tdy0 | Current day zero padded (01, 02, 03 .. 31) |
| todaydow, tdow | Current day of week (Sunday, Monday, etc) |
| todaydow3, tdw3 | Current day of week abbreviated (Sun, Mon, etc) |
| todaymil, tdym | Current date in military format (ddMONyy) |
| todaymonth, tmn | Current month (1, 2, 3 .. 12) |
| todaymonth0, tmn0 | Current zero padded month (01, 02, 03 .. 12) |
| todaymonthname, tmnn | Current month name ( January, February, etc) |
| todaymonthname3, tmn3 | Current month name abbreviated ( Jan, Feb, etc) |
| todaymonthnameap, tmap | Current month name abbreviated for AP (Jan., Feb., etc) |
| todaysort, tdys | Current date. This can be used for sorting since the format is always YYYYMMD |
| todayyear2, tyr2 | Current two digit year (e.g. 97, 04) |
| todayyear4, tyr4 | Current four digit year (e.g 1997, 2004) |
| tomorrow, tmrw | Tomorrow’s date. The format is the same as the Date & Time control panel’s ‘short date’ setting |
| wiredate, wdat | Evaluates to {iptcdow}, {iptcmonthnameap} {iptcday}, {iptcyear4} |
| year2, yr2 | Capture year (2 digits) according to camera or file creation time |
| year4, yr4 | Capture year (4 digits) according to camera or file creation time |
| yesterday, ystd | Yesterday’s date. The format is the same as the Date &Time control panel’s ‘short date’ setting |
ICC Profile Variables
| gamma, gama | The gamma of the photo |
| icc | The name of the ICC profile for a photo |
| prrx | The red x coordinate of the primaries |
| prry | The red y coordinate of the primaries |
| prgx | The green x coordinate of the primaries |
| prgy | The green y coordinate of the primaries |
| prbx | The blue x coordinate of the primaries |
| prby | The blue y coordinate of the primaries |
| wpx | The x coordinate of the white point |
| wpy | The y coordinate of the white point |
Special Variables
| index, indx | Index of the photo being processed |
| ingestseq, iseq | Current value of ingest sequence number. This is incremented for each disk being ingested |
| nl | Inserts a new-line (CR) character |
| page | Current page number during printing or exporting of HTML |
| pagecount | Total number of pages during printing or exporting of HTML |
| rand10 | A random number from 01 to 10 |
| rand100 | A random number from 001 to 100 |
| rand1000 | A random number from 0001 to 1000 |
| sequence, seqn, auto | Current value of sequence variable. This will automatically be incremented for the next photo |
| languette | Inserts a tab character |
| total, totl | Total number of photos being processed |
GPS Variables
| altitude, galt | GPS altitude in meters |
| bearingfrom, bfrm | Bearing from photo to home in degrees |
| bearingto, brto | Bearing to photo from home in degrees |
| distance, dist | Distance from photo to home in user’s units |
| gpsdate, gdat | GPS date (UTC) as YYYY:MM:DD |
| gpsdatum, gdtm | GPS map datum |
| gpsdif, gdif | GPS differential correction applied (no or yes) |
| gpsdir, gdir | GPS image direction (0-359 degrees) |
| gpddirref, gdrf | GPS image direction reference (true or magnetic) |
| gpsdop, gdop | GPS degree of data precision |
| gpsmode, gmod | GPS dimension mode (2 or 3) |
| gpsstatus, gsta | GPS status (A=acquiring, V=valid) |
| gpstime, gtim | GPS time (UTC) as HH:MM:SS |
| gpsversion, gver | GPS version |
| latitude, glat | GPS latitude |
| longitude, glon | GPS longitude |
| satellites, gsat | GPS satellites |
| speed, gspd | GPS speed |
| track, gtrk | GPS track (0-359 degrees) |
User Variables
| jobname, job | Current Job name |
| username, urna | User name |
| usercompany, urco | User Company/Name |
| useraddress, ura1 | User Street Address |
| useraddress2, ura2 | User Secondary Address |
| usercity, urcy | User City |
| userstate,urst | User State |
| userzip, urzip | User zip Code |
| usercountry, urcn | User Country |
| userphone, urph | User Phone Number |
| usermobile, urmb | User Mobile Number |
| userweb, urwb | User Website URL |
| useremail, urem | User Email address |
| usercustom1, urc1 | User Custom Field 1 |
| usercustom2, urc2 | User Custom Field 2 |
| usercustom3, urc3 | User Custom Field 3 |
Locations Taken
| locationtaken, lctk | Sublocation taken |
| citytaken, cttk | City the image was taken in |
| statetaken, sttk | State the image was taken in |
| countrytaken, cntk | Country the image was taken in |
| countrycodetaken, cctk | Country Code taken in |
| worldregiontaken, wrtk | World region the image was taken in |
Client Variables
| clientname, clna | Client name |
| clientcompany, clco | Client Company/Name |
| clientaddress, cla1 | Client Street Address |
| clientaddress2, cla2 | Client Secondary Address |
| clientcity, clcy | Client City |
| clientstate,clst | Client State |
| clientzip, clzip | Client zip Code |
| clientcountry, uscn | Client Country |
| clientphone, clph | Client Phone Number |
| clientmobile, clmb | Client Mobile Number |
| clientweb, clwb | Clients Website URL |
| clientemail, clem | Client Email address |
| clientcustom1, clc1 | Client Custom Field 1 |
| clientcustom2, clc2 | Client Custom Field 2 |
| clientcustom3, clc3 | Client Custom Field 3 |
Nikon Picture Control Settings Variables
| pcnm | Picture Control Name |
| pcad | Picture Control Adjustment |
| pcqa | Picture Control Quick Adjust |
| pcsh | Picture Control Sharpness |
| pccn | Picture Control Contrast |
| pcbr | Picture Control Brightness |
| pcsa | Picture Control Saturation |
| pchu | Picture Control Hue Adjustment |
| pcfe | Picture Control Filter Effect |
| pcte | Picture Control Toning Effect |
| pcts | Picture Control Toning Saturation |
User/Client Variables

The User / Client Variables dialog is useful when working on different jobs and with different clients when you wish to make sure images are easily trackable. By defining these variables you can use any of this data in the same way as normal variables. User/Client Variables are found at the bottom of the normal Variables pop out list.
The User/Client dialog checks for changes on Cancel and warns on changes. It gives the option to save the changes.
If you have a group of regular clients you could fill in this form for each one, using the Snapshot button to save each set of data. Each time you do a job for a client you can reload the form in two clicks by clicking the Snapshot button again and selecting the client from the list. This will populate all the fields as you last saved them. The User/Client dialog stores/loads the Job name with the Client snapshots.
Having done that you can now use the variables to, for instance, create folder names based on the clients company name or more powerfully, to add data into the IPTC Stationery Pad. Inserting {clientname} {clientcompany} and {clientphone} into, say, the Special Instructions field will tag all the files with your clients name, company and phone number.
Think of User Variables as user-defined text strings that save having to repeatedly enter identical info about you or your clients.
You can get to this dialog by using the “Set User/Client Variables…” command on the Edit menu, or while in the Ingest dialog by clicking on the “Job…” button.
Info Variable

If you right-click (Ctrl-click) on a thumbnail you can display Image Info.
This is a sub-menu showing all sorts of information about that particular image. This information also shows up as a mouse-hover tooltip if they are enabled under the View Menu.
Selecting the Show Info Tooltips option in the View Menu causes all the Info Text to display when the mouse is hovered over a thumbnail.
The information that is displayed can be customized using the Edit/Set Info Text menu option.
To edit this list simply select and delete the Variables you don’t want. You can add new Variables by opening the Variables panel and double-clicking the Variable you want to add. The insertion point for a new Variable will be wherever the cursor is flashing in the Set Info dialog.
The sequence of information displayed in the Image Info popup is the same as the sequence set in this dialog. You can edit this list by adding and deleting variables.

You can also treat this dialog just like a text editor using the normal Cut, Paste and Copy options, and you can even type directly into the box if you want certain text strings to show up in every image.
Captioning photos is a very worthwhile and even essential task for making your photos more valuable. But it can be time consuming. Good use of the IPTC Stationery Pad to create captions that have common information is a way to speed up this process. Photo Mechanic offers two other features that can help you speed up your captioning. The first feature is called Code Replacement and the second feature is called Autocomplete.
Code Replacement
Note: This information covers Photo Mechanic 5. To see documentation for Photo Mechanic 6, go to docs.camerabits.com
Code Replacement is a feature which speeds up captioning of often-used terms or names like those used in sports photography, but can be used as a method of shorthand for any type of photography.
To use Code Replacement, you must prepare a UTF-8 text file in 'tab-separated format. You can use any text editor to generate the text file. The format of the text file is simple. It is comprised of two or more ‘columns’, the first being the ‘Code’ and the second through last being the ‘Replacements’. These ‘columns’ are separated by a ‘tab’ character. Using just spaces won't work. Ideally, you want your codes to be as short as possible while being completely unique.
Here's a simple example Code Replacement text file used for Basketball (Detroit Dunkers and Chattanooga Choo-Choos):
CC8	Dain Bramage
CC17	Rick Perkins
CC43	Brian Calloway
CC13	Dennis George
CC11	Darrin Green
CC2	Aaron Barnum
...
DD41	Stanislav Zarubezhanin
DD43	Paul Kroyd
DD24	Ken Pierce
DD44	Brian Socoletto
DD55	Wally Flannenbaum
DD13	Victor Zenfliende
...
Some of the player’s names are difficult to spell correctly, even if you are familiar with them. Code Replacement makes this problem a thing of the past. All you have to do is get the spelling right once: during the creation of the Code Replacement text file. Once you have created your text file, you need to tell Photo Mechanic to use it for Code Replacement.
Edit > Settings > Set Code Replacements

This is where you can define which files contain Code replacement data – and there can be more than one. You select multiple Code Replacement files at once in the file selection dialog by holding down the Shift key. Where multiple codes exist, the most recently loaded replacement will take preference. The "delimiter" field is the keyboard character you will use to tell Photo Mechanic to do a Code Replacement. The default character is a , but you may wish to change this. For example, the can cause problems if you use Code Replacements in folder paths in Windows. Consider using something like = in those cases.
Once your text files are loaded, you can use ‘Code Replacement’ to speed up your captioning.
Continuing our basketball example, lets say you shoot a game where the Chattanooga Choo-Choos play the Detroit Dunkers. Later after Ingesting your images you begin to individually caption the keepers and want to identify the players in each of the photos.
Example: you have a picture with Dain Bramage (CC8) breaking past Stanislav Zarubezhanin (DD41) and you can visibly see their jersey numbers in the thumbnail preview of the IPTC Info dialog. You just type in your codes for each player, surrounded by the ‘’ character which tells Photo Mechanic to look up the codes and enter their replacements. Photo Mechanic instantly looks up the replacement text and enters it in place of the code and automatically places the cursor at the end of the replacement so that you can continue typing in the rest of your text.

Code Replacement can help make your captions more accurate and can save time as well: just choose a system of mnemonics to help you remember your codes and the pictures themselves will help you derive the codes. In our example we chose CC as an abbreviation for the ‘Chattanooga Choo-Choos’ and DD as an abbreviation for the ‘Detroit Dunkers’. When captioning, we can see that the two players are on the Choo-Choos and the Dunkers, so we can derive the codes from their jersey numbers (8 and 41), giving us CC8 and DD41.
Multiple Code Replacement
Code Replacement also supports multiple replacements for a code. The additional replacements just follow the first replacement with a tab character between each additional replacement. Here is an example:
code replacement replacement #2 replacement #3
In order to use the alternate replacements you need to add the field selector which is the pound sign ‘#’ followed by the number of the replacement you want to select. For instance with the above example one would use code#2 to select the second replacement which would result in ‘replacement #2’ being entered in the text. While you can enter #1 to get the first replacement, it is not necessary. Code Replacement will work with either method.
Comments are also supported and must either start at the beginning of a line or be the last column on a line. Comments start with two forward slashes like so:
// this is a comment for the whole line
code	replacement	// this is a comment for the rest of the line
Code Replacement with Variables
Code Replacement can be paired with the use of variables to add indirection to the look up of a replacement for a code. For instance if you wanted to use the variable {monthname} but you wanted it to be translated to a different language from English, say Spanish, you could create a Code Replacement file that looks like this: (Note, there is one TAB between items in each column)
January		Enero
February	Febrero
March		Marzo
April		Abril
May		Mayo
June		Junio
July		Julio
August		Agosto
September	Septiembre
October		Octubre
November	Noviembre
December	Diciembre
So if you now use {monthname} and the current month in English would be July then the Spanish replacement would become Julio.
Another example of using variables in Code Replacement would be to make sequences of often-used variables entered more quickly. For instance if you often used the set of variables {day} {monthname} {year4} in your captions you could create an entry in your Code Replacement file that looks like this:
mydate {day} {monthname} {year4}
Then instead of typing in all of those variables or entering the date manually, you would just enter: mydate and your photo’s date information would be replaced.
Code Replacement can be used any time you have commonly entered terms that you tire of entering each time. Code Replacement works in every text field of the IPTC Info and IPTC Stationery dialogs.
Advanced Code Replacement
You can combine multiple Code Replacements with variables to discover huge gains in timesaving. Here is a theoretical example: Imagine a scenario where you have a team of 4 photographers covering an event, say a music festival with 4 stages over a a period of a few days, and you're downloading all their photos from different days into a single contact sheet. If you take some time beforehand to set up a code replacement file using variables, you can save yourself a ton of time. You can differentiate the images from each photographer by using the serial number of their camera. Here is an example code replacement file that lists the serial number of each camera along the name of each photographer, which stage they are covering, and the name of the performing artist, all separated with tabs, along with a simple single code replacement for the name of the music festival.

So now even though you have photos from different photographers shooting different subjects in different locations on different dates, you can put a single caption in the IPTC Caption field for all photos from that shoot.
{serialnum}#3 performs on the {serialnum}#2 at the bmf on {monthname3} {day}, {year4}. Photo by staff photographer {serialnum}#1
Now all the photos from Jimmy's camera will have this as a caption:
David Crowie performs on the Montana Stage at the Big Music Festival presented by Trustworthy Motors on
Jan 6, 2013. Photo by staff photographer Jimmy Bits
While all the photos from Rita's camera will have this as a caption:
Taylor Sleaux performs on the Colorado Stage at the Big Music Festival presented by Trustworthy Motors on
Jan 4, 2013. Photo by staff photographer Rita Reflex
Now suppose that at the last minute, Trustworthy Motors pulls out of their sponsorship and are replaced by Guzzleade energy drink. You can simply change the one line in your code replacement file and reapply it to your photos and you're set.
More Code Replacement Ideas
Code Replacement can be used in any of the fields of the IPTC Stationery Pad. This means it can help speed up things like Keywording. For example, if you are a Wedding photographer who archives files with keywords to be able to find them later, you could set up a Code Replacement file that covers your common keyword fields
familyname	Davis
groomname	Dave Davis
bridename	Jane Jensen
motherofbride	Dorothy
motherofgroom	Diane
bestman		Bert Baker
maidofhonor	Betsy Bouffant
Then you could keep a saved IPTC Stationery Pad that you plan to reuse with keyword field that contains items like familyname and maidofhonor etc. You could then keep the same Stationery Pad and just edit your Code Replacement file before or after each shoot to match the members of that wedding.
You can also use Code Replacement to adjust the way Variables work. For example, using the {lt} variable for "lens type" will insert something like "EF24-105mm f/4L IS USM" If you prefer a shorter description for that variable, you could set up Code Replacement file with this line:
EF24-105mm f/4L IS USM 24-105mm f/4L IS
and then use {lt} in your Stationery Pad to insert the new shorter value. And since you can load multiple Code Replacement files, you can keep this one in the list all the time even as you swap out other Code Replacement files.
Code Replacement FIles
A common mistake when first working with Code Replacements is to make files that don't have the right formatting to work with Photo Mechanic. It is imperative that you create a file in plain text without any rich text or HTML formatting. Programs like Microsoft® Mot® or TextEdit can sometimes change your formatting without warning. We recommend using a text editor that makes it easy to create plain text files. Free examples of these are Notepad++ for Windows or TextWrangler for the Mac, but these are not the only options. Also, we repeat that it's crucial that you place one TAB between each column in your Code Replacement file. Using multiple spaces instead of a Tab will not work. Advanced users working with complex Code Replacement files can even use a spreadsheet program like Microsoft Excel®or Google Sheets to create and keep track of them, and then export that file as "Tab Delimited Text" format for use in Photo Mechanic.
Autocomplete
Another method for speeding up captioning is “Autocomplete” which is a realtime word completion feature that can use lists of words in a text file that you create, words from the IPTC field lists, or even {variables}. Autocomplete is off by default, but you can enable it with the “Set Autocomplete…” menu item on the “Settings” submenu found in the “Edit” menu. This command brings up the following dialog.

You can enable and disable using words from each of the sources by checking or unchecking the checkbox to the left of each of the sources. You can enable or disable the feature entirely by setting the “Enable Autocomplete” checkbox appropriately. The last checkbox, titled “When editing IPTC fields, only allow completions from the field’s own list” when set makes it so that none of the other sources will be considered even if they are enabled. Instead only the list of words or phrases in the popup menu to the right of the IPTC field that you’re editing will be looked at for completing words you’re typing.
When creating your own text file for Autocomplete, make sure that you enter one word (or phrase) per line and that you save out the text file in the UTF-8 encoding if any of the letters you’ve entered have accents on them or are written in a non-Roman script such as Japanese (Hiragana, Katakana, or Kanji).
Using Autocomplete
Autocomplete is easy to use. Just type like you normally do and when Autocomplete senses that you’re entering the first few letters of one of its words or phrases, it finds the first alphabetical match and completes the word. Here, a user has entered the three letters ‘Por’ into the IPTC Stationery Pad’s City field and Autocomplete has found the cities named Portland and Portsmouth in its list. "Portland" is alphabetically first, so it is the first choice:

From this point, If you wanted Portland, you can press the TAB key to accept the match and move on. (If you need to type more into the field than just "Portland" you can use your keyboard's right-arrow key to accept the match and stay in that field. Or, if you wanted Portsmouth, you can click your keyboard's down arrow to select Portsmouth and then TAB to select and move on.
Alternately, if you don't want to hunt for the down arrow, you can keep typing letters until your choice is the only one remaining, and then hit TAB and go.

This feature is meant to save time, so use whatever method is faster for your fingers.
Previous versions of Photo Mechanic were limited to single words for Autocomplete, but it now can handle longer phrases as well. For example, if you have a line in your text file like
At the corner of forever
And if your settings are to Autocomplete after two letters, simply typing "At" in a field will give you the full phrase option:

The IPTC Stationery Pad, Code Replacement, and Autocomplete are features that strive to make captioning many photos as quick and efficient as possible.
Toggle Combined RAW+JPEG:
⌘J
See all shortcuts
Certain digital cameras are able to shoot both RAW and JPEG images at the same time. This means that there are two identical images saved to the card, one saved as a JPEG and one saved as a RAW file. Both will have the same base file name.
Photo Mechanic is able to display these files in two ways:
- Both files are displayed as a single ‘combined’ thumbnail.
- Both files are displayed as two separate thumbnails

This can be selected in Preferences in the Contact Sheet tab where there is an option to Combine RAW+JPEG into a single thumbnail. The same setting can be made in the View menu. If unchecked, there will be two thumbs with identical file names, just different file extensions.

Also, in Preferences/Launching, there is a radio button to choose which of the pair is edited in an external editor when only one ‘combined’ thumb is displayed.
RAW+JPEG treats both images the same for the following actions:
- Tagging
- Soft rotation
- Color Class
- IPTC Captioning: by default, the caption from the JPEG is used as a source, but when saved, the caption is written to both files if possible
- Renaming
- Photoshelter (with specific options [you can choose to send both, just the JPEG, or just the RAW file])
- Copy (with specific options [you can choose to copy both, just the JPEG, or just the RAW file])
- FTP (with specific options [you can choose to send both, just the JPEG, or just the RAW file]).
In the following actions, the JPEG is used as a proxy for the RAW file:
- Send photos as email
- Impression
- HTML export
- Preview generation
- Slide Show generation
- Recadrage
- Text export
- XML export
- Variables expansion
- Trouver
- Find and Replace: but when fields are replaced and the IPTC record is updated, the RAW file is updated if possible.
Using the JPEG as a proxy file means that Photo Mechanic does not have to parse the RAW file itself, which is outside the scope of the software. It uses the JPEG data for all the above transformations and exports. Using a JPEG Proxy is like using a full resolution version of the RAW file, without having to actually process it.
RAW Rendering
Mac OS X 10.4 and later includes a RAW file processing facility. Photo Mechanic can take advantage of this and now includes an option to use RAW rendering to create Output such as Web Galleries, Save As, Emails etc.

This will often give better color than using the embedded previews but at the expense of longer processing times. The Preferences Dialog above has options to use available JPEG files for Contact Sheets and Previews to speed up the display of images.
Using embedded JPEG previews in this way may result in differing colors between the Previews and the final output depending on the RAW processing settings.
Ingest
Ingest Images
Mac: ⌘-G
Windows: Ctrl-G
This is one of the core components of Photo Mechanic, bringing the contents of a flash card onto your computer in a logical way and, at the same time, performing certain other useful tasks.
Ingest can copy the files from the card, flatten the somewhat inconvenient directory structure of the card, rename the files to your specification, add IPTC information to each file and create a mirrored backup folder. The renaming and IPTC functions can include user-specified Variables so you can customize your file naming in a huge variety of ways.

Source Paths: Shows a list of the possible sources for the ingest, usually a camera card but could be any folder.
Ingest Disks or Ingest Folders Radio Buttons: Use Ingest Disks when reading off a memory card reader. Select Ingest Folders to ingest from a particular Folder rather than a whole Volume.
Auto Ingest When this is checked, Photo Mechanic will automatically ingest files from the selected folder or disk. Note: If you'd like Photo Mechanic to start ingesting photos as soon as you plug a memory card in, you must also go to Preferences > General and set the option for On mount of Camera Disk to "Show Ingest Dialog." Photo Mechanic will remind you of this when enabling this setting.
Note: This will use all the settings from the Ingest dialog box, including IPTC Stationery Pad if you have that selected, so we suggest having your IPTC Pad set up the way you need it prior to using the Auto Ingest option.
Incremental Ingest: Copy new photos only checkbox: Photo Mechanic will keep track of all photos previously downloaded and will only download photos that have not been downloaded before. If you reformat your card in your camera, then all photos shot since the format will be downloaded.
Source Directory Structure
These are options in how to handle sources that have folders or directories.
- Ignore: Ignores the folder structure and copies all image files into the same destination. This is good for copying all images off camera cards, regardless of how they are arranged on the card itself.
Example: A camera card might contain a folder named DCIM, which in turn contains a series of folders named canon101, canon102, canon103 etc. Each folder will contain up to 100 images. Using the ignore Folders setting will copy all files from all folders into one single Destination folder.
- Keep Separate Source Folder Names Only: This is a little more complex but removes the DCIM folder and keeps images grouped within the second level folders if there are more than one.
Example 1 : A card with a DCIM folder containing 1 folder (canon101) which itself contains images would result in those images being copied to a single destination folder. The DCIM and canon101 folders are removed.
Example 2 : A card with a DCIM folder containing 2 or more folders (canon101, canon102, etc.) each containing images would result in all the canonxxx folders being preserved in the destination folder.
In a nutshell, this option removes the DCIM folder and keeps images grouped in the same folders as on the card. If there is only one folder, this is removed. If there is more than one, all of them are preserved.
'* Preserve All Source Directories:' Simply keeps the card directory structure the same as on the card, within the Destination directory.
Copy Photos
These options tell Photo Mechanic how to set up the folder into which the files will be copied.
- Directement into the folder specified as the Primary Destination (and Secondary Destination, if selected).
- Into a Dated Folder within the specified Destination Folder. The date used will be the current system date, i.e. today’s date.
- Into Folder with Name specified in the box which will appear below if this option is chosen. Type a name for the new folder in the box below and this will be reflected in the Primary Destination Path text near the bottom of the dialog box. Note that Variables may be used to create the names of folders. If you want to create folders within folders, separate the variables with forward slashes ‘/’. For instance if you want to have a folder for each year and then inside it a folder for each month and then inside that a folder for each job, you would enter the following into the Folder Name text field: {year4}/{month0}/{job}
- Into Dated Folder then folder with name: This is a combination of the previous two options and will result in a named folder within a folder named with today’s date. This option has been available for some time, but its effect can be reproduced more flexibly by using Variables like in the previous paragraph.
There is an option to auto-increment a folder suffix for named folders. This adds a specified number after the folder name and increments it by one each time the Ingest is run. This will keep the files on different camera cards separate by placing them in a series of folders with the same name but a numeric suffix i.e. JimmyPics01, JimmyPics02 etc.
Destination Folder Roots
Note: Destination folder fields support relative path expressions, (Example: ../local/folder)
- Primary Destination: Choose where the folders and/or images will be copied to by clicking the button and selecting a destination.
- Secondary Destination: (Optional) Check the box and this option will become active. Choose a destination where exact copies of all the files copied to the Primary destination will be made. This creates a mirror backup of the files as they are Ingested.
Filter Files
This option lets you control which files are Ingested. Sometimes you may only want only RAW, or only locked images, or some combination. You can choose Locked and/or Unlocked plus RAW and/or JPEGs.
Apply IPTC Stationery Pad to Photos
When this option is checked, the IPTC Stationery Pad will be applied to chaque image as it is ingested. . By setting up the Pad before Ingesting, you can make sure all the files are captioned, copyrighted, credited etc. as they are copied. See IPTC Stationery Pad for more details on Batch Captioning.
Click the IPTC Stationery Pad button to open the Pad where you can set your metadata choices.
- Use Local IPTC Stationery: The Local IPTC Stationery Pad here only applies to the Ingest, and not elsewhere in Photo Mechanic. The information you enter will stay prefilled for any later Ingests, even if you change the IPTC Stationary Pad elsewhere in Photo Mechanic.
- Use Global IPTC Stationery: If this is checked, the information you enter into the IPTC Stationery Pad for the ingest will remain prefilled everywhere you use the IPTC Stationery Pad in the program.
Rename Ingested Photos As
If this option is unchecked, all files will copy with the file names set by the camera, for example IMG_2345.CRW. Check the box to apply the full power of Image Variables to rename the files to more descriptive names with dates, locations, or other customizations that you control.
Click on the Variables button at the lower left of the Ingest Dialog to open the Variables list. Now, by double-clicking on the Variable that you want you can insert it into the Rename box. This saves typing it in and you can be sure the spelling is correct.
Here the variable {seqn} has been added to a text string, DNG, which has been typed directly into the Rename box. This will result in a series of files named DNG1, DNG2, DNG3 etc. You could use {date} to include the date the image was shot, or {user} to add your own name to the file.
Exemple: Entering this into the rename box:
new_york_{user}_{date}_{seqn}
would result in the ingested files being renamed like this:
new_york_jimmy_02142013_0001.jpg
new_york_jimmy_02142013_0002.jpg
new_york_jimmy_02142013_0003.jpg

- Set Sequence Variable: Use this button to set the number at which the sequence should start. You can add letters or Variables before the number and you can save this to use in other Ingest operations. Type in the sequence you want to use and then click on the triangle at the right of the text field. Click ‘Add’ and then the next time you use this option, that sequence will be there to select.
It's important to note that the Sequence number is ‘sticky’ between sessions so the Ingest function will always pick up where it left off. If you ingest 238 images in a session, then the next session will start with 239 as the Sequence number – unless you reset it.
Hint: Use ‘001’ or ‘0001’ instead of ‘1’ as the beginning number. Leading zeros mean that there are more unique numbers to increment. A single digit has only 9 possible values, while a 3 digit one has 999.
In many dialogs with a ‘Set {seqn} Variable’ button, holding down the modifier key changes the button to ‘Reset’. Click this to reset the sequence variable without opening the dialog box above. The number of digits is maintained so 456 will reset to 001.
- Open Contact Sheet during Ingest: Select whether to open a new Contact Sheet for the folder into which the files are being ingested or whether to open an new Contact Sheet after all the files are ingested. Opening the Contact Sheet during ingest works well because since Photo Mechanic is so quick at making thumbnails, by the time the Ingest is complete, all the files will be ready for viewing. You can also perform editing operations such as Tagging, Previewing etc. on any thumb that has appeared so you can get on with editing while files are still being Ingested.
- Unmount Source Disk after Ingest: this unmounts the card after it has finished ingesting so you can safely remove the card from the card reader.
- Erase Source Disk(s) after Ingest: this erases all files that have been ingested after the entire ingest completes successfully. WARNING: This is a dangerous option to enable since the original photos on the camera memory card will be erased after being copied. Even though the photos will not be erased unless all of the files are copied without error, Camera Bits recommends that you at least briefly inspect the files on your destination hard disk after ingesting to verify for sure that the photos were successfully copied. Then we recommend that you format your memory cards in the camera before you begin shooting, unless you intend on doing an incremental ingest later on.
Ingest Tasks
During Ingest an Ingest Tasks dialog appears showing the progress of the Ingest. Subsequent Ingests add a Ingest Task to the dialog so that you can keep track of multiple downloads.
Thus if you have 5 cards to download, once there are 5 bars completed you will know that you have Ingested all 5 of the cards. Also, if you Ingest 5 cards simultaneously with multiple card readers you will be able to see the progress of all downloads at a glance.

Each Ingest Task is color coded. Green means that the Ingest completed with no errors. Red means that the Ingest completed with errors. Yellow means that the Ingest is in progress.
There is only one “Messages” area at the bottom of the window which is shared among all of the Ingest tasks. When you click on an Ingest Task, it will become selected and its messages will fill the “Messages” area.
Use the “Clean up” button to remove any completed tasks. Use the “Abort” button to stop the currently selected Ingest Task.
If you ever close the Ingest Tasks window and want to see it again, you can show it again from the Window menu.
Live Ingest
Live Ingest works like Ingest in that it copies images to one or more destination folders. But Live Ingest is different in that it can monitor one or more paths for new files and will process them as they appear. This is useful for shooting wirelessly or tethered. You could have a wi-fi enabled Flash card in your camera set to transfer photos to a folder on your computer. Live Ingest will ingest your photos as they appear on your computer.

Live Ingest will ingest both JPEG and RAW files produced by cameras. When using Live Ingest with RAW files, Photo Mechanic tries to determine when the RAW file has completed its transfer by waiting for the file to stop changing in size. If you have a very fast connection from the camera to the computer you can decrease this wait time, but 30 seconds is a good general waiting period.
When shooting RAW+JPEG it is suggested to set the checkbox titled “Wait for RAW+JPEG pairs when {seqn} is used” as it will make sure that the same sequence number is used for both files. If no sequence number is used then the RAW and JPEG files will be processed as soon as they are safe to copy without waiting for the other file of the pair to arrive.
Pointe: For speed when shooting tethered, your tethering software may offer you the option to shoot in RAW+JPEG but only transfer the JPEG to your computer. For maximum speed when working with Live Ingest, consider transferring only the JPEG for quick review. You can do this and add color codes or ratings to the JPEG, and then ingest the RAW versions later by plugging in the memory card to a card reader. To transfer the color class/ratings and other metadata from JPEGs to the RAW versions, follow these steps:
- Put the two sets of files into the same folder
- Open that folder as a Contact Sheet
- Make sure your RAW and JPEG files are shown as a single item by setting Combined RAW+JPEG from the View menu (⌘-j)
- Select all (⌘-a)
- Use the Update IPTC/XMP command on the Tools menu. Choose to Read IPTC/XMP from JPEG.
- Click Update.
Multiple separate Live Ingests may be active at any one time. Just open the Live Ingest dialog again from the File menu after you Start a Live Ingest. If using the {seqn]variable during concurrent ingests, know that only the sequence number in use by the first Live Ingest will be kept persistent.
Live Ingest can copy photos to up to three separate locations, performing different operations on each destination. Use the popup menu in the ‘Destination Processing’ section of the dialog to setup the three different destinations. The Secondary and Tertiary destinations need the ‘Enable’ checkbox set in order to make them active. Live Ingest warns when the Rename string on the Primary, Secondary, or Tertiary destinations is empty and renaming is enabled. Live Ingest file naming supports Code Replacements both in realtime while typing and in when used in conjunction with Variables.
The IPTC Stationery Pad is local to each Live Ingest process and if applied, the same IPTC Stationery Pad is applied to each destination. The sequence variable is also local to each Live Ingest process and will be the same value for each Live Ingest destination.
After each photo is copied to all destinations, it is deleted from the source location.
The Live Ingest process continues to monitor for new files in each of its sources until it is terminated. Live Ingest monitors folder hierarchies three levels deep, in case your camera creates new folders in the destination folder.
Photo Mechanic offers a number of ways to locate photos that you may be looking for. It's important to understand the differences between them:
le "Find" feature is for locating files in whatever Contact Sheet is currently open in Photo Mechanic. "Find" will not show you photos that are not already part of an open Contact Sheet.
le "Search" feature (also known as "Spotlight Search") is only available in Mac OS X 10.4 (and later) and can help you find files on your computer even if they are not in an open Contact Sheet.
le "Quick Search" can do either of these (on OS X) and operates from the search box in the upper right corner.
Let's take a look at each of these:
Find Photos
Trouver
Mac: ⌘-F
Windows: Ctrl-F
Find photos within the current Contact Sheet with the Find function.
Photo Mechanic allows the user to search through the photos in the current Contact Sheet looking for specified metadata within either Selected Photos or All Photos.
Photos which match the set criteria will form a new selection in the Contact Sheet
view when the search is completed.
Spotlight Search (Mac Only)
Mac: ⌘-Opt-F
Mac OS X 10.4 (and later) has a facility called Spotlight which catalogs all the files on your computer to allow faster and more sophisticated searches.
For sophisticated searches on your computer use Edit/Search which will bring up this dialog:

You can set Spotlight to search in any metadata field using the first popup menu, and you can set how it searches in the second popup menu (default : ‘contains’).
- Contient: The searched field text string contains the text string typed into the text box, but need not be exactly the same to return a result.
Par exemple. ‘Filename’ ‘Contains’ ‘Any’ ‘yosemite, glacier, yellowstone’ will find any image which has the text strings ‘yosemite’ or ‘glacier’ or ‘yellowstone’ anywhere in the filename.
- Begins with: looks for text strings which start with the defined string. Ends with: looks for text strings which end with the defined string.
- Is: looks for text strings which are exactement le même as the defined string. In the example above, there is a secondary search criteria set by clicking the plus sign to the right of the first row. This adds a second row just like the first which is treated as an AND statement. In other words both criteria must be met for a result to be returned. In this case “Caption” “contains” “Sydney”. Therefore only files with a NSW somewhere in the filename AND “Sydney” in the Caption field will be returned as a result.
- Any, All, Exact: controls how text strings are matched. Any allows any of the words separated by commas or semi-colons to match. All specifies that all of the words separated by commas of semi-colons must match the field being searched. Exact matches the string exactly as typed, including any punctuation.
These tools allow quite sophisticated searches when combined in this way. Additional search criteria rows can be added by clicking the ‘plus’ sign at the right of the row. Unwanted search criteria rows can be removed by clicking the ‘minus’ sign at the right of the row.
Searches can be limited to specific hard drives or even folders on individual hard drives by using the ‘Limit searches to specific locations:’ checkbox and the list below it along with the set of buttons to the right of the locations list box. Use the ‘+’ button to add a folder or drive, the ‘-’ button to remove a selected path, and the ‘x’ button to clear the list entirely. If you don’t want to remove the paths but you want to search all drives on your system, you can simply uncheck the ‘Limit searches to specific locations:’ checkbox temporarily. To limit searches again to the set of paths listed, just set the checkbox again.
Results of searches can be opened into a new contact sheet or into the currently opened one by selecting your choice from the ‘Put search results into:’ popup menu.
Searches can be saved by typing in a name into the Name field at the bottom of the dialog and clicking “Add to Favorites”. This search will now appear as a folder icon (with a gearwheel badge) in the Favorites panel of the Contact Sheet view.
Double-clicking the saved search label will execute it within the current contact sheet window. Right-click (Ctrl-click) on the Search label in the Favorites panel to bring up more options:
- Execute Search: Applies this search criteria and results are shown in current Contact Sheet.
- Execute Search in New Contact Sheet: Applies this search criteria and results are shown in a new Contact Sheet.
- Edit Search: Brings up the Spotlight Search dialog with the current settings displayed so you can edit them.
- Saved searches are useful for keeping track of photos that meet a certain criteria and since they are dynamic, they can keep up with changes to the set of photos on your system. For instance if you want to keep track of the photos you have shot in the last week, then you can start a new search, change the criteria to ‘Captured’ and then set the second popup menu to ‘This week’. Save the search by adding it to Favorites with the name ‘This Week’ and then any time you want to see the photos you have shot within the last seven days, just double-click on ‘This Week’ in the Favorites and Spotlight will find all of the photos you shot over the past week. If you execute the search again next week, you will see a different set of photos than you see today. You can use this to keep track of photos shot between a range of dates, photos shot over the last year, photos shot by a particular photographer, or photos shot in a particular country.
You can combine several criteria to make very specific searches. For example, you could create a search that finds the photos shot by a particular photographer in the last week.
One note about Spotlight searches and speed: while most searches are very quick to complete, searches involving file attributes like filename, size and type can be very slow because the filesystem is consulted for this data instead of the Spotlight metadata database. If you want to have the fastest searches possible then omit criteria that uses the filesystem for the search.
Quick Search

At the top right of the Contact Sheet view is the Quick Search tool, simply type in a text string and Spotlight will search the filesystem and display any thumbnails that meet the criteria. Clicking on the ‘Magnifying Glass’ button in the inner left of the text field will present a menu for controlling the Quick Search:
Rename Files
Mac: ⌘-M
Windows: Ctrl-M
Photo Mechanic provides a full renaming facility based on Variables, much like the Ingest function. There is a Variables panel that will open to allow you to insert variables easily into the Rename string box, simply double-click on the variable to insert it into the box.
In the screenshot below, files will be renamed as previewed under “6 photos to rename” and the current Sequence number is also shown. Renaming can be done on single images or any selection.
Copy Photo
Mac: ⌘-Y
Windows: Ctrl-Y
Copies or moves selected photos to a specified destination folder. To copy one selected photo you can use the right-click context menu and choose Copy Photo… You can also use drag and drop to copy or move photos by dragging a selection of photos to the Favorites or Navigator, or even another application like the Finder (Mac) or Windows Explorer (Windows).
Note: Drag and drop of a camera disk ignores any Canon “MISC” folders when present in the camera disk’s DCIM folder.
When photos are selected in a Contact Sheet you can right-click on a different Contact Sheet tab, or to folders in the "Favorites " and "Navigator" panes and move or copy photos in that manner.
Some digital cameras are able to record short voice messages with each photo or on particular photos. This can be useful as a note taking device for later on. The sound is digitized and is written to a .WAV file with the same file name as the photo it is associated with.
In the Preview display pressing the A key will play any sounds associated with the Previewed image. Pressing A again toggles off the playback. This also works in the Contact Sheet window when a single image is selected.
Of course this facility only works if you have a computer capable of playing sounds and if there is a sound associated with the image file. A small loudspeaker icon will be displayed in the preview window if there is a sound to be played. Clicking on the icon plays the sound, both in the Preview window and the Contact Sheet window. You can also play sounds in the IPTC Info dialog.
Watermarking
When outputting photos it is often useful to overlay a watermark for copyright or identification purposes. The Watermarking dialog allows you to place watermarks over images generated by the following features: Save As, Export, Printing Proofs, Upload and Send Photos via Email. Each of these dialogs has a “Watermark…” button that will allow you to customize the watermark for that output. Next to the button is a check box that toggles the rendering of the watermark.
Photo Mechanic integrates easily with image editors such as Adobe® Photoshop®. Any image, or selection of images, may be opened into your choice of pixel editor for further work. If you are working with JPEGs or the DNG format, any changes made and saved will be reflected in the thumbnail in the Contact Sheet display. If you are working with other Raw formats, then the editing software will need to update the embedded JPEG preview in order for the changes to be visible in Photo Mechanic. (As an example, if you make changes made to Raw files in Adobe Camera Raw, you will not see updated thumbnails in Photo Mechanic. If you are working with DNG's in Camera Raw, you can go into Adobe's Camera Raw preferences and make sure that "Update embedded JPEG previews" is turned on.)
One possible way to work with Raw files in an external editor is to save a JPEG with the same base name in the same folder as your Raw. Photo Mechanic works well with RAW+JPEG pairings so this is a good way to see your changes in Photo Mechanic when working with Raw files.
Before using this function you need to define your external editor in Preferences / Launching.
There are several ways to open an image into an external editor:
- Select an image or group of images and choose Image / Edit Photos from the main menu. The external editor with be launched if it is not already active and the selected images will be opened.
- Use the keyboard shortcut: ⌘E.
- Right click on the selected image(s) and choose ‘Edit Selected photos’. (You will also see an option ‘Edit Photo’ which just opens the one image that you right clicked on even if there are multiple images selected. It is easy to mistake these two options and wonder why only one image opened.)
- You can also Drag and Drop images and image selections directly from Photo Mechanic into an open Image Editor, even if it is not the one defined in Preferences as the default editor.
- There is a further option, only available with a right-click, that allows you to select different external editors to use to open images. In the right-click context menu you will see ‘Edit Photo with’ and Edit Selected Photos with’. Highlighting these options will show a submenu menu with all the different image editors you have assigned in Preferences / Launching / Set. See Launching Preferences for details.
Note: If sending multiple images to an external editor using this method does not open them all in the external editor, you can try dragging those images from Photo Mechanic to the editor. This works better on some systems.
Save As
Save As
Mac: ⌘-S
Windows: Ctrl-S
Photo Mechanic does not need to use an External Editor to perform certain useful workflow related functions. The Save As function directly provides the facility to Save an image, or selection of images, into another format, another size and another destination.
One of the most useful ways to use the Save As function is for web image generation. Regardless of the file size of the original Photo Mechanic can take the image, resize it to a specified size, add IPTC information and save it to a new folder as a JPEG. This can be done on a single image but the ability to perform this operation on a selection of images from the Contact Sheet view is very powerful.
Save As can be called from the main menu under File / Save Photos As, by using the keyboard shortcuts or by right-clicking on the selected image and choosing ‘Save Photo As’. Note that this last option only applies to the single image which is right-clicked on, not a selection of images – use the shortcut or the menu to Save As for a selection of images.

- Image Type: Choose your output file type, if JPEG you can select the quality level. High is for minimal compression and Low is for high compression, see JPEG Compression for how this compares to Photoshop’s settings.
- Cropping: If a Crop has been defined for an image, checking this box will apply it when the file is saved.
- Scaling: To Fit is for when you want an image to fit inside a specified pixel or cm dimension, whether it is oriented horizontal or landscape. To Percentage sizes the image to the specified percentage size, e.g. 50% would result in an image half as high and half as long as the original and 200% would double the linear image dimensions.
- Résolution: Sets the pixels per inch of the saved file.
Operations:
- Apply IPTC Stationery: adds whatever is currently set on the IPTC Stationery Pad to all the selected images. As always, the Stationery Pad can make use of Variables and Snapshots.
- Preserve EXIF Info: Includes as much EXIF Info as the original file contains. Copy WAV Files: Copies any WAV files associated with each file.
- Rename: Uses the standard Photo Mechanic renaming tools to generate new names. See Renaming.
- Destination: This box contains four options on where your files are going to be placed:
- Original folder: Saves files back to the same folder as the original file. If filename collisions occur then the new files will be renamed according to your renaming resolution choice.
- Create subfolder: Creates a subfolder in the same folder where the original file resides. You can use variables to create the name of your subfolder.
- Copy to this folder: Saves files to the base path plus an additional (optional) subfolder. You can use variables to create the name of your subfolder
- Always pick destination: Allows you to choose where the files are saved to each time you perform the Save As operation.
Open destination as Contact Sheet: Opens the destination folder as a new Contact Sheet tab if it is not already open.
Photo Mechanic can attach selected images to email messages, which is useful for sending images to clients for approval. It would be difficult to send the original image file so Photo Mechanic offers options to resize and compress the image before it is sent.
The Send Photos via Email function is accessible via the main menu under File / Send photos via Email or by using the keyboard shortcut Shift-⌘-E.
It is also available through the right-click (option-click) context menu but only applies to the image actually clicked on.
The Uploader dialog allows you to transmit photos from your computer to various upload services like FTP, SFTP, PhotoShelter, etc. Use the ‘Selected Uploader:’ popup menu to choose the service you want to upload photos to. The Uploader dialog has its own Preferences dialog whose settings pertain to all uploader templates. These settings control “Upload Stall Detection” and “Concurent Uploads”. Upload Stall Detection is a feature where the Uploader detects lack of progress in an upload and brings up a warning dialog so that you can monitor your internet connection. The Upload Stall Detection can be set to wait anywhere from 45 seconds to 320 seconds before warning you, or it can be disabled entirely by unchecking the ‘Wait’ checkbox. The ‘Allow concurrent uploads’ enables the uploader to send more than one file simultaneously which can improve upload speeds significantly as long as you have a high bandwidth connection to the internet. You can disable this feature by unchecking that checkbox.
Here is a list of services in the Uploader dialog:
- Amazon S3
- DF Studio LINK
- Demotix
- ExposureManager
- FTP and SFTP
- Flickr
- Gallery 2
- PhotoDeck v 1.4
- PhotoShelter
- Retouchup
- SmugMug
- Gazouillement
- Zenfolio (Note: Uploading to Zenfolio is temporarily unavailable as of 11/1/2017, but it will be back.)
For notes on some of the individual services, read on below.
File Uploader
FTP photos as…
Mac: ⌘-U
Windows: Ctrl-U
FTP
FTP stands for File Transfer Protocol. This is a standard method of transmitting files from your computer to a server via the internet when you know the address of the receiving server. It is a great way to send images for approval by a client and is more robust than using Email attachments which might cause problems with big files on the receiving server.
For FTP to work you need to specify the FTP server name or IP address of the server so Photo Mechanic can log onto the target server, authenticate its connection with a logon name and password and then transmit the file to the correct folder on the target server. Clique sur le “Connections” button at the top of the Uploader dialog.
FTP Connection Setting Name: You can give a name to the settings for a particular connection. For example, if you FTP files on a regular basis to certain clients you might use the client’s name in the Connection name i.e. “ABC Advertising Connection”. This name will appear as an option in the Connection box in the Destination FTP Server options on the main Uploader dialog – see previous page.
- New: Click this button to clear all the fields to enter a new connection setting.
- Delete: Deletes the currently displayed connection.
- FTP Server Name or Address: enter the name of the server that the files will be transmitted to. This can be a normal top level URL like www.abc_advertising.com or an actual server name like ‘ftp.server-web.com’. Only enter the top level name here, not the folder the file should be transmitted to, and leave off ‘ftp://’.
- Login: The Login name for the server. You may have to ask the client for this. Password: The password for the login name. You may have to ask the client for
this.
- Port: Leave set to 21 unless you have a good reason to change it, Port 21 is the default setting expected by most servers.
- Passive Connection: Check this box, unless the Network Admin tells you otherwise.
- Anonymous Login: Should be left unchecked unless you are connection to a server that allows anonymous login.
- Destination Folder: This is where you specify the folder on the target server that you wish the files to be transmitted to. If you need to specify a sub-folder use a forward slash (/) like this: images/new. The folder you need to transmit to will often be specified by the client.
- Copy Photos: This gives you the option to create a new folder in the destination folder, either based on the date or a specified name, or both. Useful if you are transmitting sets of images that need to be kept separated on the server.
Cliquez sur D'accord to return to the main Uploader dialog and you will see the Connection Name displayed in the Connection popup menu and to the right, the full destination path for the transmitted files.
If a file is transmitted and there is a file with the same name on the destination server you can choose what you would like to happen from the “If a file already exists…” drop down box.
- Replace overwrites the server file with the transmitted file
- Rename the transmitted file before uploading
- Rename the file on the server, keeping the transmitted file name the same
Once all these settings have been made, click the Send button to transmit the selected files. All of the settings are sticky so if you come back to the Uploader dialog later all of the settings will be the same.
If you hold down the modifier key when choosing FTP As, the whole dialog box will be bypassed quickly and the last settings will be used. This offers a convenient way to transmit files if you use one FTP destination regularly or just wish to queue up some more photos into a current FTP session.
Uploader Preferences

In this dialog, you can change the way the Uploader behaves. In some cases, you may be sending to an FTP host that doesn't like more than one connection at a time. In that case, you could disable "Allow concurrent uploads" here.
Amazon S3
When uploading photos to an Amazon S3 account, it may only work if you use the location bucket for US-Standard. Trying to use more precise location bucket may result in your files not being uploaded.
PhotoShelter
With the PhotoShelter template you can securely upload photos to your PhotoShelter account from within Photo Mechanic. PhotoShelter is a service useful for backing up your photos and for providing them for sale to prospective clients. IPTC caption data that you enter into your photos in Photo Mechanic will be preserved and will be searchable by people using PhotoShelter. Even the tag checkbox setting on each photo is recognized by PhotoShelter. The PhotoShelter template allows you to upload to existing Archives, or you can create new ones during upload. This integration even supports multiuser collaboration with PhotoShelter accounts that support it.
You can upload photos to your Twitter account. Photos uploaded to Twitter via Photo Mechanic are hosted on Twitter's servers. Please note that Twitter removes all IPTC and EXIF metadata from photos uploaded to its servers, regardless of any settings in Photo Mechanic. Therefore, we suggest that you consider a watermark for photos uploaded this way, to preserve proper credit. You can specify how a watermark will appear right from the Uploader module. (Note: You may send "direct message" tweets to other Twitter users using the 'd' shortcut in your tweet through Photo Mechanic, but Twitter will not deliver the image(s) in the DM. This is due to how Twitter processes direct messages.)
Upload Progress
Once files have begun the upload process, the Upload Progress window will appear, listing all of the files in the upload queue:

You can use the Upload Progress window to track the progress of your uploads. It is here that you can also ‘Cancel’ the entire upload operation (files already uploaded will not be removed), and handle any errors that may occur during the upload process. You can minimize the window to the Dock (or the TaskBar on Windows) by clicking on the ‘minimize’ icon in the titlebar.
Upload Status Indicators
Another way to monitor the progress of uploading files is by looking for the Upload Status Indicators on the thumbnails in the Contact Sheet. They appear in the upper right corner of each queued thumbnail:

A blank rectangle indicates that the photo has been queued, but hasn’t been sent yet. A yellow rectangle indicates that the photo is being uploaded. A green rectangle indicates that the upload is complete. A red rectangle indicates that a failure of some sort has occurred while uploading the photo. Viewing the Upload Progress window would now be in order.
RAW+JPEG mode images will show up to two indicators when uploading both the RAW photo and JPEG photo. The upper indicator shows the progress of the JPEG and the lower indicator shows the progress of the RAW file.
Export
The Export option creates a full set of files from a selection of images. With this command you can make a web gallery with all the internal links already set up. This can be posted directly to a web site and can be very useful to show a client proofs from a shoot, quickly and easily. The web pages are fully customizable with respect to colors, type faces etc, and Variables can be used to add metadata into the layouts.

Select Template
Photo Mechanic now includes a variety of Flash templates in addition to the PM Classic as described below. Each is slightly different and the main Export dialog will only allow you to choose customizations applicable to the chosen template. The dialog changes to reflect this but in general, the uses of the labels remains the same from one template to the next. Export Text and Export XML options are at the bottom of the list.
Le rendu
- JPEG Quality: set the slider to an appropriate amount, 6 or 7 is a good compromise between size and quality
- Subsample Chroma: removes some chroma information reducing file size still further and the expense of color quality
- Sharpen Images: applies sharpening to the exported images – recommended.
- Convert to sRGB Colorspace: converts to the sRGB colorspace which will show images to their best advantage when viewed in non-ICC profile aware applications like many web browsers. Recommended unless you know for certain the images are to be viewed in a color managed application.
- Use Original File names for Images: exported images keep the original file names.
Open in Browser: when the export is completed the finished gallery will automatically open in your web browser for checking.
Page Section
- HTML Title Tag: This field is used to define the text in the top line of a Web
browser, also used by many search engines to locate information. Banner: Add a logo or banner image to the top of each index page.
- Banner2: Add a logo or banner image to the top of each large image page.
- Banner Width and Height: Controls the width and height of the banner image displayed on each page. This should be the same width and height as the image used.
- Title and Title 2: Type in a title or use Variables to generate a title. The variable {page} adds a page number to each page of thumbnails. In the screenshot above the title of each page would be the name of the folder containing the images followed by 'Page 1'. Any subsequent pages would be the same with 'Page 2, Page 3, Page 4' etc.'
- Columns and Rows: Set how you would like the thumbnails to be arranged, how many columns and how many rows per page. This determines how many images will be on each page and thus how many pages will be generated.
- Contexte: Choose a background color for each page or choose a background image to be used.
Table Section
- Table Width: Sets the width of the table containing the rows and columns. le
value may be given as a number of pixels or as a percentage.
- Left and Right Margin: Specify the left and right margin area between the table's outer edge and browser window.
- Cell Spacing: The amount of thickness, in pixels, of the walls surrounding each image cell in the table.
- Table Color / None: The color, or absence of color inside the table. Text/Links Section Set the colors of the various page elements.
Text/Links Section
Here's where you can set the colors of the various page elements.
- Titre: is equivalent to the 'cb_title' HTML tag
- Title2: is equivalent to the 'cb_title2' HTML tag
- Légende: is equivalent to the 'text' HTML tag
- Lien: is the same as the 'link' HTML tag
- Visited: is the equivalent to the 'vlink' HTML tag.
- Home Page: enter the name of your webpage.
- Home URL: enter your main webpage address (
- Include All Index Link: includes a link back up to the main index on each large image page.
- Max Height / Max Width: Set the size of the thumbnails. They will be fitted inside the pixel dimensions without altering the aspect ratio, much like the 'Fit in Box' options in other export dialogs.
- Frame Color / Frame Thickness: Set the color and thickness of the frame surrounding each thumbnail cell.
Images
- Max Height / Max Width: Set the size of the large images. They will be fitted
inside the pixel dimensions without altering the aspect ratio, much like the 'Fit in Box' options in other export dialogs.
- Frame Color / Frame Thickness: Set the color and thickness of the frame surrounding each image cell.
- Preserve EXIF: includes camera EXIF info in the exported images. Preserve IPTC: includes IPTC metadata in the exported images.
- Watermarking: When checked will place watermarks over images generated in the gallery.
- Include a link beneath the image: Adds a link underneath each image that users can click on to view or download the original file.
- Link Name: enter the name of the link.
- Link URL: enter your image Web address.
Export Text
Among the various Web Gallery templates are the Text and XML Export templates.

Use Variables to choose which metadata fields to export and separate them with a Tab to distinguish between the fields in the text file. You can use the {tab} variable instead of inserting Tab characters if you wish.
Many external applications such as spreadsheets and databases can import TAB delimited text files. Word processors can do 'mailmerges' based on TAB delimited text files so you could use this option to generate labels for 35mm slides based on variables (for instance: {Category} and {Name}).
Save as One/Individual Files: This option sets whether the export creates one text file containing all the metadata or a series of individual files, one per image.
Export XML
The XML Exporter template allows you to export metadata to an XML format for use in applications that can work with the eXtensible Markup Language format.
HTML Template Exporter
The HTML Template Exporter is different from all other Exporter templates in that it processes HTML that you create in order to generate a Web gallery. The HTML Template Exporter uses some simple markup features to allow you to create your own customized Web galleries. In order to start working with the HTML Template Exporter, you need to tell Photo Mechanic where you're storing your HTML templates. You do this in the Files tab of the Preferences dialog. Clique sur le Choisir… button across from the field labeled "Location of user HTML templates:" and use the folder picker dialog to choose the folder where you're going to create your HTML templates. Inside this folder is where you place your HTML template folders.
Vue d'ensemble
The HTML Template Exporter generates web pages from user-supplied HTML templates. A user HTML template is a folder with specially marked-up HTML and CSS files, an optional les atouts folder, and an optional user interface file.
At the minimum, a user HTML template folder must have the following layout:
example_template/
	index.html	(this is the main page where thumbnail grids are generated)
	preview.html	(this is the page used to show previews)
The user HTML template folder may also contain a CSS file used for styles in both index.html and preview.html:
styles.css
Additional image, sound, and flash assets needed by a user HTML template should be stored in an les atouts folder:
assets/
shadow.gif
The assets folder will be copied verbatim with no processing to the output destination.
User-defined controls are described in a file named:
ui.rb (this file describes the user interface for the template)
A fully-featured user template folder would have the following layout:
example_template/
index.html
preview.html
styles.css
ui.rb
Voir le HTML Template Controls section below for more details on the various controls that can be specified.
Template HTML is standard HTML or XHTML (recommended) with special markup. All Photo Mechanic variables may be used to extract data from your images and put that data on web pages. In addition, there are a number of Template HTML-only variables that are used to help template authors produce effective HTML pages.
Voir le HTML Templates Variables section below for more details on the Template HTML-only variables that may be used to markup HTML templates.
Simple Example pour index.html
{folder} | Page {page} {folder}
{job}
| {thumbnail_link} {filename} | {table_col_end}
Made with Photo Mechanic | {dow}, {monthname} {day}, {year4}
Simple Example pour preview.html
{folder} {folder}
{job}
{preview_link}
{caption}
{filename}Made with Photo Mechanic | {monthname} {day}, {year4}
Stylesheet processing differs from HTML processing in that the use of {variables} requires placing a '#' in front of the {variable}, like so:
#{variable}
This is necessary because each style declaration requires a beginning '{' and an ending '}' already and this would cause issues for the parser. Remember to use variables in styles.css with a leading '#'.
Simple Example pour styles.css
body {
	margin-left:0px;
    margin-right:0px;
	margin-top:0px;
    background-color:#{background_color};
}  padding:20px;
p {color:#{text_color};
   font-family:Arial,Helvetica,sans-serif;
}  font-size:14px
h1 {color:#{text_color}; font-family:Arial,Helvetica,sans-serif;
}  font-size:24px
h2 {color:#{text_color}; font-family:Arial,Helvetica,sans-serif;
}  font-size:18px
.nav {
   color:#{nav_text_color};
   font-family:Arial,Helvetica,sans-serif;
}  font-size:12px
.nav a:link {
   color:#{nav_link_color};
}  text-decoration:none;
.nav a:visited {
   color:#{nav_link_color};
   font-family:Arial,Helvetica,sans-serif;
   texte-décoration: aucun;
}  font-size:12px
.nav a:hover {
   color:#{nav_hover_color};
}  text-decoration:underline
.nav a:active {
   color:#{nav_text_color};
}  text-decoration:underline
Simple Example pour ui.rb
colorbutton(:background_color, "Background color:",  :value=>"000000")
                colorbutton(:text_color,       "Text color:",        :value=>"A0A0A0")
                colorbutton(:nav_text_color,   "Nav text color:",    :value=>"183F00")
                colorbutton(:nav_link_color,   "Nav link color:",    :value=>"99A700")
                colorbutton(:nav_hover_color,  "Nav hover color:",   :value=>"FFFFFF")
Notice that each color button has a name and that those names are used in the styles.css file (above) to provide user control over the colors used on the pages.
This concludes the Simple Example. If you placed the four files (index.html, preview.html, styles.css, and ui.rb) into a folder named "Simple Example" inside the folder you chose to be the location of your user HTML templates folder then the HTML Template Exporter will now show your "Simple Example" in its list of available HTML templates.
HTML Template Controls:
There are four HTML Template controls that may be used to customize your template:
- colorbutton
- fontcombo
- spinedit
- textfield
Any of these controls may appear in your ui.rb file and in any order. The controls will be created in the order that they appear in your ui.rb file.
colorbutton(varname, label, attributes={})
This creates a color picker preceded by a static text label (label) with variable name varname, and optional attributes.
Value of the control in the HTML template can be accessed by using {varname}
Value of the control in the styles.css file can be accessed by using #{varname}
colorbutton(:text_color, "Text Color:", :value=>"FFFFFF")
fontcombo(varname, label, attributes={})
Creates a font menu preceded by a static text label (label) with variable name varname, and optional attributes.
Value of the control in the html template can be accessed by using {varname}
Value of the control in the styles.css file can be accessed by using #{varname}
fontcombo(:font_name, "Font:", :selected=>"Arial")
spinedit(varname, label, attributes={})
Creates a text field and spin control preceded by a static text label (label) with variable name varname, and optional attributes.
Value of the control in the html template can be accessed by using {varname}
Value of the control in the styles.css file can be accessed by using #{varname}
spinedit(:font_size, "Font Size:", :value=>8, :formatter=>"unsigned", :min=>8, :max=>72)
textfield(varname, label, attributes={})
Creates a text field preceded by a static text label (label) with variable name varname, and optional attributes.
Value of the control in the html template can be accessed by using {varname}
Value of the control in the styles.css file can be accessed by using #{varname}
textfield(:author, "Author Name:", :value=>"{username}")
HTML Templates Variables
The following variables are used only in the HTML Template Exporter template. You can still use the normal set of variables used elsewhere in Photo Mechanic.
- {count} Returns the number of images being processed. Exemple:
{count}
	=> 23
- {idx} Returns the current thumbnail index or preview index. Exemple:
{idx}
=> 3
- {index_links} Generates a set of links useful for navigation from an index page. If no page_indx is provided then the index navigation links are generated for the index page being processed. Exemple:
{index_links}
=> précédent  Suivant
		  1  2  3
You can achieve your own specific layout by creating your own links using {index_page_previous_path} and {index_page_next_path}
- {index_page_next_path} Returns the path of the next index page for the current index page. If there is only one index page then an empty string is returned.
Exemple:
{index_page_next_path}
	=> index3.html
- {index_page_path} Returns the path of the index page that the current preview page came from. Exemple:
{index_page_path}
	=> index2.html
- {index_page_previous_path} Returns the path of the previous index page for the current index page. If there is only one index page then an empty string is returned. Exemple:
{index_page_previous_path}
	=> index.html
- {page} Returns the page number being processed for index or preview pages. Exemple:
{page}
	=> 7
- {page_count} Returns the total number of index pages. Exemple:
{page_count}
	=> 8
- {preview_height} Returns the height of the scaled preview at {idx} or if no parameter provided, the preview used in the preview page being processed. Exemple:
{preview_height}
=> 600
- {preview_link} Generates an image tag for the current preview image, suitable for use when processing preview.html only.
Exemple:
{preview_link}
=> 
You can create your own preview image tag by using {preview_path}, {filename}, {preview_width}, and {preview_height}
- {preview_links} Generates a set of links useful for navigation from a preview page. If no preview_indx is provided then the preview navigation links are generated for the preview page being processed. Exemple:
{preview_links}
=> précédent  Index  Suivant
You can achieve your own specific layout by creating your own links using {preview_page_previous_path}, {preview_page_next_path} and {index_page_path}
- {preview_max_height} Returns the maximum value the user entered into the Preview's Max. Height field. Exemple:
{preview_max_height}
=> 600
- {preview_max_width} Returns the maximum value the user entered into the Preview's Max. Width field. Exemple:
{preview_max_width}
	=> 800
- {preview_page_next_path} Returns the path to the next preview page (or the starting preview page if the current preview page is the ending preview page). Exemple:
{preview_page_next_path}
	=> preview3.html
- {preview_page_path} Returns the path to the {idx} preview page (or the preview currently being processed). Exemple:
{preview_page_path}
	=> preview1.html
- {preview_page_previous_path} Returns the path to the previous preview page (or the ending preview page if the current preview page is the starting preview page). Exemple:
{preview_page_previous_path}
	=> preview1.html
- {preview_path} Returns the path to the indx preview image (or the preview currently being processed). Exemple:
{preview_path}
	=> images/filename.JPG
- {preview_text} Returns the text the user entered into the Preview's Title field. Exemple:
{preview_text}
	=> {caption}
- {preview_width} Returns the width of the scaled preview at {idx} or if no parameter provided, the preview used in the preview page being processed. Exemple:
{preview_width}
	=> 800
- {table_row_start} Marks the beginning of an indexed page layout. Most commonly this is used right before a TR tag but can be used with DIV and SPAN as well.
When expanded, the HTML between {table_row_start} and {table_row_end} will be repeated {thumbnail_rows} times or until the index page runs out of images.
| {thumbnail_link} {filesize} | {table_col_end}
- {table_col_start} Marks the beginning of a thumbnail layout. Most commonly this is used right before a TD tag but can be used with DIV, SPAN, and A as well.
When expanded, the HTML between {table_col_start} and {table_col_end} will be repeated {thumbnail_columns} times or until the index page runs out of images.
| {thumbnail_link} {filesize} | {table_col_end}
{table_col_end} Marks the ending of a thumbnail layout. Most commonly this is used right after a
tag but can be used with
, , et ainsi que. Quand
expanded,the HTML between {table_col_start} and {table_col_end} will be repeated {thumbnail_columns} times or until the index page runs out of images.
| {thumbnail_link} {filesize} | {table_col_end}
- {table_row_end} Marks the ending of an indexed page layout. Most commonly this is used right after a
tag but can be used with
et ainsi que.
When expanded, the HTML between {table_row_start} and {table_row_end} will be repeated {thumbnail_rows} times or until the index page runs out of images.
| {thumbnail_link} {filesize} | {table_col_end}
- {thumbnail_columns} Returns the number of columns entered by the user in the Thumbnail's Columns field. Exemple:
{thumbnail_columns}
=> 3
- {thumbnail_height} Returns the height of the scaled thumbnail at {idx} or if no parameter provided, the thumbnail used in the table cell being processed. Exemple:
{thumbnail_height}
	=> 112
- {thumbnail_link} Generates a link to the {idx} preview (or current table cell) with an image tag for the {idx} thumbnail (or current table cell). Exemple:
{thumbnail_link}
=> 
You can create your own thumbnail/preview links by using {preview_page_path}, {thumbnail_path}, {thumbnail_width} and {thumbnail_height}.
- {thumbnail_max_height} Returns the maximum value the user entered into the Thumbnail's Max. Height field. Exemple:
{thumbnail_max_height}
	=> 128
- {thumbnail_max_width} Returns the maximum value the user entered into the Thumbnail's Max. Width field. Exemple:
{thumbnail_max_width}
	=> 128
- {thumbnail_path} Returns the path to the {idx} thumbnail image (or the thumbnail currently being processed). Exemple:
{thumbnail_path}
	=> thumbs/IMG_1.JPG
- {thumbnail_rows} Returns the number of rows entered by the user in the Thumbnail's Rows field. Exemple:
{thumbnail_rows}
=> 4
- {thumbnail_text} Returns the text the user entered into the Thumbnail's Title field. Exemple:
{thumbnail_text}
	=> {filenamebase}
- {thumbnail_width} Returns the width of the scaled thumbnail at indx or if no parameter provided, the thumbnail used in the table cell being processed. Exemple:
{thumbnail_width}
	=> 128
- {word_index} Returns the word "Index". Exemple:
{word_index}
	=> Index
- {word_next} Returns the word "Next". Exemple:
{word_next}
	=> Next
- {word_previous} Returns the word "Previous". Exemple:
{word_previous}
	=> Previous
Note that when you use a variable that returns a string of text, you'll need to add quotes around the variable expansion so that your HTML has the text enclosed in quotes.
Burn to Disc
Mac: ⌘-B
Windows: Ctrl-B
Photo Mechanic takes care of your backup needs by burning images to CD/DVD, across multiple disks and with all the power of Variables, Renaming, etc.
Photo Mechanic also offers the ability to manually add GPS coordinates to photos either singly, or in a batch. Use the ‘Set GPS Coordinates’ command on the ‘Image’ menu to bring up this dialog. GPS coordinates may be entered manually in the coordinate format of your choice or by using the Google map on the right side of the dialog.
For viewing photos along with their location on a map, and Info Text use the ‘Show Map’ command on a Contact Sheet thumbnail’s contextual menu by right-clicking on a thumbnail (use Ctrl-click if you have a single button mouse). Note that this option only shows up when the selected photos have GPS info associated with them. This will display the GPS Map Browser like so:
Photo Mechanic also offers the ability to set a GPS location of your current base of operations. With a GPS home location, you can use some of Photo Mechanic’s variables to display useful information like distance and bearing of each photo relative to the GPS home location. The variables {distance}, {bearingfrom} and {bearingto} each have their use, but {distance} is immediately understandable and can be used for sorting of your photos by their distance from your GPS home location.
Once you have set a GPS Home location, you can create a custom sort to sort your photos by their distance from your GPS Home location. Click on the Sort popup menu in the toolbar and choose the Edit Custom… command. Override one of the ten custom sorts. Then click on the OK button and your new custom distance sort will cause the photos to be sorted by their distance from the current GPS Home location. If you like, you can set one of the three custom thumbnail labels to show the distance. Just enter:
Distance: {distance}
in any one of the Label fields in the Contact Sheet tab of the Preferences dialog and you’ll see the distance each photo’s location is from the current GPS Home location.
Photo Mechanic can print two different types of output, a Contact Sheet style of multiple images on a page and a Proof Sheet style with one image per page. Both styles can be customized with respect to captions, titles, footers, page numbering etc.
Printing Contact Sheets

- Header: Type in a title for the page(s), This can be a text string or a Variable or a combination of the two. In the above screenshot the Footer uses the {page} variable to add incremented page numbers to each page but there is nothing to stop you from using this in the header if you choose.
- Thumb Margins: Set the white space around each thumbnail image. This sets the spacing.
- Thumbnail Title: Choose the text to be printed under each thumbnail image, this can be the file name or any combination of text and Variables. The variable {filenamebase} uses the file name without the extension for a more professional look.
- Title Line Height: Set this to one more than the number of lines you need for the thumbnail title text to make sure there is a blank line between the text and the next thumbnail down the page.
- Rows and Columns: Set the layout of the page in rows and columns. The number of pages to be printed will be displayed just to the right of these controls.
- Orientation: Three options for layout, the best one being to use the thumb’s displayed orientation in the contact sheet.
- Footer: Use text and Variables to set the footer text or leave blank for no footer. In the example “Page : {page}” will print as “Page : 1”, “Page : 2” etc with the variable {page} incrementing up by one for each page printed.
- Page Margins: Set the paper margins within which the thumbnails will be arranged. Check ‘Printer Scaling’ to allow the printer driver to perform image scaling.
- Color Match to: Set the printer profile to be used when printing, or choose “No Color Matching” to let the printer color manage the printout. Make sure that if you do let Photo Mechanic do the color management you must set the printer driver to do No Color Management.
- Résolution: Set the output resolution for the print job. Note that this is not the native printer resolution but the image resolution. Best results will be at settings like 240dpi or 360dpi. The printer output resolution should be set in the printer driver software as normal.
- Source for RAW + JPEG: If there is a RAW and JPEG pair choose which will be processed to print.
- When using RAW: if you select RAW above, choose whether the RAW file is rendered by the OS or whether the internal preview is used (faster).
Click Print to go to the printer driver software and to see a preview of how the printed pages will look.
Printing Proof Sheets

Printing Proof Sheets is the same as printing Contact Sheets except there is only one image per page. The image is scaled from the original to fit the page, within the margins set. Again, headers and footers can be defined using text and variables, and there is much more room to add in more details captions in the footer. Using the variable {caption} means that each image will have a caption printed under it based on the IPTC Caption previously set. In the example below the footer includes the date it was taken ({date}), the f-stop used ({f }) and the ISO ({iso}). On the next line would be the caption info ({caption}), if any.
Selecting a Printer
When printing, a page setup dialog that allows one to choose the printer appears before a job is printed. This means you can select a printer other than your system's default if you wish.
The printer's paper type and quality settings will be accessed from the printer's properties. Only the DPI setting can be adjusted from Photo Mechanic's Print Settings dialog.
Various dialogs in Photo Mechanic offer an option for resizing and compressing files using the JPEG file format. The ‘Quality’ slider has no numbers on it but there are in fact 101 steps which can be chosen – 0 to 100. 100 can be considered an almost lossless compression and will therefore produce the biggest file sizes, although still considerably smaller than TIFFs.
Color management in Photo Mechanic is quite straightforward. It is recommended that you use a properly calibrated monitor to make sure that the color you see is accurate. Photo Mechanic uses the system monitor profile to display correct color.
This command is found under the Tools menu and allows embedding of profiles into JPEGs using either predefined color spaces like sRGB and Adobe RGB(1998), or custom profiles for output devices.
Photo Mechanic’s power lies in its flexibility and each user will no doubt use Photo Mechanic in subtly different ways to fit into their own unique workflow needs.
This section will suggest some simple but effective ways to get started and along the way improve the efficiency of your workflow. None of the steps should be construed as ‘must do.' Feel free to adapt, modify, and customize anything you like.
Let’s look at a fairly typical photographic shoot and how Photo Mechanic can help with reducing the time taken to deal with the resulting images.
Real World Example
Les mariages
This type of photography probably generates more images in a day that any other photographic job. Some photographers will shoot 2000 images of a single wedding, filling up maybe ten 1 GB cards in the process, using the Large Fine JPEG setting on the camera generating files of maybe about 4 MB each.
The photographer will need to accomplish three main tasks:
- Ingest the files from the cards onto a computer and make a safety backup.
- modifier the images down to maybe 200 ‘keepers’ and copy these files to a folder for subsequent editing in an external editor.
- Upload the images to a web gallery for the client to see and make choices before coming to the studio to make final selections of proofs sheets.
Not every photographer works this way but this step will serve to illustrate a few key concepts.
Ingest
Step one is best accomplished using the Ingest function. But first a few preparations must be made.
Decide where on your computer you want the images to be copied to. You may have a folder called Work in Progress or something similar. Also, and most importantly, you need to consider where you want a backup set of images to be copied to. Ideally this will be to an external hard drive but each has their own way of doing things.
One very effective way is of achieving this to copy onto a harddrive and into folders named DVD1, DVD2 etc. When a folder reaches about 4 GB simply burn it to a DVD and label it with the appropriate number. This means you have a backup copy on a harddrive as well as an off-line mirrored backup on DVD.
Also, you need to decide on a consistent file naming strategy which includes meaningful information in the file name. This makes it much easier to recognize file names from specific shoots much better than the file names generated by the camera. One simple method might be to use the name of the bride, the date and a unique file number. (E.g. jones_01012007_0001.jpg) This is immediately recognizable as being from the Jones wedding on Jan 1st 2007.
Open Photo Mechanic and go to Edit/Preferences. In the General tab set ‘On Start Up’ to ‘do nothing’ and ‘On Mount of Card’ to ‘Show Ingest Dialog’. Now, when a card is mounted the Ingest dialog will start up automatically.
Open the IPTC Stationery Pad dialog and enter the details of the shoot. Make sure you enter your name as credit, your Copyright label, the date of the wedding, the location and the names of the bride and groom in the Caption field. Remember to make sure the check boxes next to any info you want to use are checked.
It would also be useful to add the bride’s maiden name into the category or keyword field. Later, if you use a separate cataloging program, it will be easy to search on this name to find all the images from that particular wedding. If your company shoots more than one wedding, or portrait session, on the same day, then searching on the date AND the surname will find you the correct images. If you use internal Job numbers the category field could be a good field to use too.
Close the IPTC Stationery Pad: all the settings will be kept and will be applied to files when needed.
Insert a card into the computer or card reader, this should trigger the Ingest Dialog to appear. There is an option in Preferences, (Launching) to tell Image Capture to launch Photo Mechanic when a card is inserted. (See how to Configure Image Capture manually)
Normally you will want to copy all the images off the cards, so the option to copy from specific folders is not so important in this example. Select the card from the list in the Source Disk list.
Now choose the Source Directory Structure as ‘ignore : copy all photos’. This simply copies all the files, regardless of location on the card, into the destination folder.
For Copy Photos choose ‘into folder with name’. Type the name of the bride into the text box. This will result in the files being copied to the Primary and Secondary Destinations into a folder named, in our example, Jones.
Choose a Primary Destination and a Secondary Destination with the top right option buttons. You will need to check the Secondary checkbox to activate the Secondary button.
Check Apply IPTC Stationery Pad to add the data you set previously to each file as it is copied.
Check ‘Rename Ingested Photos As’ and type this into the text box:
jones_{date}_{seqn}
You can select {date} and {seqn} from the variables list by opening the Variables list (button in the lower left corner) and double clicking the Variable you want. Click on the “Set {seqn} var…” button and type 0001 into the text box and click OK. This sets the initial number of the numbering sequence and by adding three leading zeroes Photo Mechanic can increment the file number from 0001 to 9999 which is plenty for this example.
Check the ‘Open Contact Sheet during Ingest’ box to generate a Contact Sheet of all the Ingested images during the ingest process. You can work in the Contact Sheet and Preview windows even while Photo Mechanic is Ingesting so you can view and edit your images right away.
Check the ‘Unmount Source Disk after Ingest’ box.
Click ‘Ingest’ and files will be copied to your computer.
Once the first card is completed, it will be unmounted and can be removed. Insert a second card and the Ingest Dialog will reappear. All the settings will be the same as before, and the file sequence number will be set to where it left off during the last Ingest, i.e. if you ingested 100 files, the {seqn} variable number will be on 0101.
Click ‘Ingest’ again and the next batch of images will be copied, backed up and added to the open Contact Sheet.
When all the cards are finished you now have all the images mirrored in two places, all renamed and with accurate metadata added for future cataloging.
Editing
Now all the images are copied and backed up you can start editing them; in fact you can start this process before the Ingest is finished since Photo Mechanic allows full use of the Contact Sheet view and Preview during the Ingest process. On the Ingest dialog there is an option to ‘Open Contact Sheet during Ingest’.
For quick editing double-click the first image in the Contact Sheet to open it in the Preview window. Press F to show it full screen and press Z to toggle between full image and zoomed in. (The ⌘-click zoom function is very useful here too.)
Use the left and right arrow keys to step through the images one at a time.
As you view the images and decide whether the image is worthy or not press T to tag the image with a tick in the box in the lower right hand corner. This marks the image as a ’possible’.
Go through all the images in this way, tagging ones that are worthy in some way. When you have finished, press ‘Esc’ to shut down the Preview window and return to the Contact Sheet. Press F3 and all the untagged images will disappear leaving behind the ones you tagged. Select All (⌘-A) and use the Copy command to copy all the tagged images to a new folder named something like ‘Final’ or ‘Keepers’.
You could get more sophisticated by using the Color Classes to whittle the whole collection down to the amount you want to present to the client.
En présentant
Once you have settled on your final selection press ⌘-A to ‘Select All’. Then choose File/Export. Pick a layout for your webpages: see Export for details.
This gallery could be uploaded to your website for the bride and groom to view.
So, to summarize, we have copied all the cards quickly and easily. The settings for Ingest and IPTC Stationery Pad needed only to be set once for this shoot, no matter how many cards were filled or how many images were shot. If two photographers were covering the wedding Photo Mechanic can keep the images separate based on the photographer’s name set in each camera (see your camera manual for this). This is the {owner} or {user} variable.
The images were edited quickly and easily using the simple tagging system built into Photo Mechanic. For more sophisticated edits we could have used Color Classes to separate the images into up to 8 different color classes. Or we could have used the 5-star ranking system.
Once edited, the images were uploaded for viewing but they could also have been Saved As JPEGs of a different size of they could have been FTP transmitted to a client’s server for viewing.
Photo Mechanic offers enough options for any photographer to customize their workflow to suit their needs.
All menus in Photo Mechanic follow certain conventions: A single menu item will directly execute a command e.g. Close. A menu item followed by an ellipsis (…) will bring up a dialog box with more options. A menu item with a small triangle to the right leads to a submenu with further choices.

New Window: Opens a copy of Photo Mechanic in a new window. Contact Sheet tabs may be moved between open Windows simply by dragging them from one window to another.
New Contact Sheet Tab…: Opens a new tab in the current Window.
Open contact sheet…: Choose a folder of images to be browsed.
Open Recent…: Choose from a list of recently opened contact sheets.
Close Window: Close currently displayed Contact Sheet Window.
Close Contact Sheet Tab: Close the current Contact Sheet tab.
Ingest…: Opens the Ingest dialog to copy images from external sources like CF
cards.
Live Ingest…: Opens the Live Ingest dialog.
Live Slide Show: Opens the Live Slide Show dialog.
Remember Folders as a Favorite…: This command is only active when the current Contact Sheet tab is browsing multiple folders. When used, this command ‘remembers’ the set of folders as a Favorite in the Favorites panel.
Rename Photos…: Renames selected photos.
Copy/Move Photos…: Copies or moves selected photos to a new destination, photos
can be renamed and IPTC Stationery can be applied.
Delete Photos…: Deletes selected photos from computer by moving them to the Trash or deleting them immediately. There is an optional confirmation dialog for this operation.
Save Photos as…: Saves photos in a variety of ways, with options for resizing, cropping, compressing and renaming.
Burn Photos to Disc…: Burn images to CD or DVD.
Send Photos via email…: Send selected images by email, with resizing, compression and renaming options.
FTP Photos as…: Transmits images by File Transfer Protocol to a remote server via the internet. There are options for sizing, compressing and renaming.
Upload: Sends images to your online accounts. There are options for sizing, compressing and renaming.
Export: Opens the Export dialog for HTML Web page creation or Text and XMP Exports.
Import GPS Coordinates…: Opens the Import GPS Coordinates dialog and allows you to import supported GPS log file formats onto your photos.
Page Setup…: Set up your printer for making Contact Sheets or Proofs.
Print…: Prints selected images as either a contact sheet view or a series of individual
proofs. There are full layout and captioning options based on variables.

Undo, Redo, Cut, Copy, Paste, Clear: These are the normal text editing functions common to all applications and are used when editing text in the various Photo Mechanic text boxes. All the usual text selection standards apply, such as double-clicking a word to select it.
Take IPTC Snapshot: Grabs the IPTC data from a selected image and copies it to a clipboard for pasting.
Paste IPTC Snapshot: Pastes the IPTC data to selected images.
Clear Transferred: Clears the Upload Status Indicators of the selected images. Find…: Finds images in the current selection or contact sheet by searching the file
names and/or metadata for specified words.
Find and Replace…: Looks for and replaces, from a selection of the current contact sheet, metadata text in selected metadata fields.
Search…: Spotlight search. Select All: Selects all images in current contact sheet. Deselect All: Deselects any selected images.
Select Tagged: Selects all images that are currently Tagged.
Select Rotated: Selects all images that have been soft-rotated.
Select Transferred: Selects all images that have been uploaded.
Select Photos with Audio: Selects all images that have sound files associated with them.
Select Photos with GPS: Selects all images that have GPS coordinates applied to them.
Select Color Class: Selects all images of a particular Color Class. Select Rating: Selects images with a specified Star Rating. Select Date Range…: Selects all images in a particular date range. Select Others: Inverts the current selection to the images that are not selected.
Save/Load Selection: Saves out a text file with a list of the currently selected images. Load the text file to reselect the same images. This could be useful if you were to be sent a folder of images to make a selection from – just make the selection, save the selection and then you only need to return the selection text file, not the whole folder of images.
- Set Autocomplete…: Opens the ‘Autocomplete Settings’ dialog.
- Set Code Replacements…: Opens the Code Replacement dialog.
- Reload Code Replacements: Refreshes Code Replacements from recently saved Code Replacement files
- Set GPS Home…: Opens the Set GPS Home dialog.
- Set Info Text…: Opens the ‘Set Info Text’ dialog.
- Set Sequence Variable…: Opens the ‘Set Sequence Variable’ dialog.
- Set User/Client Variables…: Opens the ‘User/Client Variables’ dialog box.
FTP Connection Settings…: Opens the ‘FTP Connection Settings’ dialog.
Upload Connection Settings…: Opens the ‘Upload Connection Settings’ dialog.
Special Characters…: (Mac only) Opens a list of special characters to insert into metadata.
This tool will adjust the capture dates and/or times of the selected group of photos. The capture date/time is the time stamp written by the camera, usually stored in the EXIF data of a photo.
Oftentimes the clock in a camera may be off, sometimes by a little, and sometimes by a lot. The most common example is when you change time zones and forget to change the clock on the camera. The capture times recorded are therefore still relative to the original time zone (e.g. before you went on vacation).
For multiple camera environments such as sporting events, it is often critical to synchronize all the cameras down to the second if photos from multiple cameras are to be viewed together.
This tool can be used to either “Adjust Relative” or “Adjust Absolute”.
If you know your camera clock was off by some time delta (e.g. three hours since you changed three time zones), simply dial in the delta time (or even days) in the Adjust Relative section. For example, if you live in Boston and you went to vacation or work in San Diego without adjusting your camera clock, then set the Hours control to -3 to adjust the capture times of the photos from the Eastern to the Pacific time zone.
To precisely adjust the capture times, use the Adjust Absolute controls to set the absolute time a photo was taken. For example, with multiple cameras at a sporting event, make sure all cameras take a photo of the game clock (or some other common clock that shows seconds). Then select the photos from one camera, locate the photo of the clock using the arrow buttons under the photo, then dial-in the actual capture time of the photo shows using the controls to the bottom-right of the photo. A relative time will be calculated from that photo and applied to all the selected photos.
With the three checkboxes at the bottom you can also choose to update the file system’s creation and/or modification date/time, or the IPTC/XMP date/time.
All selected photos will be adjusted accordingly when the Adjust button is clicked.
Remove Crops
This tool will let you remove at once the soft crops that have been added to multiple photos.
Update IPTC/XMP
Photo Mechanic does not generally rotate files, it simply displays the thumbnails in the correct orientation. Using this option on JPEGs applies the soft rotation to the files in a lossless manner so that the images will appear with the new orientation when opened in other applications which do not recognize soft rotations or EXIF orientation data. Once you’ve used this tool a few times and don’t want to see the confirmation dialog, holding down the modifier key will bypass the dialog.
Many RAW files contain preview JPEGs created by the camera at the time of capture. Often these files are of sufficient quality for small uses, such as for the web, and being able to extract them means the whole RAW files does not have to be processed just to create a small image.
The new file will have the same name as the original, with all the settings for the original can be carried over using the three check box options.
The size of the extracted file depends on the camera model: some cameras only produces images for display on the camera’s rear screen so these will be very small.
Remap
These commands govern how the program window appears. If you have multiple Photo Mechanic windows open, here is where you can switch between them.
Aidez-moi
This menu contains links to various documentations of Photo Mechanic, including within the program, or the online documentation.
- Photo Mechanic Help: This will open up this manual as included in Photo Mechanic (Works even if you are offline)
- Photo Mechanic Online Manual: This takes you to the online version of the manual will may be more up to date than the one included with your instance of Photo Mechanic. However, the online version may also apply to a newer version of Photo Mechanic than what you have installed
- Photo Mechanic Support Forums: This is a link to an online customer forum where you can interact with the program developers and other power users to ask questions and make feature requests
- Licence
- Enter New License: Use this if you are entering a license that you have purchased after using Photo Mechanic on a free trial
- Deactivate computer: Use this if you are decommissioning or discarding a computer and wish to free up its activation to install Photo Mechanic on a new computer
- Software Update: Checks Camera Bits' servers to see if there is an updated version of Photo Mechanic available. You can specify how often tocheck for updates, or stop checking altogether
- Reveal Support Data: Use this if directed by Camera Bits Tech Support when submitting a support request
- Download Team Help client application: This will take you to a page where you can download software to help Camera Bits Tech Support troubleshoot issues on your specific computer. Use this when directed by Camera Bits Tech Support.
Préférences
Mac: ⌘-,
Windows: Ctrl-,
(comma)
There are many parameters that can be set in Photo Mechanic to customize its operation to the way you choose to work. In the Preferences Dialog box there are a series of tabs across the top, each of which leads to a new set of preferences.
General Preferences

On startup: This is how you would like Photo Mechanic to behave when it is launched.
On mount of Camera Disk: This is what action you would like to happen when Photo Mechanic senses that a card has been placed in a card reader. The logical choice here is the second one, ‘Show Ingest Dialog’, but you can also ignore it or cause the card to be browsed as a set of Contact Sheets.
Color Classes: Here you can customize the Color Classes and names that Photo Mechanic uses to sort images. Click on a color box to choose another color and type in the box next to it to re-label that color. If you wanted to maximize compatibility with Adobe® Bridge®/Lightroom® you would set the labels and colors here to match the labels and colors you use in those applications. Additionally, the Synchronize Color Class with IPTC/XMP Urgency field check box, when set, will cause the IPTC Urgency field to be set as the Color Class index whenever the Color Class is adjusted.
GPS: This section allows you to choose how you want GPS information displayed. le GPS Latitude/Longitude format popup menu lets you choose the format for display of GPS coordinates. le Units for GPS distance popup allows you to choose miles or kilometers for distance displays.
Contact Sheet Preferences

Selection Method: Three options on how a selection may be made. Option one is the default and is the one most people will be familiar with.
Default Sorting Method: This is the sorting sequence that Photo Mechanic uses to display a Contact Sheet when the sheet is first created. This will appear in the main menu bar in the Contact Sheet window and can be changed.
Behavior, Wrap-around: Toggles whether the arrow keys progress from the last image in a Contact Sheet back to the first image when the end of a folder is encountered.
Behavior, Close Contact Sheet window when last tab is closed: When this is enabled, closing all the tabs in the Contact Sheet window will also close the window itself.
Behavior, Create New…: If there are no Contact Sheets open and Photo Mechanic is minimised, a new blank Contact Sheet will be created when photo Mechanic is resumed.
Only Allow Arrangements…: Thumbs can only be dragged to make new arrangements when the Sort dropdown is set to Arrangement.
Automatically rescan when folder contents change: Causes Contact Sheets to rescan when other applications notify the system that they have added or removed files from a folder. This feature has been a source of reliability issues for some users and has been made optional. If you are having issues when working with folders outside of Photo Mechanic, please try turning this option off. The change will only take effect when Photo Mechanic is restarted.
Thumbnail section:
Default Size: This is the size of thumbnail that Photo Mechanic uses when it first creates a new Contact Sheet. It can be changed by using the thumb size slider on the Toolbar.
Generate High Quality Thumbnails: Turning this off displays the very small EXIF thumbnails only. Super-fast but low quality.
Sharpen Thumbnails: Thumbnails will have sharpening applied and will look crisper to the eye, again, at a slight cost in speed.
Combine RAW+JPEG into single thumbnail: Toggles the combination of RAW+JPEG pairs into a single thumbnail.
Show Soft Rotation indicator on thumbnails: Displays a symbol to show if a thumbnail has been rotated. Also allows other indicators like Upload status to be shown.

Files Preferences

Move Photos to Trash: Check this box to move deleted items to the Trash. Unchecking this box deletes the item permanently.
Play move to Trash sound: Photo Mechanic will play a sound effect when deleting photos. Uncheck this to silence this effect.
Never Warn when deleting: Turns off the warning when deleting files. Use with caution.
Allow modification of files on Camera Disks ( not recommended ! ): By default, Photo Mechanic will not make any changes to files on a memory device so that if anything ever goes wrong, you'll still have your original untouched files. If you're really, really sure you want to turn off this protection, you can.
Update Creation Time: Changes the creation time of the image to the EXIF time of capture during Ingest or Copy. Unchecking this option will cause the files to have a creation time set as the time of Ingest or Copy, not the actual time of capture.
File Extensions: Choose upper or lower case for file extensions. Once set this is best left alone for consistency. Lower case is safer than upper case for web use.
Resolution Units: Choose between pixels per centimeter or pixels per inch. PPI is the default.
Add Photoshop resolution info to Camera JPEGs during IPTC update: Sets the default resolution for files created during Copy or IPTC Updates for other imaging applications which use a dpi value for sizing.
Default Resolution to use: Choose a resolution to use for all file operations such as Resize, Crop, Save As, FTP etc. Saved images will have this resolution when viewed in other applications.
Renaming resolution: Set options for what Photo Mechanic should do when it tries to save a file to a folder and there is an identically named file already present at the destination. This policy applies to all renaming operations. You can choose to append a letter, or a single or double digit number, when needed. The best option here is probably ‘Append Digits when needed (01,02 etc.)’. This option makes it easy to see at a glance when there were two files with the same name since the new file name will be longer and easy to spot.
Always update XMP Label when changing Color Class: Tells Photo Mechanic to set the XMP Label to the new Color Class name even if the XMP Label didn’t previously match the Color Class name.
Location of User Templates: These settings allow you to choose a folder where your custom templates are stored on your system. The Export dialog, HTML Template Exporter, and Uploader dialog will look here for additional templates.
The Windows version of Photo Mechanic includes a button to set HTTP proxy settings for templates that use HTTP as the basis for their protocol. (The OS X version of Photo Mechanic picks up the HTTP proxy settings from the System Preferences Network pane.)
RAW Rendering is part of Mac OS X. Photo Mechanic cannot render images on Windows.
Enable RAW Rendering: turns on the facilty to use the OS RAW rendering capabilities.
For RAW+JPEG: If there is an image pair when you have shot with the camera in RAW+JPEG mode then you can choose to work with the JPEG for speed or render the RAW for quality.
For RAW Only: You can choose to use the embedded JPEG preview in the RAW file to speed up thumbnailing or export, or use RAW Rendering to generate the output. Using embedded previews is faster but using RAW rending can produce higher quality results.
Launching Preferences
These are preferences for how Photo Mechanic launches other applications in your workflow.

Configure Image Capture: (Mac only) Use this option to set up Photo Mechanic to automatically launch when a camera card is mounted. Used in conjunction with Preferences/General to bring up an Ingest Dialog on launch. On Windows, “AutoPlay” is used to launch Photo Mechanic when a camera card is mounted.
Default application to edit photos: Choose an external editor to launch when the Edit photos options are invoked. For many people this will be Adobe Photoshop but you can choose whatever you like here.
Default application to edit movies: same as above but for movie files.
Assign Specific Application to File Type: Click ‘Set…’ to assign different file formats to different applications. You might like to use Photoshop as the default but also set ImageReady to open GIFs and a particular RAW Converter to process NEF files. These options are shown when using the right-click context menu option on photos in the contact sheet: ‘Edit Photos with’. You can also use "Custom Editor" slots to be able to assign External editors as options that appear when you select 'Edit photos with…" from the menu.
Max Photos to Edit: Sending more than this number of image to an external editor will bring up a warning. This warning acts as a safety net in case you send more files than your computer can handle at once. The number of files you can safely send will depend on both the file size and the amount of RAM available.
RAW+JPEG Editing: When Photo Mechanic is treating a RAW+JPEG pair as a single file, this option sets which one of the pair is sent to an external editor when using the ‘Edit Photos’ command. You can toggle this preference temporarily by holding down the Modifier key when choosing to edit.
Opening Contact Sheet with Navigator or Favorites panes: Sets one of four options for single-clicking or double-clicking in the Navigator or Favorites panes.
The “When opening a new Contact Sheet make the Navigator show the path to the folder” checkbox can be set so that the Navigator shows the full path to the newly opened folder.
Photoshop Droplets: Use this to set where your Droplets are stored so Photo Mechanic can load them into the ‘Send Photos to Droplet’ menu option on the Image menu.
IPTC/XMP Preferences

The IPTC / XMP Preferences section is where you setup how Photo Mechanic reads and writes IPTC and/or XMP metadata with photos in order to customize your workflow with other applications that use this metadata. Most IPTC metadata fields (e.g. City, Photographer, etc.) have an equivalent field representation in XMP (known as IPTC4XMP), although XMP can also contain other metadata such as rendering preferences. Unfortunately, not all applications or operating systems support IPTC and XMP metadata equivalently, so Photo Mechanic has been designed to be very flexible about how IPTC and XMP metadata is both read and written.
For example, since IPTC (an international standard) was in use for more than a decade before XMP (a format introduced by Adobe Systems), older applications may only handle IPTC data and not be able to view or edit XMP data. Newer and future applications may only handle XMP. Some applications that handle XMP may expect the metadata to be embedded within photos such as JPEGs and TIFFs, but expect to find an XMP sidecar file for RAW photos. Some applications may be able to read, but not write, IPTC or XMP metadata embedded within a RAW photo. If a photo contains both IPTC and XMP metadata, some applications may read the IPTC and ignore the XMP or vice versa.
By understanding how all your various applications handle IPTC and/or XMP metadata, you can configure Photo Mechanic to read and write this metadata for maximum inter-operability. The handling of proprietary RAW photos, for example, can be very different than the handling of standard JPEG, TIFF, and PSD photos. Unlike the standard photo formats, which have well-documented methods for embedding IPTC and XMP metadata, most proprietary RAW photos do not come with IPTC or XMP metadata; and if they do, are difficult to edit because of their TIFF-based structure (and if altered may fail to work with certain applications or operating systems). Therefore, some applications favor using an XMP sidecar file for RAW photos. Fortunately, Photo Mechanic is able to read and write both IPTC and XMP in various combinations depending on the photo’s format.
In the left section, When reading IPTC/XMP, you tell Photo Mechanic how to handle the reading of IPTC/XMP data when both types of metadata are present. For example, if you create a JPEG with both IPTC and XMP (e.g. by saving from Photoshop CS), then edit the photo’s metadata with an older application that only understands IPTC, then the XMP metadata in the file will be “stale” (out of date). Therefore, in this case, you will want to have Photo Mechanic read IPTC before XMP for JPEG (and TIFF and PSD) photos. On the other hand, if you edit the same photo with a newer application that only uses XMP, then the IPTC metadata will be stale and you will want to change the JPEG read preference to read XMP before IPTC. For RAW photos, there is an additional third place to find metadata: the XMP sidecar file. Therefore, you can choose the first, second, and third choices for reading IPTC/XMP metadata for RAW photos. If you are using a Mac, you can also choose to read the IPTC from a photo’s “resource fork”, either as the first place to look or only as a last resort or uncheck it to ignore the resource fork altogether. Put another way: If data is found for your first choice, then the second and third choices will not be read. If data is not found for your first choice, then the second choice will be attempted and if successful the third choice will not be read. If the first and second choices are not successful then the third choice will be attempted. If none of the choices result in metadata being read, then the image will not have any metadata (other than shooting data) associated with it.
In the right section, When writing IPTC/XMP, you tell Photo Mechanic how to handle the writing of IPTC/XMPdata. ForJPEG,TIFF,and PSD photos,you can choose to embed IPTC or XMP or both. By default, Photo Mechanic will embed both IPTC and XMP into these standard formats, but you may want to only embed IPTC for older applications or only XMP for newer applications. For TIFF-based RAW photos (e.g. 1D TIF, NEF, CR2, ORF), you can choose to embed IPTC or XMP or both. If you choose to embed neither, or for non-TIFF based RAW photos, Photo Mechanic will always create and/or update an XMP sidecar file. However, if you embed IPTC and/or XMP in a TIFF-based RAW photo, then the XMP sidecar is optional and you have three choices of how to handle them. You can always update the XMP sidecar file, or only if an XMP sidecar file is present, or only if an XMP sidecar file is present AND already contains IPTC4XMP metadata. On the Mac, you can also choose to add the IPTC-NAA resource fork when embedding IPTC/XMP.
The option Don’t update embedded IPTC/IPTC4XMP even if it exists… causes Photo Mechanic to only update the XMP sidecar file, letting any current embedded IPTC or XMP data stay in its current state.
One important note: the IPTC/XMP write preferences have to do with ADDING IPTC/XMP metadata when it doesn’t exist in a photo. Photo Mechanic will always update any existing metadata to make sure no metadata is left stale (unless you force Photo Mechanic not to update it with the previous option.) For example, if you choose to ADD only XMP metadata into JPEG photos, but Photo Mechanic finds only existing IPTC metadata in a JPEG, it will update the IPTC data AND add XMP data to the JPEG photo.
Also, Photo Mechanic will load an IPTC ANPA 10000 resource if it exists as a last resort if no embedded IPTC or XMP or XMP sidecar is available.
IPTC Line Endings: Sets the Line Endings that are used in the IPTC data. The IPTC standard does not specify a line ending (a character that lets a computer know to start a new line) and the original Mac version always wrote out a CR character (carriage return). Windows uses CR/LF (a carriage return followed by a line feed) to delineate new lines. This option lets you choose how you want it to work.
When viewing photos in RAW+JPEG mode use the metadata from the: This popup menu allows you to choose where the metadata comes from when RAW and JPEG images are paired.
For JPEGs with multiple IPTC and/or XMP records: Some applications edit IPTC and XMP metadata in JPEG photos in different ways. If Photo Mechanic encounters improperly formatted JPEG photos with multiple records, this lets you configure what Photo Mechanic will do when it encounters this situation. You can choose to Read/update the first IPTC or XMP record or the last record.
Use a (comma or semi-colon) to separate repeating fields (Keywords, Caption Writers, etc.): Lets you choose how repeating IPTC fields are separated. If you like to use commas in names as in “Last name, First name” then choose semi-colon as your separator.
Check Spelling: Checks spelling of the Caption field using the system Dictionary.
When updating XMP, add Structured Keywords to hierarchical keywords field only: When unchecked, the Structured Keywords will be added as a flat list to the keywords field. Checking this box will attempt to ensure that the keywords remain hierarchical within the XMP file.
Always Use Today’s Date in Stationery Pad: Presets the Date field in the IPTC Stationery Pad to the current system date. You can override this in the IPTC Stationery Pad if you want, it just opens with the date already set to ‘now’.
Restore defaults: Restores all IPTC/XMP ‘factory’ defaults.
Maximizing IPTC/XMP Compatibility
Having data move smoothly between Photo Mechanic and other photography software is very important. To make sure your key metadata follows your photos as you work with them in other programs, you may have to adjust the settings in Photo Mechanic. Other software can look for metadata in different places, so you'll have to specify where and how to keep it.
You can now select a specific group of settings designed to work best with other common software packages. Do this from the "Snapshot" button in the lower right:
The following settings will maximize compatibility with Adobe products. The key is to remember when working with Raw files that Adobe will try to look for metadata in XMP sidecar files that live alongside each Raw file. If you click the "Restore defaults" button, you should get these settings which will work well with Adobe products. (You can click the screenshot to see a full size version)

Capture NX2 settings
Here are suggested settings for working with Nikon Capture NX2:

The key difference here is that (as of February 2013) Capture NX2 doesn't make use of XMP sidecar files, so tell Photo Mechanic to look for embedded XMP first.
Note on Default IPTC Encoding: Users should either use the default Mac Roman encoding which is historically the default encoding that Photo Mechanic has always used, or they should change it to one of the other encodings to work with the encoding of choice used by their organization. For better compatibility with non-PM users on Windows, using “Microsoft Latin1+Euro” is a good choice. Using “Write IPTC as Unicode” makes IPTC fully international, but unfortunately some applications do not know how to interpret Unicode IPTC data even though they work fine with Unicode XMP data.
Preview Preferences

Enlarge photos to fit previews and slide shows: Check this box to have Photo Mechanic enlarge images that are smaller than the preview window and the slide show window. Images will be resized to fit within the workspace. Images that are bigger than the workspace will always be reduced to fit unless zoom is used.
Wrap-around: Allows the arrow keys to progress from the last image to the first image or the first image to the last.
Show Soft-rotation: Displays a small rotation icon to designate that an image has been soft-rotated from its original orientation. Photo Mechanic does not alter original image data, it merely displays a preview as opposed to actually rotating the original image. This indicator will let you know when an image has been soft-rotated.
Auto-center thumbnails in thumbnail gallery: Causes the current selected preview to have its thumbnail centered in the thumbnail gallery.
Sharpen Previews: Displays Previews with sharpening applied for a crisper view, at a slight cost in processing speed.
High DPI Display Quality: Change this setting if you have a high resolution display (e.g. Retina or 4K or above). Setting this to “Best (uses more memory)” will ensure your previews will display at the best resolution possible. Please note that when set to "Best," the preview will use more memory than in "Standard." If your performance changes, consider adjusting your Memory Cache setting down to 256MB to compensate. (This is set in Caching preferences)
Edit/Preview: The "double-click" options control what happens when you double-click a thumbnail in the Contact Sheet. You can choose to have a double-click open the Preview window OR to open the default external editor for that filetype.
Close preview window when editing a photo externally. When you are viewing an image in the Preview window, you can choose to open it in an external editor. This option means the Preview window will automatically close if you do so. (Photo Mechanic will remain open).
Always make current Preview visible in Contact Sheet: With this option checked, when you advance through images in the Preview Window, the Contact sheet will automatically scroll to keep up. When unchecked, the Contact Sheet will remain static.
Synchronize single selection between Preview and Contact Sheet:' You can uncheck this option if you want to keep a single image selected in the Contact Sheet while you advance through images in the Preview window.
Rescan Contact Sheet when Preview closes: Photo Mechanic will rescan the folder(s) in the current Contact Sheet when the Preview window is closed. This ensures you have the most up-to-date view of your files. If you would like to turn this off, you can uncheck this option.
Automatically advance to next photo: When the “Tag is changed”, “Color Class is changed”, or “Rating is changed” checkboxes are checked these options will cause the preview to advance to the next photo when any of the checked options are changed.
When zoomed, the mouse wheel: Allows the mouse wheel to function in one of two ways when zoomed– the mouse wheel can pan the preview around, or it can advance to next/previous photo. (Mac OS X-only feature.)
Mouse wheel sensitivity: This is where you can adjust the sensitivity of your mouse wheel for panning and advancing. (This is a separate setting from the "Scroll wheel sensitivity" setting for working in the Contact Sheet)
Cropping: Sets the default mode of Cropping, either constrained or freehand. If you choose constrained you can set the default ratio here. The numbers represent aspect ratios not units. For example, 5:5 will give a square crop and 9:3 will give a panoramic one.
Background Colors: Choose colors for the background of the preview window.
Caching Preferences
Location for Cache: Choose a folder where you would like Photo Mechanic to store cached thumbnails. Note that if you choose a location other than the default and are using OS X then you need to tell Spotlight to ignore your cache folder or performance will be reduced.
Disk Cache Size: Maximum size of the cache folder. Generally, bigger is not always better, and the usefulness of the cache will top out at a few thousand MB, because startup and shutdown times will become excessive.
Reserve at least: Makes sure that there is always this amount of space left on the cache disk volume.
Empty on Quit: Empties the cache when Photo Mechanic is closed. Photo Mechanic is very quick to generate thumbnails and previews so it is not always necessary to keep the cache between sessions. On quit, if emptying the disk cache takes longer than one and a half seconds, then a progress dialog is displayed.
Remove Cached files that are older than: Cached files older than ‘n’ days old are removed as Photo Mechanic starts up. Keeping a large cache between sessions can cause Photo Mechanic to launch slower than normal because it has to check every cached file for its creation date on startup.
Memory Cache Size: Sets aside an amount of RAM to be used for caching and previewing. If you have less than 1GB of RAM this should be 64MB or 128MB, more if you are running Photo Mechanic on its own. For 2GB of RAM, 256MB would be a reasonable setting.
Sort Cache: Photo Mechanic can cache the sorting of large folders to improve performance when re-opening the folder later on. To save disk space, PM will clear out older cached data per your choice of size here. You can also "Empty Now" to immediately get rid of cached sorting data.
Color Management Preferences

Default ICC Profile: Sets a profile to use if a file has no profile assigned to it. sRGB would be the usual choice here since most non-ICC capable cameras would be using a nominal sRGB-like colorspace.
Color Manage Thumbs: Applies color management to the Contact Sheet view.
Color Manage Preview: Applies color management to the Preview.
Embed ICC Profile into Camera JPEGs during copy or ingest: Causes Photo Mechanic to embed the actual ICC profile into your images during copy or ingest operations.
Accessibility Preferences

Font scale for IPTC Caption field: Allows you to make the text larger in the Caption field of the new-layout IPTC dialogs.
Use Classic IPTC Dialogs: Sets Photo Mechanic to use the older IPTC Stationery Pad/IPTC Info layouts which many people are very familiar with.
Enable Save, Upload and Next button in IPTC Info: Uncheck this to prevent inadvertently saving over critical information while reviewing files.
Customize IPTC Info & Customize IPTC Stationery These dialogs allow you to control what fields appear in the IPTC Info and Stationery Pads, how those fields are shown in Photo Mechanic, and even how big the text fields is for data entry.
le Field column is the default IPTC name for the field and should generally be left alone. See here for a description of those fields: IPTC Variables Map
le Field Label column is the displayed description of the field in the IPTC dialog box. To change the way the field appears, double-click on the Field Label and change it to what you want. (E.g. Change "Description/Caption" to just "Caption" and then press Return or Tab to apply the changes.)
You can change the number of Rows of text input space.
Control which fields show up in your IPTC dialogs in the Visible colonne.
Single key shortcut for Color Class or 5-Star Rating: Set whether the number keys set the 5-Star Rating or the Color Class without a qualifier key when a single photo is selected.
Run Navigation Services dialogs in a separate process: When checked, this causes all Open/Save dialogs to be run in a separate process which makes Photo Mechanic run far more reliably, especially on Snow Leopard (10.6.x) Mac OS X systems. Unless you have a good reason to turn this feature off, please keep this feature on.
Show Growl notifications instead of modal alerts where possible: When checked, this feature causes certain modal alerts (for instance Ingest complete messages) to present themselves as Growl notifications. Growl lets Mac OS X applications unintrusively tell you when things happen. It is free software that you can install on your Mac OS X system. You can read more about it here: http://growl.info and download its installer.
Ask when quitting Photo Mechanic: When this is checked, Photo Mechanic will ask you if you're sure when quitting Photo Mechanic. This is most often useful if you are used to using keyboard shortcuts and accidentally use the shortcut to quit the program. If you have no contact sheet open, Photo Mechanic will not ask you if you are sure, even if this preference is enabled. Note: Enabling this preference may interfere with system shutdown on some computers as Photo Mechanic will not exit without confirmation.
Use lighter interface theme on dialogs and message boxes: Use this option if you require a change for readability.
AP Preferences

Photo Mechanic has some special features to optimize use with the Associated Press
Exporting Preferences
Nearly all Photo Mechanic Preferences may be exported to a PMX file so that they can be imported into Photo Mechanic at a later time. If you run a second copy of Photo Mechanic on a laptop then this saves you having to set each Preference one at a time. Find the Import and Export buttons on the bottom of the Preferences window:

Importing Preferences
Choose a previously exported PMX file to import into Photo Mechanic.
Use the Merge settings checkbox to merge the imported settings with your current settings. If you want to replace your current settings with the imported settings, then turn off the Merge settings checkbox Not all settings can be merged, but many can.
Resetting Preferences
If for some reason you need to start over with your Preferences, you can completely reset them all to factory defaults. In rare cases this can even solve persistant crashing issues that come from corrupt preferences file. The process is different on OSX and Windows. Here's how you do it on each:
On OSX (Mac)
Resetting Photo Mechanic's Preference files will erase all of the entries in the Favorites pane and Open Recent list. If you need to restore your Favorites entries, then Take a screen shot of them before resetting PM's preference files.
If you have FTP connection settings or IPTC field lists that need to be preserved, then go to the Photo Mechanic Preferences dialog and click the Export button to save the current settings as a .PMX file. Call the file PM-old-prefs.PMX and save it wherever you like. Now quit Photo Mechanic. Use the Command-Tab shortcut when the Finder is running to show a list of all of the running application icons. If Photo Mechanic is not listed, then we can continue.
The Photo Mechanic preferences files are located in your user Library folder -> Preferences folder. Unfortunately this folder is hidden on the new Mac operating systems (Lion and Mountain Lion). We can get around that problem: with the Finder running click the Desktop so the Finder is active. Hold down the Option key and click the Go menu. Keep the Option key down so you can access the Library folder from the Go menu. When the Library folder opens, you can drag the Library folder icon from the top of the Finder window, to the left sidebar next to the Desktop entry. Make sure you see the separating line between two entries in the sidebar before letting go of the mouse. This will add the Library folder shortcut to the sidebar.
Now open the Preferences folder. Look for a folder called com.camerabits.PhotoMechanic. Rename this folder by adding -old to the name. If there are any com.camerabits.PhotoMechanic.plist files, then you can delete them or add "-old" to their names. There could be 3 of these plus 3 copies ending with Lockfile. Close the Finder window.
Start Photo Mechanic. If you see any messages about registration, you can re-enter it there, If you do not have your registration info handy, then quit Photo Mechanic. Go back to the Library folder and then the Preferences folder. ( Library folder shortcut will be in the left sidebar of any Finder window ).
Photo Mechanic should have created a new com.camerabits.PhotoMechanic folder. Open the com.camerabits.PhotoMechanic-old folder and move the com.camerabits.PhotoMechanic.registration file to the new com.camerabits.PhotoMechanic folder.
Now Photo Mechanic should be reset so it looks as if it has just been installed for the first time. Try the same workflow to make sure Photo Mechanic is working correctly now. If not, then we recommend re-installing the Photo Mechanic application.
If Photo Mechanic is working correctly now, go to the Preferences and click the Import button. Locate the PM-old-prefs.PMX file from where you saved it earlier and Open it. When the list opens click the Import button to continue. Click the Yes button in the alert dialog to complete the Import. Photo Mechanic will need to quit to save the changes.
les fenêtres
If Photo Mechanic will start up, then go to the Preferences option at the bottom of the Edit menu. Click the Export button at the bottom of the page. After a few seconds a list of selected items will appear. I recommend deselecting the Preferences:Caching entry. This entry will be near the top of the list. Just hold down the Control key and click it to deselect it. Click the Export button at the bottom of the list to save this to your Desktop. Call it something like PM-prefs-
For Vista, Windows 7/8/10 go to the following location:
C:Users
Remarque: If the AppData folder is not visible, then go to the Explorer Window's Tools menu and select Folder Options. This can also be accessed by entering Folder Options in the Control Panel's search field. Click the View tab and set the option to display Hidden Files and Folders. Apply the changes and then open a new Explorer window.
Click on the Photo Mechanic folder name on the left side of the Explorer window. This will show all of the files and folders in the right panel. Delete the files starting with "com.camerabits.PhotoMechanic". They are preferences files. Close the Explorer window and then restart your PC.
When it's done starting up, check the amount of RAM in your system by going to the System Control Panel. The RAM memory size will be listed by the CPU info. Make a note of the size.
Now start Photo Mechanic. Go to the Edit menu and select Preferences. Click the Import button at the bottom of the dialog and locate the PM-prefs-
Next go to the Caching preference page and double check the Memory Cache Size at the bottom. This should be set to approximately 20% of the total system ram size up to 600 MB. Here is a basic guide for PM's Memory Cache size:
| Your system RAM | PM Memory Cache size |
| <1 GB | 128 MB |
| 1 GB | 200 MB |
| 2 Go | 400 MB |
| 4 GB+ | 600 – 800 MB |
Click OK the preference dialog. Quit Photo Mechanic.
Start Photo Mechanic again. Hopefully the problem is fixed.
Custom Toolbars
The Photo Mechanic Toolbar can be fully customized to suit your own preferred way of working. Right click (Ctrl-click) in any empty space on the toolbar and select an option.
Click on Customize Toolbar to bring up the following dialog box. Icons can be dragged to and from the Toolbar to suit your personal taste, or you can simply reset the default toolbar by dragging the whole default set all at once.
Checking the Small Icons option merely reduces the size of the Toolbar Icons to make more room.
Contact Sheet Shortcuts (OS X)
If you have only one photo selected you can use the arrow keys to move the selection around.
| Copy item | y |
| Edit in default editor | e |
| Upload photo via FTP | vous |
| Turn tag on | + |
| Turn tag off | – |
| Toggle tag on/off | t |
| Toggle Selection and Loupe cursor modes | z |
| Set Star Rating (if configured in Prefs) | 1 thru 5 |
| Set Color Class (if configured in Prefs) | 1 thru 8 |
| Remove Color Class or Star Rating (if conf. in Prefs) | 0 |
| Select and scroll to last previewed item | l |
| sauvegarder | s |
| Rotate counter-clockwise 90° | [ |
| Rotate clockwise 90° | ] |
| Rename | M or Return |
| Aperçu | Espace |
| Play/Stop any sounds | une |
| Open IPTC Info | je |
| Move to previous Contact Sheet tab | ⌘-{ |
| Move to next Contact Sheet tab | ⌘-} |
| Close current tab | ⌘-w |
| Close all tabs except current | Ctrl-Opt-⌘-w |
Preview Window Shortcuts (OS X)
| Close Preview window | Esc or ⌘-w |
| Move back/forward one item | ←, → |
| Scroll thumbnails by page | ↑, ↓, PgUp, PgDn |
| Delete current item | Delete or Backspace |
| Toggle rendering quality (RAW vs. JPG) | q |
| Turn zoom on/off | z or * |
| Increase zoom | + |
| Decrease zoom | – |
| Toggle shadow | n |
| Toggle highlight | b |
| Link the two previews | l |
| One up view | o |
| 2-up view (landscape) | v |
| 2-up view (portraits) | h |
| Switch active preview pane in 2-up | Languette |
| Full mode (toggles) | F |
| Restore from full screen mode | r |
| Swap items in 2-up view | g or / |
| Set Color Class (if set in Prefs) | 1 thru 8 |
| Set Star Rating (if set in Prefs) | 1 thru 5 |
| Remove Star Rating or Color Class (if set in Prefs) | 0 |
| Set Color Class | ⌘-1 thru ⌘-8 |
| Remove Color Class | ⌘-0 |
| Set Star Rating | Ctrl-1 thru Ctrl-5 |
| Remove Star Rating | Ctrl-0 |
| Toggle tag on/off | T or . (period) |
| Upload | vous |
| Toggle crop tool | c or x |
| Remove crop | Opt-c |
| Rotate counter-clockwise 90° | [ |
| Rotate clockwise 90° | ] |
| Play/Stop audio sounds | une |
| IPTC Info | je |
| Add to selected items | w |
| Deselect | ré |
| Copy | y |
| Rename | m |
| modifier | e |
| sauvegarder | s |
| Panning cursor | Space or Opt |
| Pan in the zoomed mode | Opt-↑, ↓,←, → |
| Pan faster in the zoomed mode | Shift-Opt-↑, ↓,←, → |
| Zoom in and out | Opt-scroll |
| Zoom in and center on click | ⌘-click |
IPTC Stationery Pad Shortcuts (OS X)
| Clear all fields | ⌘-Del |
| Load IPTC template | ⌘-Opt-l (lowercase L) |
| Save IPTC template | ⌘-Opt-s |
| Show Job/User/Client dialog | ⌘-Opt-j |
| Show/Hide Variables window | ⌘-Opt-v |
| Apply to selected items | ⌘-Opt-a |
| Accept changes and close Pad | ⌘-Return |
IPTC Info Shortcuts (OS X)
| Save changes and go to next | ⌘-]or ⌘-n |
| Go to next without saving | ⌘-Shift-]or ⌘-Shift-n |
| Save changes and go to previous | ⌘-[ or ⌘-b |
| Go back to the previous without saving | ⌘-Shift-[ or ⌘-Shift-b |
| Save, send to Uploader, and go to next | ⌘-u |
| Copy all IPTC field data to clipboard | ⌘-Shift-c |
| Paste clipboard into IPTC fields | ⌘-Shift-v |
| Save changes and close dialog | ⌘-Return |
| Clear all fields based on Clear mask | ⌘-Delete |
| Load a .IPT or .XMP file | ⌘-Opt-l (lowercase L) |
| Show Job/User/Client dialog | ⌘-Opt-j |
| Save all as a .IPT or .XMP file | ⌘-Opt-s |
| Apply the IPTC Stationery Pad | ⌘-Opt-c |
| Open Variables window | ⌘-Opt-v |
| Play the associated sound file | ⌘-Opt-a |
| Add Color Class | ⌘-1 thru 8 |
| Remove Color Class | ⌘-0 |
| Add Star rating | Ctrl-1 thru 5 |
| Remove Star rating | Ctrl-0 |
| Toggle tag on/off | ⌘-t |
| Enlarge the thumbnail | Ctrl-z |
Slide Show Shortcuts (OS X)
| Exit Slide Show | Esc |
| Advance to next item | Space or → |
| Show previous item | Backspace or ← |
| Dismiss item from Slide Show | Delete or d |
| Tag item | + |
| Untag item | – |
| Toggle tag | t |
| Set Color Class | 1 thru 8 |
| Remove Color Class | 0 |
| Pause slide show if on Auto | CapsLock |
| Toggle fullscreen on/off | F |
| Préférences | ⌘-, (comma) |
| Hide Photo Mechanic | ⌘-h |
| Hide other applications | ⌘-Opt-h |
| Quit Photo Mechanic | ⌘-q |
| New Contact Sheet window | ⌘-Shift-n |
| New Contact Sheet tab | ⌘-n |
| Open Contact Sheet | ⌘-o |
| Close Contact Sheet tab/window | ⌘-w |
| Close window | ⌘-Shift-w |
| Ingest | ⌘-g |
| Live Ingest | ⌘-Shift-g |
| Live Slide Show | ⌘-Shift-l |
| Rename Photos | ⌘-m |
| Copy items | ⌘-y |
| Effacer | ⌘-Delete |
| Save As | ⌘-s |
| Burn items to disc | ⌘-b |
| Send items by email | ⌘-Shift-e |
| FTP | ⌘-u |
| Upload | ⌘-Ctrl-u |
| Export | ⌘-Ctrl-x |
| Page setup | ⌘-Shift-p |
| Impression | ⌘-p |
| Undo | ⌘-z |
| Redo | ⌘-Shift-z |
| Cut | ⌘-x |
| Copy | ⌘-c |
| Coller | ⌘-v |
| Take IPTC Snapshot | ⌘-Opt-c |
| Paste IPTC Snapshot | ⌘-Opt-v |
| Trouver | ⌘-f |
| Find and Replace | ⌘-Shift-f |
| Search using Spotlight | ⌘-Opt-f |
| Select all | ⌘-a |
| Deselect all | ⌘-d |
| Select tagged items | ⌘-t |
| Select rotated items | ⌘-Shift-r |
| Select others (invert selection) | ⌘-Shift-o |
| Select Color Class 1-8 | ⌘-Ctrl-1 thru 8 |
| Select anything with a Color Class | ⌘-Ctrl-9 |
| Select items with no Color Class | ⌘-Ctrl-0 |
| Select Star Rating 1-5 | ⌘-Opt-1 thru 5 |
| Select anything Star Rated | ⌘-Opt-6 |
| Select anything not Star Rated | ⌘-Opt-0 |
| Set Code Replacements | ⌘-Ctrl-c |
| Reload Code Replacements | Shift-⌘-Ctrl-c |
| Enter special characters | ⌘-Opt-t |
| IPTC Stationery Pad | ⌘-i |
| Apply Stationery Pad | ⌘-Shift-i |
| Keywords panel | ⌘-k |
| Structured Keywords panel | ⌘-Opt-k |
| Rotate counter-clockwise 90° | ⌘-[ |
| Rotate clockwise 90° | ⌘-] |
| Tag photos | ⌘-+ |
| Untag | ⌘– (minus) |
| Aperçu | ⌘-r |
| Edit items | ⌘-e |
| Slide Show | ⌘-L |
| Set Color Class | ⌘-1 thru ⌘-8 |
| Remove Color Class | ⌘-0 |
| Set Star Rating | Ctrl-1 thru Ctrl-5 |
| Remove Star Rating | Ctrl-0 |
| Toggle combined RAW+JPEG | ⌘-j |
| View all | F1 |
| View selected | F2 |
| View tagged | F3 |
| View untagged | F4 |
| Refresh | F5 |
| Rescan Contact Sheet | ⌘-/ |
| Show/Hide Info tooltips | ⌘-Shift-t |
| Apply rotation to JPEGs | ⌘-Ctrl-r |
| Select previous tab | ⌘-{ |
| Select next tab | ⌘-} |
Windows Shortcuts
Contact Sheet Shortcuts (Win)
| Copy item | y |
| Edit in default editor | e |
| Upload photo via FTP | vous |
| Turn tag on | + |
| Turn tag off | – |
| Toggle tag on/off | t |
| Toggle Selection and Loupe cursor modes | z |
| Set Star Rating (if configured in Prefs) | 1 thru 5 |
| Set Color Class (if configured in Prefs) | 1 thru 8 |
| Remove Color Class or Star Rating (if conf. in Prefs) | 0 |
| Select and scroll to last previewed item | l |
| sauvegarder | s |
| Rotate counter-clockwise 90° | [ |
| Rotate clockwise 90° | ] |
| Rename | M or Return |
| Aperçu | Espace |
| Play/Stop any sounds. | une |
| Open IPTC Info | je |
| Move to previous Contact Sheet tab | Cmd-{ |
| Move to next Contact Sheet tab | Command-} |
| Close current tab | Ctrl-w |
| Close all other tabs except current | Ctrl-Shift-w |
Preview Window Shortcuts (Win)
| Close Preview window | Esc or Alt-w |
| Move back/forward one item | ←, → |
| Scroll thumbnails by page | ↑, ↓, PgUp, PgDn |
| Delete current item | Delete or Backspace |
| Toggle rendering quality (RAW vs. JPG) | q |
| Turn zoom on/off | z or * |
| Increase zoom | + |
| Decrease zoom | – |
| Toggle shadow | n |
| Toggle highlight | b |
| Link the two previews | l |
| One up view | o |
| 2-up view (landscape) | v |
| 2-up view (portraits) | h |
| Switch active preview pane in 2-up | Languette |
| Full screen mode (toggles) | F |
| Restore from full screen mode | r |
| Swap items in 2-up view | g or / |
| Set Color Class (if set in Prefs) | 1 thru 8 |
| Set Star Rating (if set in Prefs) | 1 thru 5 |
| Remove Star Rating or Color Class (if set in Prefs) | 0 |
| Set Color Class | Ctrl-1 thru Ctrl-8 |
| Remove Color Class | Ctrl-0 |
| Set Star Rating | Altl-1 thru Alt-5 |
| Remove Star Rating | Altl-0 |
| Toggle tag on/off | T or . (period) |
| Upload | vous |
| Toggle crop tool | c or x |
| Remove crop | Shift-c |
| Rotate counter-clockwise 90° | [ |
| Rotate clockwise 90° | ] |
| Play/Stop audio sounds | une |
| IPTC Info | je |
| Add to selected items | w |
| Deselect | ré |
| Copy | y |
| Rename | m |
| modifier | e |
| sauvegarder | s |
| Panning cursor | Space or Shift |
| Pan in the zoomed mode | Shift–↑, ↓,←, → |
| Pan faster in the zoomed mode | Shift-Ctrl-↑, ↓,←, → |
| Zoom in and out | + and keypad-+ |
| Zoom in and center on click | Ctrl+left-mouse-click |
IPTC Stationery Pad Shortcuts (Win)
| Clear all fields | Ctrl-Delete |
| Load IPTC template | Ctrl-Alt-l |
| Save IPTC template | Ctrl-Alt-s |
| Show Job/User/Client dialog | Ctrl-Alt-j |
| Show/Hide Variables window | Ctrl-Alt-v |
| Apply to selected items | Ctrl-Alt-a |
| Accept changes and close Pad | Ctrl-Enter |
IPTC Info Shortcuts (Win)
| Save changes and go to next | Alt-]or Ctrl-n |
| Go to next without saving | Alt-Shift-]or Ctrl-Shift-n |
| Save changes and go to previous | Alt-[ or Alt-b |
| Go back to the previous without saving | Alt-Shift-[ or Ctrl-Shift-b |
| Save, send to Uploader, and go to next | Alt-u |
| Copy all IPTC field data to clipboard | Ctrl-Shift-c |
| Paste clipboard into IPTC fields | Ctrl-Shift-v |
| Save changes and close dialog | Ctrl-Enter |
| Clear all fields based on Clear mask | Ctrl-Del |
| Load a .IPT or .XMP file | Ctrl-Alt-l |
| Save all as a .IPT or .XMP file | Ctrl-Alt-s |
| Apply the IPTC Stationery Pad | Ctrl-Alt-c |
| Open Variables window | Ctrl-Alt-v |
| Play the associated sound file | Ctrl-Alt-a |
| Add Color Class | Ctrl-1 thru 8 |
| Remove Color Class | Ctrl-0 |
| Add Star rating | Alt-1 thru 5 |
| Remove Star rating | Alt-0 |
| Enlarge the thumbnail | Alt-z |
Slide Show Shortcuts (Win)
| Exit Slide Show | Esc |
| Advance to next item | Space or → |
| Show previous item | Backspace or ← |
| Dismiss item from Slide Show | Delete or d |
| Tag item | + |
| Untag item | – |
| Toggle tag | t |
| Set Color Class | 1 thru 8 |
| Remove Color Class | 0 |
| Pause slide show if on Auto | CapsLock |
| Toggle fullscreen on/off | F |
| Préférences | Ctrl-, (comma) |
| Quit Photo Mechanic | Ctrl-q |
| New Contact Sheet window | Ctrl-Alt-n |
| New Contact Sheet tab | Ctrl-n |
| Open Contact Sheet | Ctrl-o |
| Close Contact Sheet tab/window | Ctrl-w |
| Close window | Ctrl-Alt-w |
| Ingest | Ctrl-g |
| Live Ingest | Ctrl-Alt-g |
| Live Slide Show | Ctrl-Alt-l |
| Rename Photos | Ctrl-m |
| Copy items | Ctrl-y |
| Effacer | Ctrl-Del |
| Save As | Ctrl-s |
| Burn items to disc | Ctrl-b |
| Send items by email | Ctrl-Alt-e |
| FTP | Ctrl-u |
| Upload | Ctrl-Alt-u |
| Export | Ctrl-Alt-x |
| Page setup | Ctrl-Alt-p |
| Impression | Ctrl-p |
| Undo | Ctrl-z |
| Redo | Ctrl-Shift-z |
| Cut | Ctrl-x |
| Copy | Ctrl-c |
| Coller | Ctrl-v |
| Take IPTC Snapshot | Alt-c |
| Paste IPTC Snapshot | Alt-v |
| Trouver | Ctrl-f |
| Find and Replace | Ctrl-Shift-f |
| Search using Spotlight | Ctrl-Option-f |
| Select all | Crtl-a |
| Deselect all | Ctrl-d |
| Select tagged items | Ctrl-t |
| Select rotated items | Ctrl-Shift-r |
| Select others (invert selection) | Ctrl-Shift-o |
| Select Color Class 1-8 | Ctrl-Shift-1 thru 8 |
| Select anything with a Color Class | Ctrl-Shift-9 |
| Select items with no Color Class | Ctrl-Shift-0 (XP only) |
| Select Star Rating 1-5 | Alt-Shift-1 thru 5 |
| Select anything Star Rated | Alt-Shift-6 |
| Select anything not Star Rated | Alt-Shift-0 |
| Set Code Replacements | Ctrl-Alt-c |
| Reload Code Replacements | Shift-Ctrl-Alt-c |
| IPTC Stationery Pad | Ctrl-i |
| Apply Stationery Pad | Ctrl-Shift-i |
| Keywords panel | Ctrl-k |
| Structured Keywords panel | Ctrl-Shift-k |
| Rotate counter-clockwise 90° | Alt-[ |
| Rotate clockwise 90° | Alt-] |
| Tag photos | Ctrl-NumLock-+ |
| Untag | Ctrl– (minus) |
| Aperçu | Ctrl-r |
| Edit items | Ctrl-e |
| Slide Show | Ctrl-l |
| Set Color Class | Ctrl-1 thru Ctrl-8 |
| Remove Color Class | Ctrl-0 |
| Set Star Rating | Alt-1 thru Alt-5 |
| Remove Star Rating | Alt-0 |
| Toggle combined RAW+JPEG | Ctrl-j |
| View all | F1 |
| View selected | F2 |
| View tagged | F3 |
| View untagged | F4 |
| Refresh | F5 |
| Rescan Contact Sheet | Ctrl-/ |
| Show/Hide Info tooltips | Ctrl-Shift-t |
| Apply rotation to JPEGs | Alt-r |
| Select previous tab | Ctrl-+ |
| Select next tab | Ctrl– (minus) |
Downloadable Shortcut RefCards (PDF)
Photo Mechanic Shortcuts for OS X
Photo Mechanic Shortcuts for Windows
The Modifier Key (‘Option’ key on Mac, ‘Shift’ key on Windows) can be used to modify the operation of various dialog boxes throughout Photo Mechanic. The most common use is to bypass a dialog box and directly apply the last used settings without that particular dialog box presenting itself. For example, if you choose ‘FTP as’ from the right-click context menu while holding down the Modifier key, the selected image(s) will be uploaded to whatever the FTP Photos As dialog box was last set to.
Holding down the Modifier key…
When deleting skips the delete files confirmation dialog.
When clicking on a tag box will make all images in the selection have the same tag value as the photo whose tag was clicked on.
When clicking on a rotation hover button will rotate all images in the selection in the same direction.
When setting a color class on a photo via the contextual menu will set all selected images (if any) to the same color class.
When pasting an IPTC snapshot will skip the confirmation dialog when multiple items are selected.
When applying IPTC stationery via the contextual menu to multiple items will skip the confirmation dialog.
When double clicking on a thumbnail in the contact sheet will toggle the sense of your preferred double-click action (edit or preview are the two choices.)
When double-clicking a saved search in the Favorites will execute the search in a new Contact Sheet.
When double-clicking a folder in the Favorites or Navigator will add the folder as an additional folder in the current Contact Sheet.
Holding down the Modifier key in any dialog that has “Set seqn variable…” button will change the button to read “Reset seqn variable and will instead reset the sequence variable when clicked.
When opening the FTP As… dialog will attempt to skip the dialog and send the files immediately.
When clicking on the Remove crop button in the Preview window will remove a constrained crop as well as the crop rectangle.
While zoomed into a cropped preview will give you the “hand” cursor which can be used to click and drag the zoomed preview around.
While zoomed into a preview will allow the cursor keys to pan the preview around. Adding the shift key (Mac OS X) or control key (Windows) will scroll faster.
While moving the scroll wheel on your mouse will zoom in and out of the current preview. Moving the scroll wheel without the Modifier key down will advance through the previews.
When starting an external edit will toggle the sense of your RAW/JPEG editing preference when in RAW+JPEG mode.
When using the copy command will attempt to skip the dialog and perform the last copy operation with the current selection of photos.
When using the rename command will attempt to skip the dialog and perform the last rename operation with the current selection of photos.
When using the save as command will attempt to skip the dialog and perform the last save as operation with the current selection of photos.
While inside the IPTC Info dialog will change the “Clear” button to “Options” which will bring up the Clear IPTC Fields dialog. It will change the “Apply Stationery Pad” button to “Copy to Stationery”. When multiple items are selected in the Contact Sheet and you hold down Ctrl and Modifier the button will change to “Apply to Selected“. The Modifier key will change the “OK” button to “Eval” which will replace all variables with their interpreted values which is useful to see how variables replacement will work.
While inside the IPTC Stationery Pad dialog will change the “Clear” button to “Options” which will bring up the Clear IPTC Fields dialog.
Photo Mechanic can be used on touchscreen computers or tablets that are running Windows such as Microsoft Surface Tablets. Contextual menus work with touchscreen gestures. Contextual menus respond to two finger taps and tap and hold.
(OSX only)
When you install Photo Mechanic on OSX you may notice an additional folder named Extras alongside the installer.
HTML Template Docs
This folder contains documentation for the HTML templates used in Photo Mechanic's Export feature. These materials help you create user-defined HTML templates. Refer to the index.html file in that folder for full info on these materials.
For looking at files and folders in OSX's Finder, you can install this optional service called "Browse with Photo Mechanic." Once installed, it adds a menu item to the Finder's context menu (Ctrl-click [or right-click if you have a two-button mouse] on a file or a folder to make it appear) that reads "Browse with Photo Mechanic". If you then choose that menu item, Photo Mechanic will be launched (or brought forward if it is already running) and then Photo Mechanic will open and browse those items. If you had selected several files to browse, then the parent folder will be opened and the items that were selected will be preselected when the Contact Sheet tab opens.
Installing the service
When you download the Photo Mechanic installer, there is a folder called Extras that exists alongside the installer. Just copy the BrowseWithPMService.service item to your home directory's Library/Services/ folder. If the Services folder does not exist in your home directory's Library folder, you can just create it and then copy the BrowseWithPMService.service item. Copying the service to your home directory's Library/Services/ folder will make the service available only to your account. If you wish to make it available for all accounts then you can instead copy it your boot drive's Library/Services/ folder. Create the Services folder in your boot drive's Library folder if it doesn't exist. Then, copy the service there. Now, all users will have access to the Browse with Photo Mechanic service.
On some versions of OSX, the service may still not work. If that is the case for you, try holding down the OPTION key while selecting "Browse with Photo Mechanic." You should be shown a dialog to choose an application. Select Photo Mechanic here once, and it should work normally after that. If you have multiple versions of Photo Mechanic installed in your computer, this procedure will allow you to tell the service which instance of Photo Mechanic to be launched.
Uninstalling the Service
All you need to do is find the service and move it to the Trash and then the next time you restart the Finder it will be gone. The service will be located in one of two places:
- In the Services folder contained in the Library folder that is in your home folder.
- In the Services folder contained in the Library folder that is on the root of your boot drive.
Once you find the "BrowseWithPMService.service" item, just move it to the Trash and then restart the Finder by either restarting or logging out of your account.
Just the FAQ!
Why should I upgrade to Photo Mechanic Version 5?
Answer: The top 5 reasons are:
- Get full compatibility with the latest version of Mac OS X* If you have a new Mac, you’ll definitely need Photo Mechanic Version 5.
- Start ingesting photos as soon as you plug in a memory card with the new Auto Ingest feature.
- Take advantage of dozens of new IPTC/XMP fields that are now available. Customize the order, label, and visibility of each one.
- Save IPTC info, upload file, and move to the next – all with one click!
- Keep a Preview window open while you continue to browse a contact sheet.
Send Photos to Photoshop?
I used to be able to send my photos from Photo Mechanic to Photoshop but the new version doesn’t seem to work. Qu'est-ce que je dois faire?
Answer: Photo Mechanic is no longer tied to the full versions of Photoshop. You can use any image editing application now. The path to the secondary application will be set in the Preferences on the Launching page. Photo Mechanic’s preferences can be accessed from the Photo Mechanic menu (Mac) or the Edit menu (Windows )
Select the radio button at the top section to Assign default application and then click the “Choose…” button to the right of the field. This will open the Application picker dialog so you can locate the Photoshop application. See the path below for a default install location of the Photoshop application.
Les fenêtres:
C:Program FilesAdobePhotoshop xxPhotoshop.exe

Mac OS X:
/Applications/Adobe Photoshop xx/Adobe Photoshop xx.app
Highlight the Photoshop application and then click on the Open (Mac) or OK (Windows) button to set the path and return to the Photo Mechanic preferences. You should now see the path displayed in the field.
Opening Photos in Photoshop?
I have set the path to the Photoshop application but I still can’t get my photos to open in PS CS. Photoshop opens but never displays the images. What setting did I miss?
Answer: This sounds like the Photoshop application needs to be re-installed. Try this quick test to make sure. Quit both Photo Mechanic and Photoshop CS. Locate a JPEG file on your Desktop and drag its icon to the Photoshop icon in the Dock. If Photoshop launched but never opens the photo, then you will need to re-install Photoshop CS.
Upgrading to a New Version?
I am a bit apprehensive about upgrading my older version of Photo Mechanic the latest Version 5 because it seems so different. I've tried the demo and I can’t make it work like I'm used to. Do I have to learn a new set of commands for the new version?
Answer: Photo Mechanic Version 5 has a wide variety of customizable behaviors. This means that you should be able to configure it to behave like you're used to. Hopefully this manual will help you understand the different customizations.
Network Attached Storage (NAS) drives
I have a NAS drive attached to my Mac but it does not show up in Photo Mechanic's Navigator. Finder does see the drive. It is listed by name under "Shared" but does not have a drive letter/number. I tried to access the images via other programs and had no problem accessing all the files. What is wrong?
Answer: Photo Mechanic will only "see" mounted volumes. In OS X, you can usually do this just by clicking on the drive in Finder, and you'll be logged in and mounted. Then it should be accessible with Photo Mechanic
Browsing PSD Files?
I have seen other Photo Mechanic users work with PSD files. When I try to browse my PSD files, all I see is a blank thumbnail box. Is there some patch or plugin I need to install?
Answer: Photo Mechanic can only render Photoshop PSD files that have a flattened preview within them. If the PSD files are not saved from Photoshop with the Maximize Compatibility option enabled, then you will see a blank thumbnail. If you do not see the Maximize Compatibility dialog open in Photoshop when saving a new PSD file, then go to Photoshop’s preferences on the File Handling page and set the Maximize PSD and PSB File Compatibility to either Ask or Always.
Purchased After Demo?
I purchased Photo Mechanic via email. When I try to register my demo with the permanent password, it comes up as invalid. Do I need to re-install the Photo Mechanic application?
Answer: Photo Mechanic’s registration dialog is very strict about the text entered. You must type the text in exactly as shown in the email or on the registration certificate. One extra character or blank space will invalidate the password.
If you have copied the text from the email, then you could have pasted in hidden characters that will also invalidate the password. Photo Mechanic will, remember these hidden characters the next time you try to register it. The solution is to clear the registration dialog fields first and then type in your registration info. To clear the field, just use the Tab key or Shift Tab to backup one field. When the field is highlighted, hit the Delete key and then type in the required text. If your registration info does not have a department, then make sure to leave that field empty.
Expired Thumbnails?
I am trying out the Photo Mechanic demo and one of my photographer’s images all say Expired in a black thumbnail box. Is that camera broken?
Answer: The Expired Thumbnails will be displayed any time the capture date of the photo is beyond the expiration date of the Photo Mechanic demo. This can be fixed by using the Adjust Capture Dates and Times from the Tools menu.
Where Did My Photos Go?
I am using the Ingest utility to copy my Flash card photos to a folder on the local hard drive. When I click the Ingest button I see a small dialog open for just a second and then disappear. I have checked the box to open contact sheet during Ingest but all that opens is a blank gray window. Where are my photos?
Answer: If you have selected the “Copy Locked files Only” menu item in the Ingest dialog, then Photo Mechanic will only copy the files that have been locked by your camera. If you have not locked any files, then nothing will be copied by Ingest when this box is checked.
Ingest Copy Errors?
I'm using the Ingest utility to copy and rename all of my photos to the hard drive and make a secondary backup. The Ingest progress bar starts to move as normal and then I see a bunch of copy errors list in the dialog. What could be the problem?
Answer: If you don't use a rename string that will generate unique names for all of the photos, then Photo Mechanic will append a letter (A~z) to the end of each new file with the same name until all 26 letters are used. All the remaining files will now flag a copy error since you are not allowed to have two files with the same name in the same folder.
The solution is to use the Sequence variable somewhere in the rename string. Most people place the sequence variable at the end of their filenames. Make sure to Set the sequence variable to the correct value before renaming your photos. Make sure to allow enough leading zeros to cover all of the photos. Don’t set the sequence value to 01 if you have more than 99 photos to copy. If you do that then once the third digit is added to the sequence value, you’ll find that sorting by Filename will not display the photos in the correct order.
Spell Checker Dictionary?
How do I change the default dictionary used by the Spell Checker?
Answer: (Mac OS X) In System Preferences>International>Language make sure that the desired language (e.g., Canadian English) is in the list of languages. If it isn’t, click edit and edit the list. This controls what dictionaries are available as choices for spell checking. (But it does not select the language used for spell checking.) You can also edit the language list order so that the one you always use or use most is at the top of the list. Close system preferences.
Start Photo Mechanic. Open a contact sheet with some images. Put the cursor over an image and click its info button. Put the cursor in the Caption area and click to make Photo Mechanic think you are about to enter some text it should spell check. Click Edit>Spelling>Spelling… In the spelling popup window select the language you want. Fermer les fenêtres. Close Photo Mechanic. Run Photo Mechanic again and you should have your desired spelling dictionary as the default. (Thanks to Roy Smith for this solution.)
On Windows, you can change the dictionary from the IPTC/XMP tab of the Preferences dialog. Please note that the spell checker built into the Windows version is currently incompatible with Unicode characters and if enabled, it may interfere with some languages. Turn off the spell checker if you experience difficulties.
Costco Photo Center Failed
I’m having difficulty uploading images to Costco Photo Center because their uploader says ‘Failed Photo’ on each image thumbnail. How can I fix this problem?
Answer: Select the photos you want to upload in the Contact Sheet. Use the Delete Metadata command on the Tools menu. Set only the ‘Photo Mechanic end of file preferences’ checkbox on. Click on the ‘OK’ button.
Now when you use the Costco Photo Center uploader you’ll no longer see that error and you can upload your photos.
Clean up Ingest dialog?
The Ingest dialog often shows drives I never want to Ingest from. How can I permanently remove those drives from the list?
Answer: All you need to do is create a folder named: PMIngestIgnore on the root of each drive that you want Photo Mechanic’s Ingest feature to ignore. You can do this with the Finder (Mac OS X) or with Windows Explorer (Windows.). You can also create a hidden file called .PMIngestIgnore (with a dot as the first character), though some operating system settings may affect your ability to create hidden files in this manner. For example, in OS X, you might need to rename the file in Terminal.
Check for Updates annoying?
The Check for Updates mechanism asks me to check for updates every day I startup Photo Mechanic. Is there some way I can disable this or check less often?
Answer: The ‘Software Update…’ command on the application menu (Mac OS X) or Help menu (Windows) will allow you to adjust those parameters to be less bothersome. You can change the frequency of the updates checking, or disable them altogether.
Snapshots location?
I use the Snapshots facility in various dialogs quite often but sometimes I find that I don’t want some of my Snapshots anymore. Where are the Snapshots located?
Answer: If you hold down the Modifier key (Option on Mac OS X, Shift on Windows) while you select one of your Snapshots, then your OS will open (Finder on Mac OS X, Windows Explorer on Windows) one of its windows and show you the Snapshot you selected. From there you can rename, duplicate, or delete your Snapshots.
Thumbnails matching other programs
My thumbnails don't look like they do in Lightroom. Pourquoi pas?
Answer: Photo Mechanic uses the embedded Jpeg preview in the Raw files for the thumbnails and large previews. Some programs, like Lightroom, will render the raw data and using a color profile like ProPhoto RGB. Sometimes there can be a difference between the look in these two methods. You will need to use the controls in the Develop module to adjust the Raw image to match the embedded Jpeg generated by the camera.
Photo Mechanic and iPhone
When I plug my iPhone into my Mac, Photo Mechanic opens up. Comment puis-je arrêter ça?
Photo Mechanic currently does not ingest photos off the iPhone or iPad. If PM is opening when you plug your devices is, it might be because of Image Capture. When your device is plugged in, open Image Capture, select your device on the left, and change the application that opens up in the menu at the bottom.
Uninstall Photo Mechanic?
How do I uninstall Photo Mechanic?
Should you need to uninstall Photo Mechanic, it is in your best interest to deactivate the program so that it does not count against future installs. If you purchased Photo Mechanic after October 2013, you should be able to do that via the Help menu in the program. If you purchased Photo Mechanic before Oct 2013, please contact support to walk through the steps to deactivate your computer. Then, follow the standard uninstall process for your operating system. On Apple OS X, you can go into your Applications folder and drag the program icon to the trash. On a Windows system, you can go into your Control Panel to the "Add/Remove Programs" utility. On Windows, you also have the option of running the original PM5Setup.exe (if you still have it) and choosing the "Uninstall" option.

Advanced Photo Mechanic advice from Camera Bits lead technical wizard Bob Russell
Here's where we'll look at some frequently encountered trouble scenarios and walk step-by-step with Bob, using his considerable expertise to solve these knotty problems.
Incremental Ingest mistake – All previously Ingested images are now duplicated.
The Scenario:
You've Ingested to a folder based on the capture date of the images. A new folder is created for each day a photo was shot using the following variable string in the folder name field: {year4}-{month0}-{day0} But, you've accidentally ingested your shoot twice and all of the images from the first shoot are now duplicated in that folder. Each duplicate image has a capital A appended before the file's extension. If a second Ingest was done before checking the Incremental Ingest box, then there will be a second set of duplicate images, all with a capital B appended before the extension.
The Solution:
In the future, check the Incremental Ingest box below the Source path window, in the Ingest dialog. The next Ingest will now just copy the new files since the last Ingest. In the meantime, to clean up the duplicate files now: Follow these steps:
- Go to the Edit menu and select the Find utility. Make sure you have the Filenames box checked in the Searching section. Uncheck the IPTC data box if it's checked.
- The In menu should be set to All items.
- Checking the box for a Case sensitive search will reduce the chance of selecting non-duplicated images.
- Enter A. in the Find field. (If you have renamed your images during Ingest to have an A before the extension)
Eg, 2015-{seqn}-ATLANTA.CR2, then you will need to enter AA. in the Find field. This will skip any filenames that end in ATLANTA.
- Click the Find button to select all of the duplicates. You can close the Find dialog by clicking anywhere in the dialog and then hitting the escape key. To verify you have selected just the duplicates, go to the View menu and click the Selected option or use the F2 function key shortcut. Now you can delete the selected images using the Delete Photos option in the File menu.
If you have a second set of duplicates, then repeat the process only using B.
Autocorrect on newer Apple Operating Systems
The Scenario:
Photo Mechanic uses many of the Apple OSX built in features including the spell checker utility. The newer Apple operating systems now have the autocorrect spelling option enabled by default in most applications, which has been a surprise for a few of our customers. This is not a setting that you can change in Photo Mechanic settings, but it can be changed.
The Solution:
You can turn this off by right-clicking in a text area and navigating to "Spelling and Grammar" to uncheck the option "Correct Spelling Automatically."
Browsing photos taken with iPhone
The Scenario:
You've taken photos with your iPhone and want to browse them with Photo Mechanic, but the iPhone does not mount as a disk, so you cannot ingest as normal with Photo Mechanic.
The Solution:
Bob walks you through the process on YouTube
Configure Windows 10 to launch Photo Mechanic
The Scenario:
You want to launch Photo Mechanic when you click on one of your camera's Raw files in Windows 10
The Solution:
Bob has come up with a PDF that shows you how to configure Windows 10. Download it here
So, you'd like a printed or PDF version of the Photo Mechanic manual? Génial. Here are some tips on printing directly from your web browser.
First, when you choose to print pages of this wiki from your browser, the site is smart enough to know that you don't need the header and footer, and sidebar menus included. So, the printed version will look something like this:
If you're a Apple OS X user, you're fortunate enough to have a PDF printer driver built into to your OS. That means you can create PDFs right from your browser. Go to the section you'd like to print and choose File > Print from your browser. If your browser has a custom print dialog (like Chrome, for example) you may want to choose to use the OS dialog. Then you can choose to print or Save as a PDF.
You can also do this with the single-page view of the entire manual.
Windows Issues
Doing this on Windows can be a little trickier. Printing out sections should be straightforward, but getting PDFs would require additional software. If you have a third-party PDF driver for printing, then you're all set. Another option to save a local copy for is to click the "Printable version" link in the sidebar. You could then save that resulting using various tools into an offline document.
Pre-assembled PDF
Here is an example of the complete manual as a PDF, created by the method above. The formatting may not be perfect on all pages, but hopefully it will suffice for those in need of a PDF right away. This version may not be as up-to-date as the online pages, but we try to keep it updated regularly.
Photo Mechanic Version 5 User Manual PDF
Download a local copy of the hyperlinked manual
If you need a full local HTML copy of the manual with working hyperlinks and interconnected pages, one comes with Photo Mechanic! Just choose "Photo Mechanic Help" from the Help menu.
Copyright (c) 1998 – 2019 Camera Bits, Inc. All rights reserved. This manual, as well as the Photo Mechanic software described in it, is furnished under license and may only be used or copied in accordance with the terms of the license. The information in this manual is supplied for informational use only, and is subject to change without notice, and should not be construed as a commitment by Camera Bits, Inc. Camera Bits, Inc. assumes no responsibility or liability for any errors or inaccuracies that may appear in this guide.
This guide may be reproduced only in support of the use of Photo Mechanic. Other uses should be considered outside the terms of the license. Please remember that artwork or images in this guide are protected under copyright law, and may not be used without the permission of the author of the images.
Photo Mechanic is a trademark of Camera Bits, Inc. The following are trademarks or registered trademarks of their respective companies or organizations: Apple, Finder, PowerBook, Mac, OS X, MacBook, Macintosh, Power Macintosh (Apple Inc.), Adobe, Acrobat, Photoshop (Adobe Systems Inc.), Kodak (Eastman Kodak Company), Windows, Windows 2000, Windows XP, Windows Vista, Windows 7, WIndows 8 (Microsoft Corporation) All other brand names or products are the trademarks or registered trademarks of their respective companies or organizations.
For defense agencies: Restricted Rights Legend. Use, reproduction or disclosure is subject to restrictions set forth in subparagraph (c)(1)(ii) of the Rights in Technical Data and Computer Software clause at 252.27-7013. For civilian agencies: Restricted Rights Legend. Use, reproduction or disclosure is subject to restrictions set forth in subparagraphs (a) through (d) of the commercial Computer Software in Restricted Rights clause at 52.227-19 and the limitations set forth in Camera Bits, Inc. licensing agreement for this software. Unpublished rights reserved under the copyright laws of the United States.
Camera Bits, Inc.
- Dennis Walker, Concept, Application Design and Engineering
- Kirk A. Baker, Application Design and Engineering
- Bill Kelly, System Architecture, Application and Web Engineering
- Jerry Hebert, Application and Web Engineering
- Bob Russell, Technical Support Manager
- John Keel, Tech Support
- Katie Werremeyer, Chief Operating Officer
- Mick Orlosky, Director of Customer Communications
- Jamie Brown, Sales Lead
- Amy Bowers, Sales
- Katy Zukas, Sales and Marketing Coordinator
Manual written by Nick Rains, Kirk A. Baker, and Mick Orlosky
Camera Bits, Inc. would like to thank the following for their support and ideas:
- Rob Galbraith (www.robgalbraith.com)
- Kevin Gilbert, Nick Didlick, and Reed Hoffmann of Blue Pixel bluepixel.net
- Bob Deutsch of USA Today
- David Breslauer
- David Riecks – Provided a sample set of his Controlled Vocabulary for use in the Structured Keywords editor. You can purchase the full version at: www.ControlledVocabulary.com
The Design Team at Momenta Creative
Jordan Karr-Morse: Icon Design SoftBoxDesign.com
Photo Mechanic uses software contained in the following libraries:
- libjpeg (www.ijg.org)
- libtiff (www.libtiff.org)
- Adobe XMP (www.adobe.com)
- libxml (www.xmlsoft.org)
- libiconv (www.gnu.org/software/libiconv)
- SDL (www.libsdl.org)
- libresample (ccrma-www.stanford.edu/~jos/resample/Free_Resampling_Software.html)
- ZLib (www.zlib.net)
This software is based in part on the work of the Independent JPEG Group.
TIFF support is © 1988-1996 Sam Leffler and © 1991-1997 Silicon Graphics Inc.
This product contains Polar SpellChecker 5.0 from Polar. Copyright © 1998-2003. Tous les droits sont réservés.
Commentaires
Laisser un commentaire